
This forging but in a "different" sort of way. <img src=' http://www.americanbladesmith.com/ipboard/public/style_emoticons//smile.gi f' class='bbc_emoticon' alt=':)' />
I have been thinking of making this spacer assembly and just had to try it. It's amazing how easy it was when I decided just how to hold the thing.
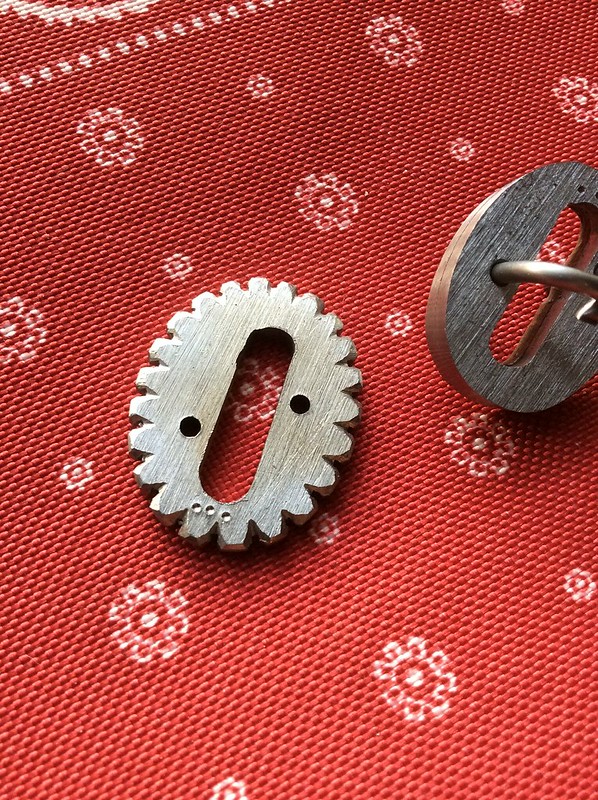
I started with a three piece spacer assembly. The outside two layers are essentially the same with the middle one about 1/8 inch larger in all places.
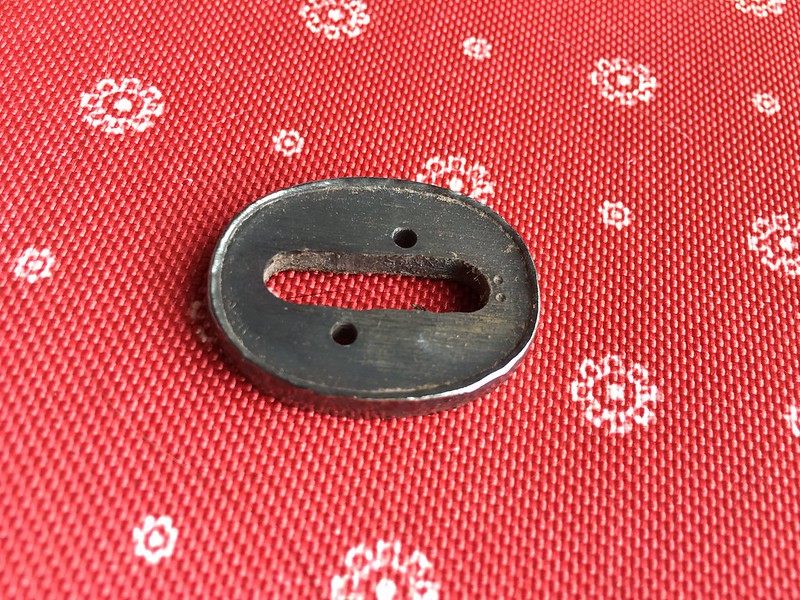
Here is the 1/8 plates that I rough cut and marked the holes in the general location of the slot. I do a lot of marking, punching, and re checking. Otherwise I will ruin something important.

After drilling the alignment pins, then roughing in the slots in all three, I shape the two outside while temporarily pinned together. I got them basically finished but knowing I would have to lightly touch them up later.
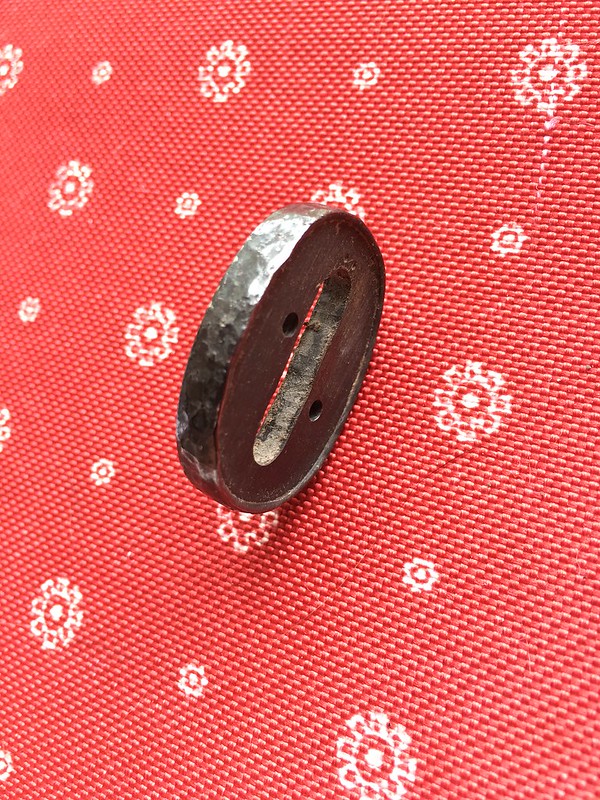
In the above picture, I have cut saw kerfs into the middle layer just down to the finished spacers. Yes, I scratched them a little but not bad. When I was finished sawing, I just cleaned them up again. I then filed the bumps into a rough octagon shape and softened/rounded all of the corners with a file.
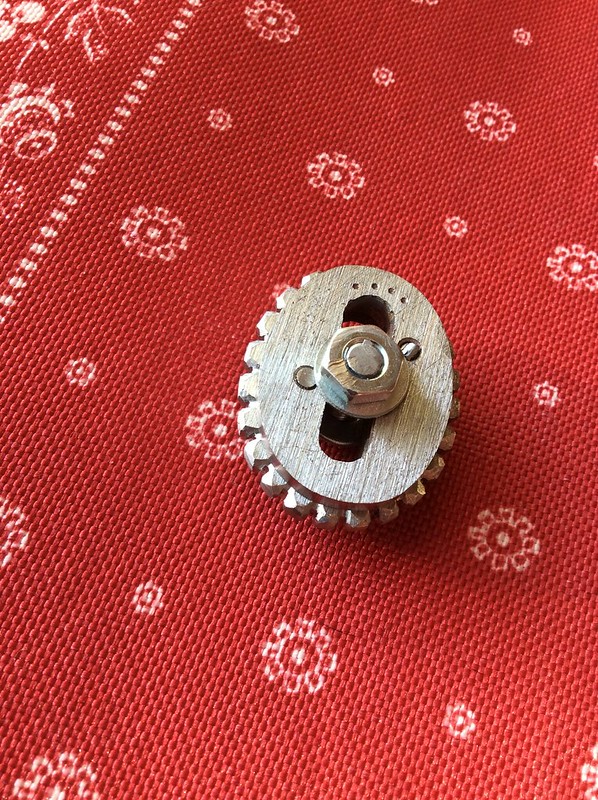
I use a piece of threaded rod with a washer and nut on each end. I also put in some pins to keep it aligned. I tightened the nuts pretty snug and filed off the ends of the threaded rod flush to the top of the nuts.
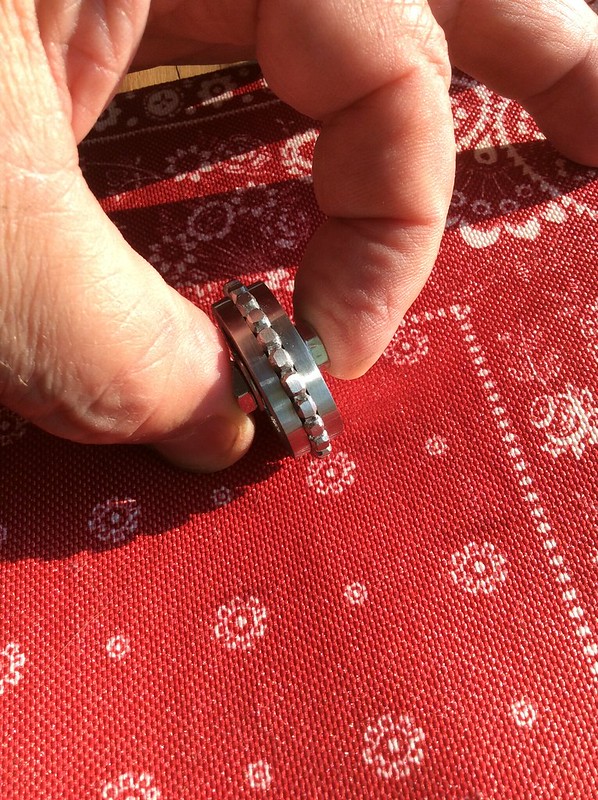
The way I'm holding it with my fingers is the way I held it in the vise jaws. Directly inward on the bolt and nuts without touching the cleaned up spacers. My plan is to heat (with a torch)the ends of the bumps to red without getting the rest of the assembly very hot so as to deform it. It worked very well. I used a 12 oz ball peen and hit it very lightly to get the bumps spread and shaped. By working the bumps a little ahead and then back, they squished down and butted one another instead of lapping over.
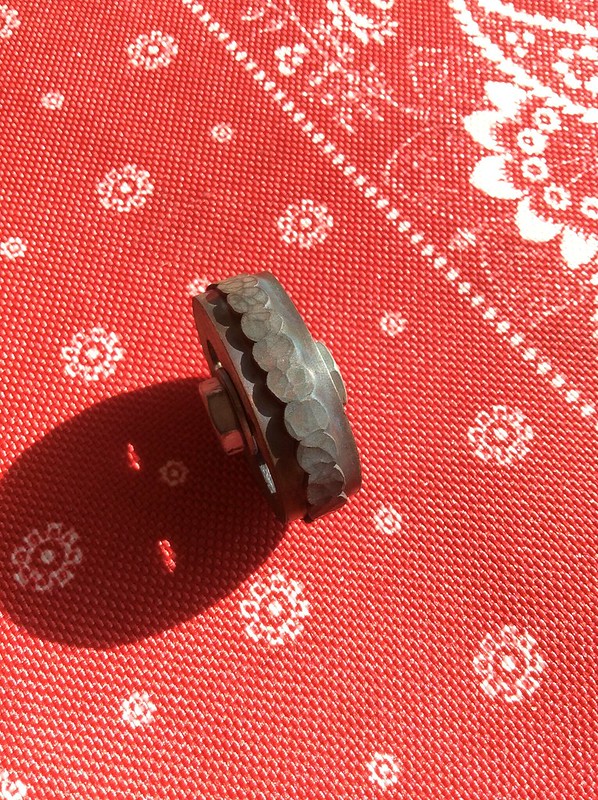
After I was satisfied that they were pretty even and I had not hit the clean spacers, I took it apart for the final clean up.
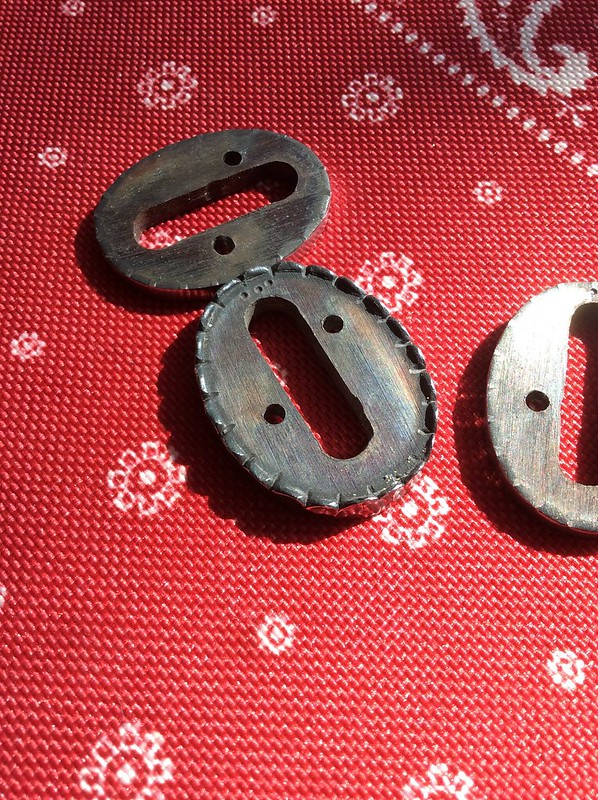
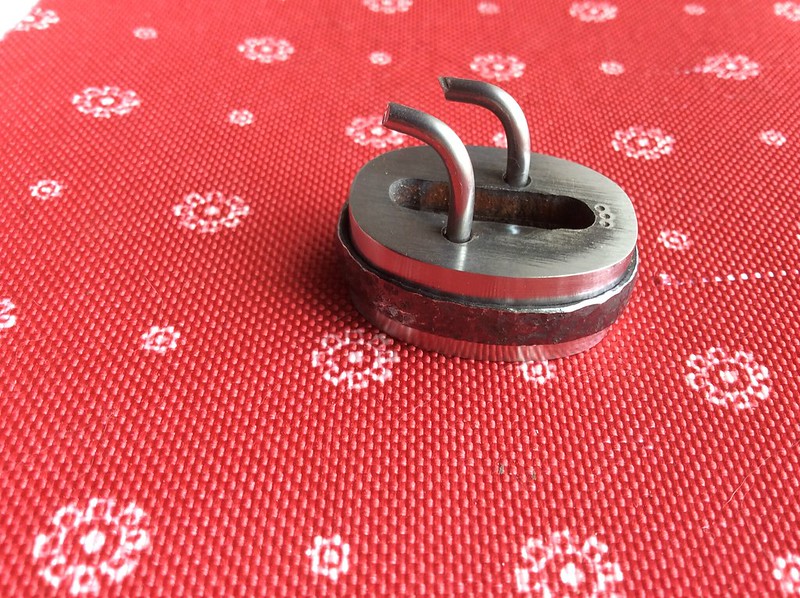
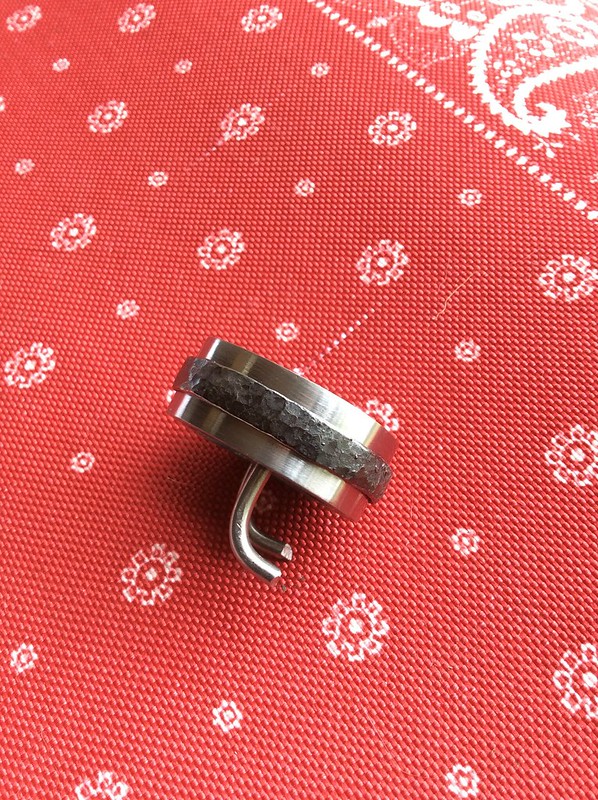
You can see that there is a pocket that is formed on each side of the center layer that is form fit to receive the outside spacers. Fits like a rubber glove. <img src=' http://www.americanbladesmith.com/ipboard/public/style_emoticons//smile.gi f' class='bbc_emoticon' alt=':)' />
I was able to hit the center spacer on the buffer and shine up the high points and put it together.

Very unique for sure. Turned out great!
Bob
Beautiful knife MS Rhea! I really like how your spacer turned out amazing work.
Very cool and truly unique look.
Lovely work Lin. I enjoy seeing the products that come from you way of thinking.
Chris

Wow!!! That looks great!!!
I really appreciate the tutorial. This is the kind of tutorials us apprentice smiths need.
Thank you so much Lin
Lin
The things you do and the willingness to show others is completely amazing.
Thank you
Anthony
Thanks guys. I appreciate the kind words.
Lin, I want you to know how much these tutorial's help us, very hard for us to find this kind of instruction. Thank you very much for sharing.
What a great looking knife.
Dean, thank you.
I must be honest. While it's nice to hear compliments, I'm really sharing this to show that there are some things that have never been done only because no one has tried it. There are a lot of ideas that are in our heads that need to be discussed and enacted. This is not re inventing the wheel. It is just making wheels more interesting. Complacency shuts down creativity.
So cool Lin. You are very talented and very creative. I'm not sure I could have ever even thought of something like that. I kind of want to try it now.
Thanks for sharing this.

|quoted:
So cool Lin. You are very talented and very creative. I'm not sure I could have ever even thought of something like that. I kind of want to try it now.
Thanks for sharing this.
Oh Yeah. That's worth copying!
Very nice Lin. That is a distinctive embellishment that will likely become very popular.
Joshua States
www.dosgatosforge.com
https://www.youtube.com/channel/UCdJMFMqnbLYqv965xd64vYg
https://www.facebook.com/dos.gatos.71
Also on Instagram and Facebook as J.States Bladesmith
“So I'm lightin' out for the territory, ahead of the scared and the weak and the mean spirited, because Aunt Sally is fixin’ to adopt me and civilize me, and I can't stand it. I've been there before.â€
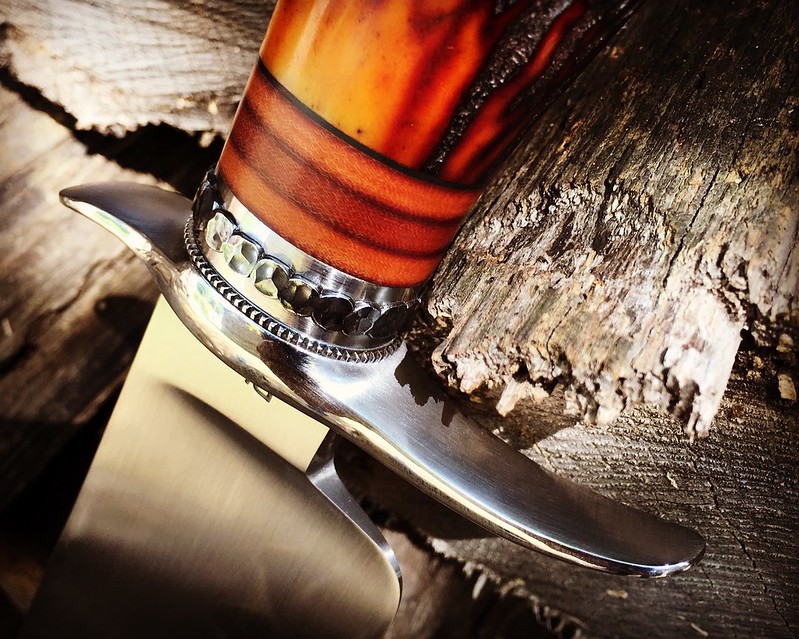
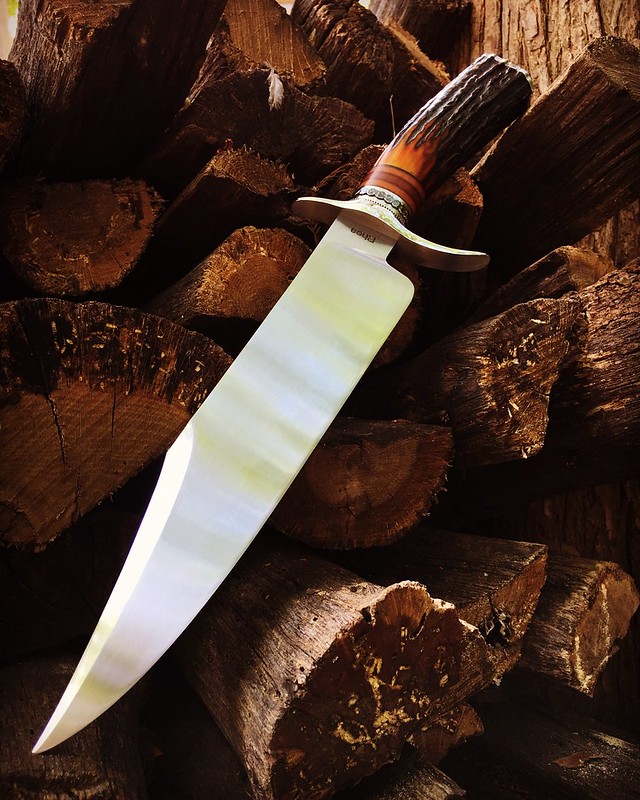
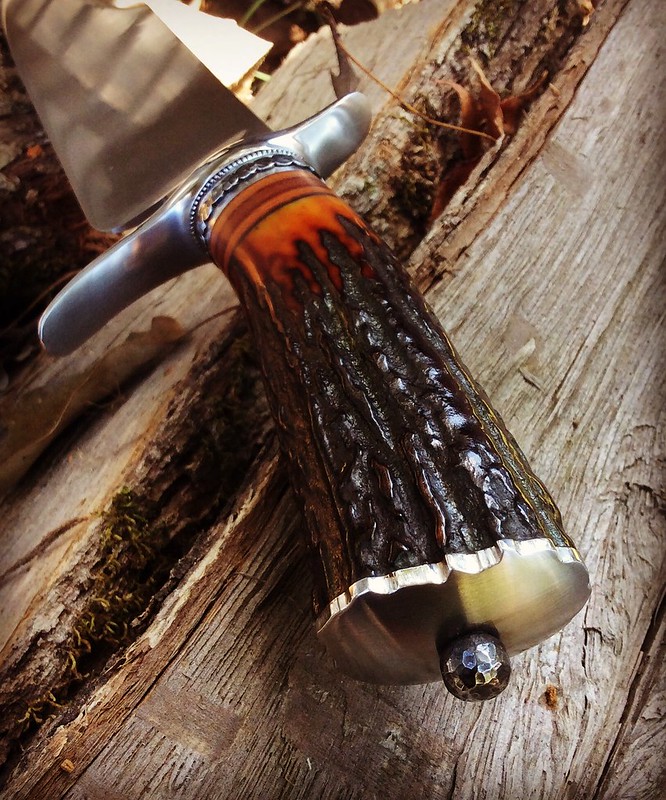
Here's another example I made. I ground the middle layer 1/16 inch larger than the two outside layers and forged it down.
Lin
Both of the spacers are do to become classics.
Thanks Lin.
Anthony

Hoooowww!!!!
Very nice Lin, thank you! 🙂
jean-louis
