
Nice work, as always, Lin.
Dale
Dale Huckabee
Journeyman Smith
dalehuckabeeknives.weebly.com


Well, I'm not finished with exploring this technique. I hesitate to say "new" technique but I have not seen it done.
Again, it is what I would call "intermediate forging" since there is a mix of cutting/filing along with the forging.
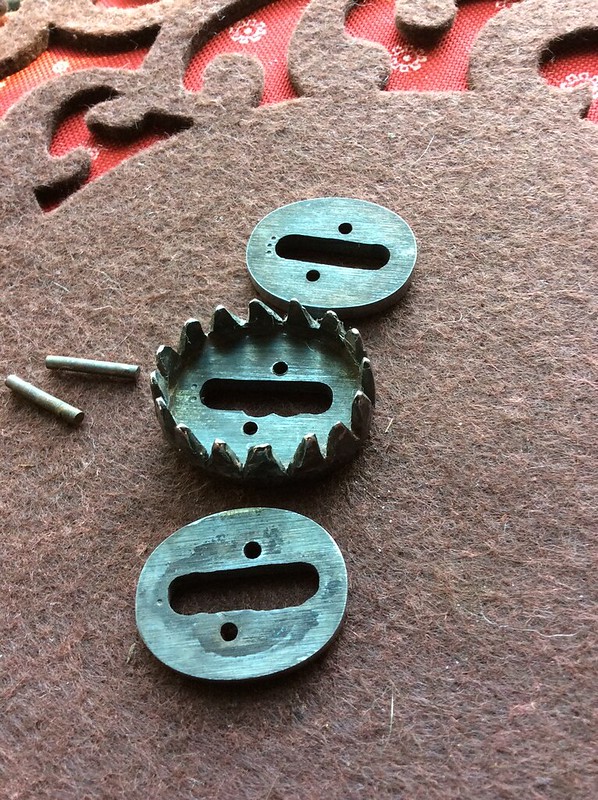
Here are some of the parts to let you see the idea taking shape.
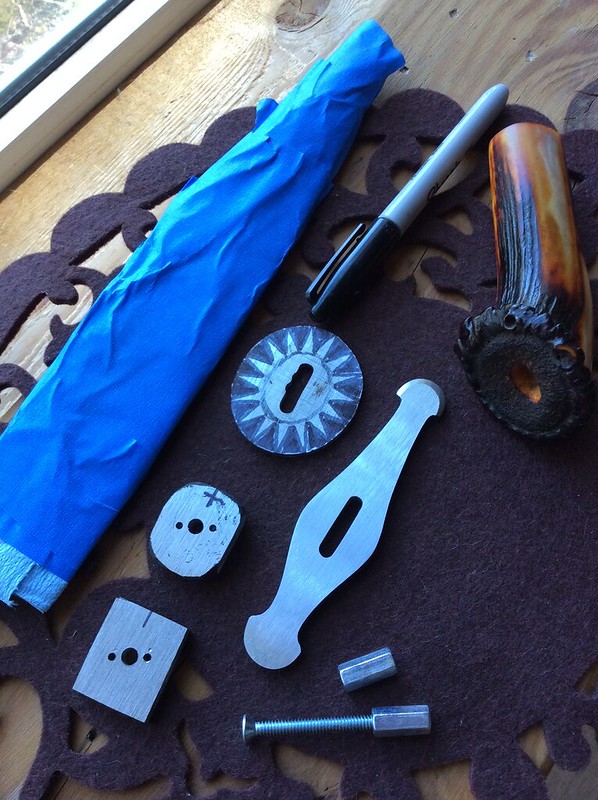
Now for the orientation of parts. In the first photo, there are three parts to the ferrule/spacer. The fourth extra heavy piece represents the stag that will set within the points that will be forged 90 degrees and lay tight against the handle.
This shows the "handle" in place. Notice that I thinned and tapered the points leaving a "shoulder" near the other spacer. I did this to help the material flow my way and so I could push the shoulder forward a little.
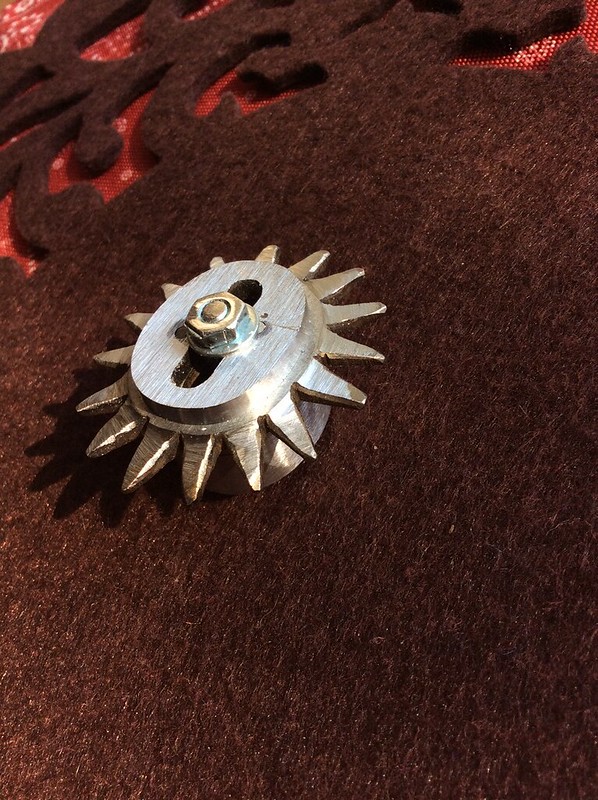
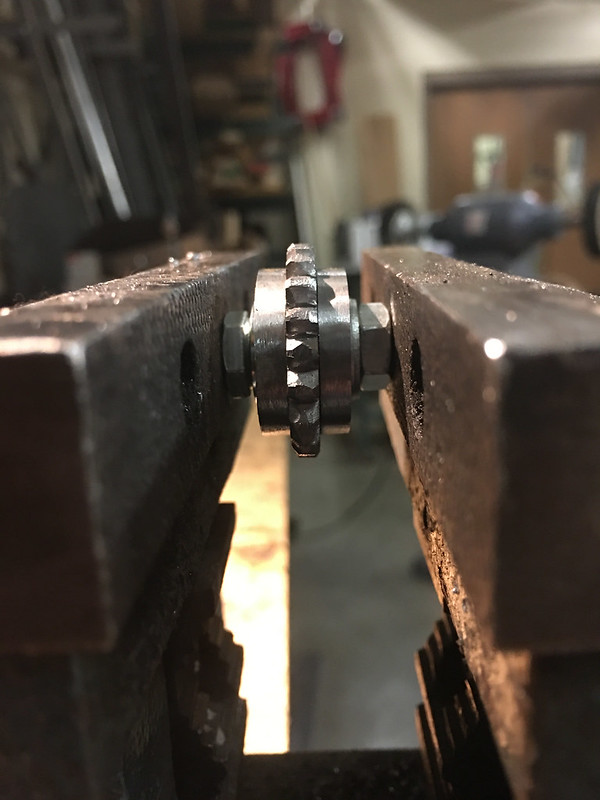
The whole assembly is then bolted together to not only hold it tight, but to give the vise a place to grab it and not distort the already "finished" layers. Now, I use a torch to heat the points and fold them down and hammer them to alignment and shape. There is some spreading and lengthening, which is what I expect and want.
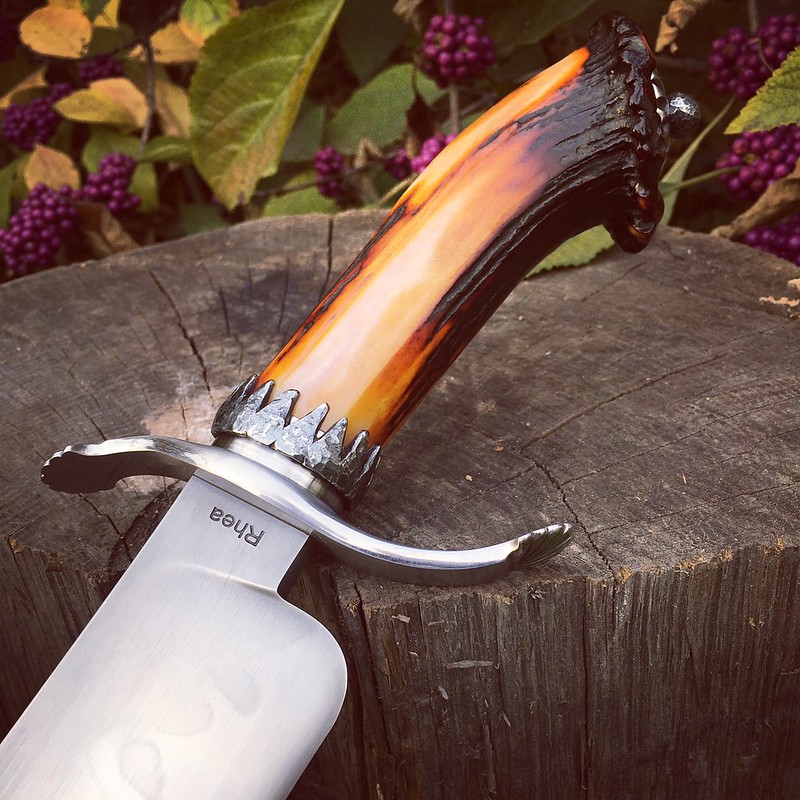
Here is the part on the knife.
I will start a thread in show and tell for the knife. Thanks.
Lin
Very neat and well executed.
I will love to see the show and tell.
Anthony
A few photos of the intermediate forging of one of my spacers.
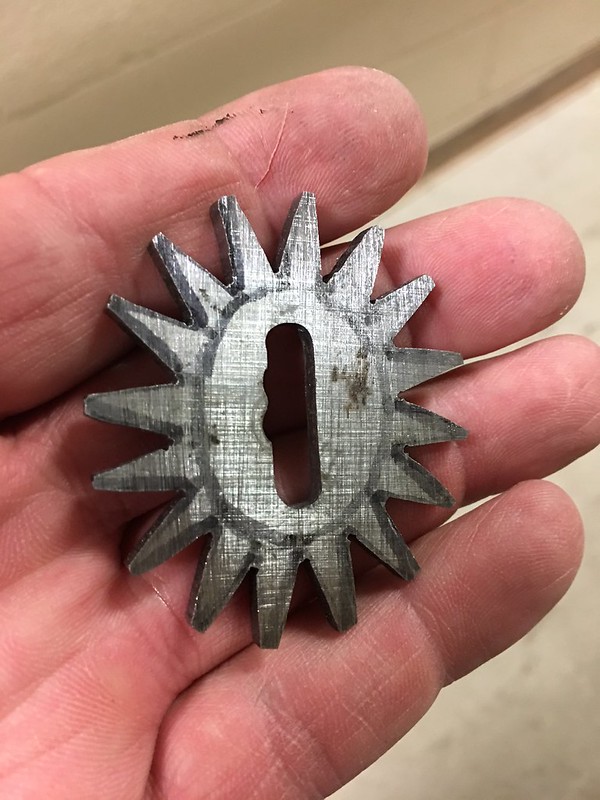
I have three layers. The middle layer is bigger. In the this photo, the middle layer is actually glued and pinned to the outside of the two. I did this so I could drill the guide pin holes. So I went ahead and sawed into the edge to separate my "rosettes". Cant think of anything else to call them.

I filed the notches to separate them a bit more and "round" the rosettes.
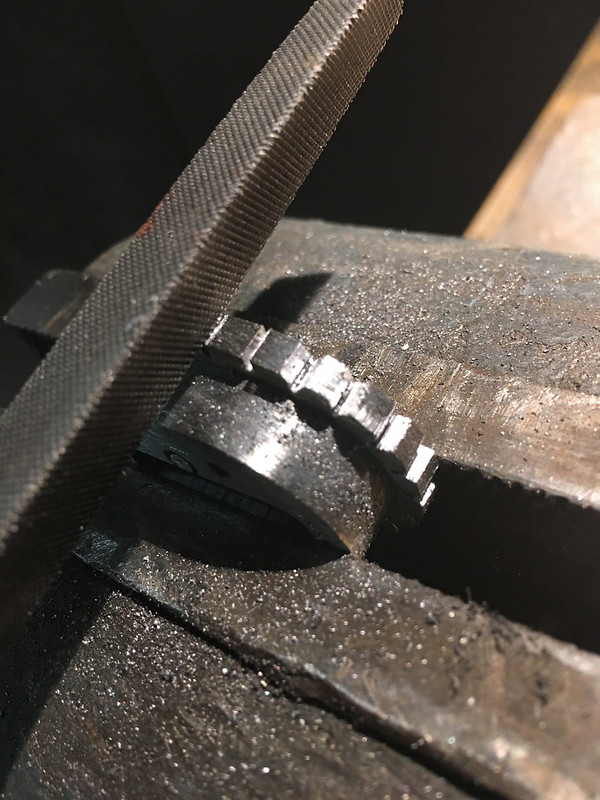
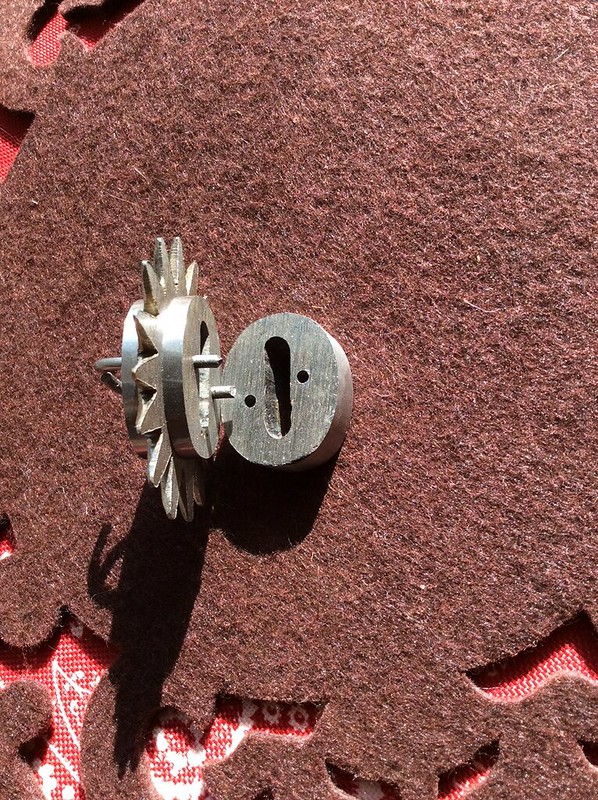
Now I pop it apart and orient them correctly. Here I have them in the vise in the way I would when I heat and forge the rosettes down.
Lin,
great set of ideas, and can be used in a lot of ways (butt caps come to mind, making them real caps with flared edges).
I wonder whether it would be possible to get the same basic round squashed rosette without preforming into an octagon? If the same result can be had with less work, then that may be a good thing. I think it still needs a preform, though, or you would get ellipses instead of circles (which may look good, too).
I have seen butt caps swaged out like that, made of silver, and Japanese and Chinese round-ish sword guards with the edges mashed out (and then one side filed off sometimes on the Chinese version to make a cap to fit over the sheath to keep rain and dirt out).
You are the first, maybe ever but that is hard to believe or prove, to do this with spacers. How about this, "The first within living memory." Scott Rodell used that term to describe a Ming style jian I am finishing. I thought it was cool.
I also think it really applies to these things you are doing.
great experimentation.

To the above pictures of your skill, I say "Masterful" And an awesome end product, Piece of ART, for sure.
Hap Smith Jr. 2112 8531
U.S. Marine Corps (retired)
Thank you guys.

So, I just had to try this out. It didn't come out anywhere near as nice as Lin's did, but I'm happy with the finished product. I will be adding this technique to my quiver of arrows. The possibilities are endless.
Thanks again Lin.
Joshua States
www.dosgatosforge.com
https://www.youtube.com/channel/UCdJMFMqnbLYqv965xd64vYg
https://www.facebook.com/dos.gatos.71
Also on Instagram and Facebook as J.States Bladesmith
“So I'm lightin' out for the territory, ahead of the scared and the weak and the mean spirited, because Aunt Sally is fixin’ to adopt me and civilize me, and I can't stand it. I've been there before.â€
I'm anxious to see it Joshua.
Here you are.
Joshua States
www.dosgatosforge.com
https://www.youtube.com/channel/UCdJMFMqnbLYqv965xd64vYg
https://www.facebook.com/dos.gatos.71
Also on Instagram and Facebook as J.States Bladesmith
“So I'm lightin' out for the territory, ahead of the scared and the weak and the mean spirited, because Aunt Sally is fixin’ to adopt me and civilize me, and I can't stand it. I've been there before.â€
I am new here and in the ABS, I am just now seeing this. Would you mind if I give this a go Lin ? The variations are beautiful
Minimum Effort = Minimum Results every time
