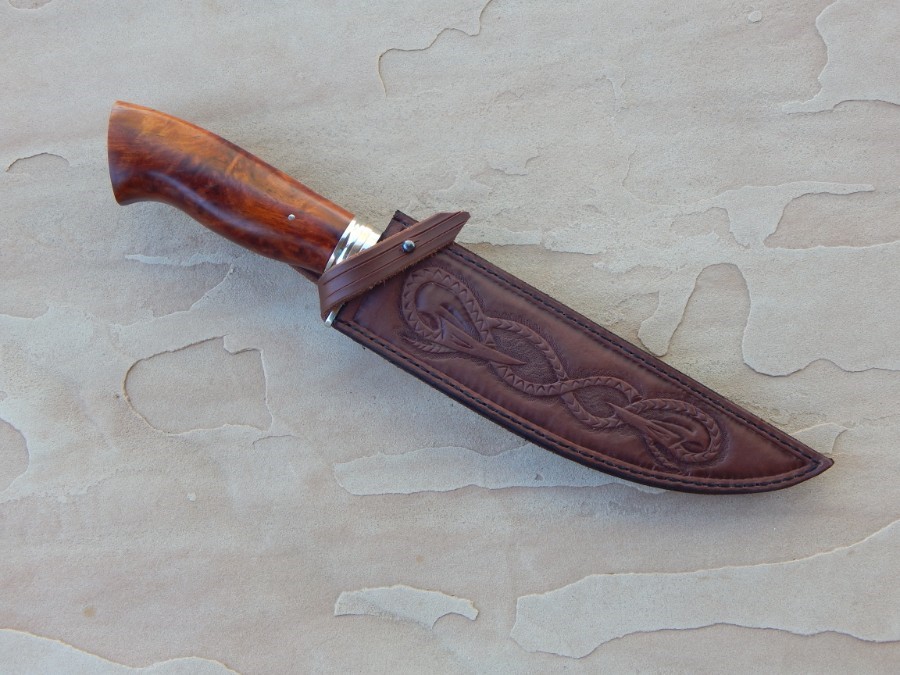
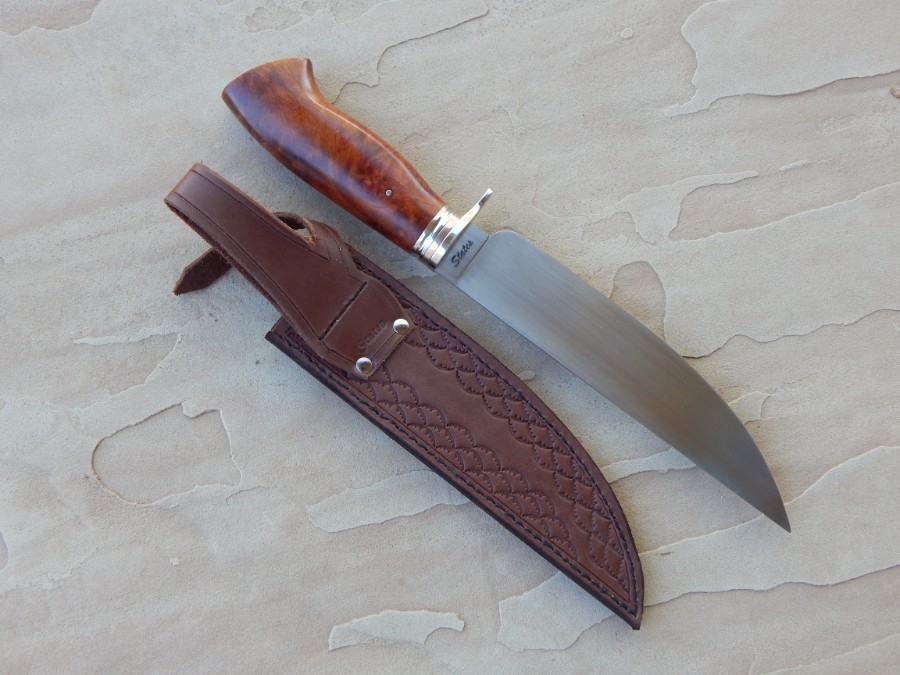
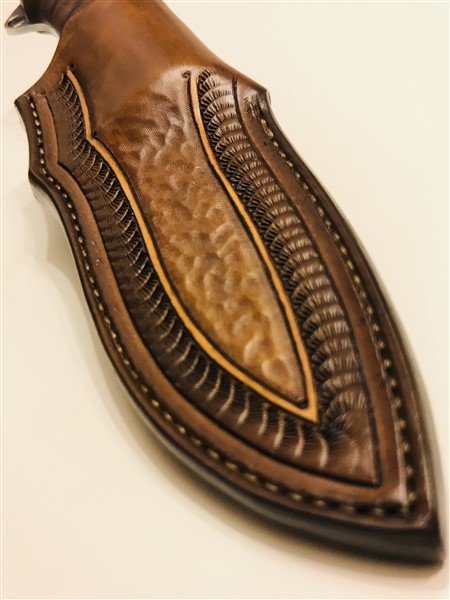
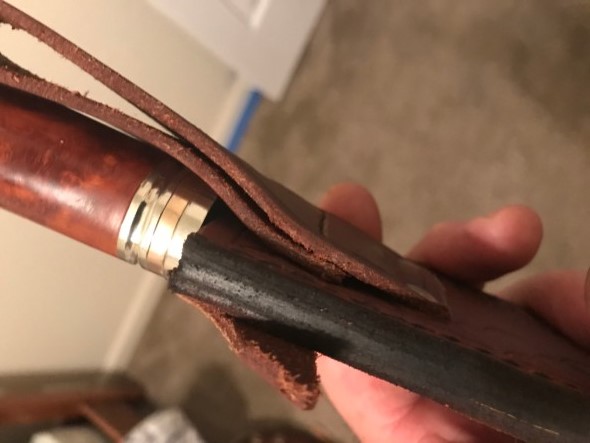
This is the latest sheath I finished.
Let me know what you think.
Joshua States
www.dosgatosforge.com
https://www.youtube.com/channel/UCdJMFMqnbLYqv965xd64vYg
https://www.facebook.com/dos.gatos.71
Also on Instagram and Facebook as J.States Bladesmith
“So I'm lightin' out for the territory, ahead of the scared and the weak and the mean spirited, because Aunt Sally is fixin’ to adopt me and civilize me, and I can't stand it. I've been there before.â€
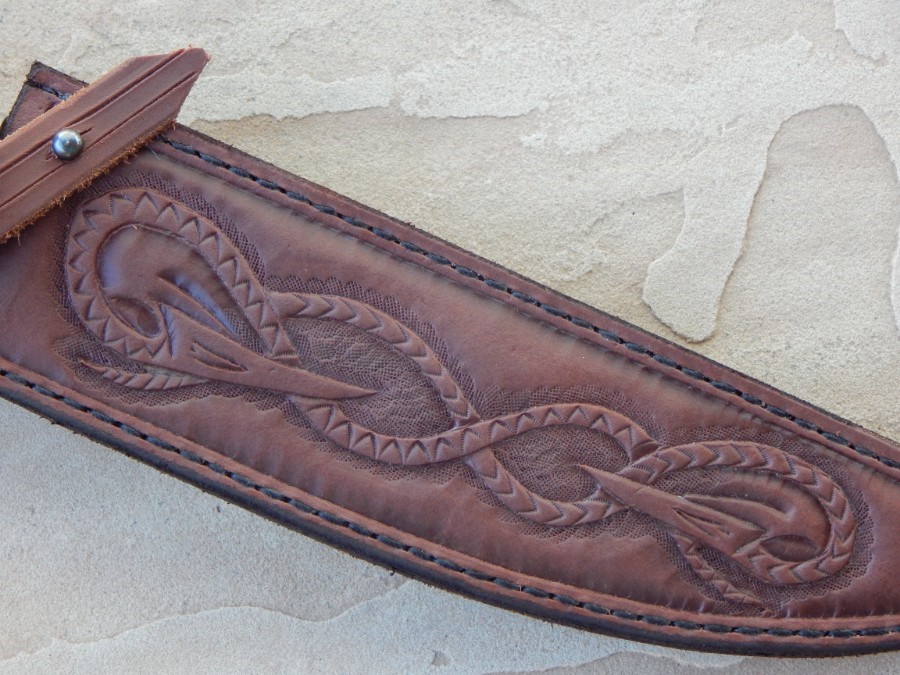
Very nice. The raised rope caught my eye immediately. Did you tamp down the leather inside the rope in order to allow the rope to stand above the surrounding leather? I also like the rivets and clasp. Classy
Joshua that layout, tooling design is outstanding!! Looks great.
Something stand out to me that I would like to help you with. If you refer to your other leather post, I mentioned the need to let your leather dry longer after you moisten it. It is the absolute most common issue of leather tooling. It causes the tooling impressions themselves to look mushy (soft around the edge, not as clean and defined)as well as uneven. See around the edge where you beveled the leather? those uneven tooling marks will not be as bad or there at all if that leather surface was drier when you stamped it.
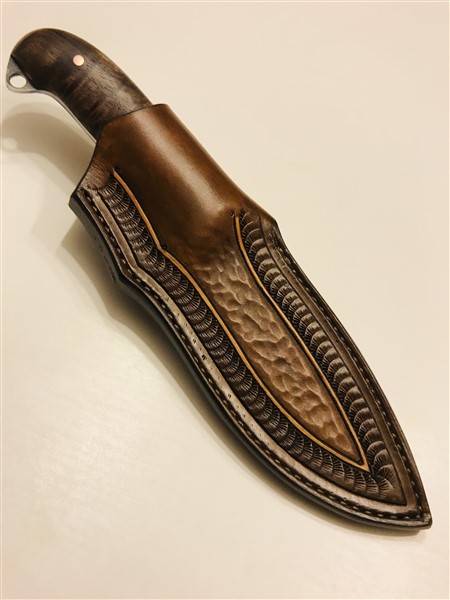
Look at the pictures below,
That level of detail is possible due to two important factors... good leather in this case Hermann Oak Leather \, and secondly that keather being properly cased. I feel like Im beating this fact in, but casing the leather will get you depth and detail. The ONLY cost for that is a little time/ patience.
If you have any questions, do not hesitate to ask them..I have a couple more tutorials that I started writing up, no time right now with my work schedule.
Have a great day Gents.
Jesse, thank you for the compliment. To answer your question, the simple one is "yes". The more accurate one, requires a little explanation about figure carving as opposed to simple tooling. The back side if this sheath is simple tooling. Take a stamping tool and create a pattern. Figure carving, like the front of the sheath, or like the western floral design Tomas posted on a pistol holster in his other thread uses a process. The first step in that process is deciding what parts of the design are "up" and what are "down". So, what you call the rope is supposed to be "up". First you have to use the beveler around both sides. This will recess the adjacent areas. Then I use the background tool over the beveled areas to provide further suppression and a texture differential.
Tomas, Thanks for the critique and suggestions. Always welcome. However, the crinkly edges around the perimeter was a design choice. I like more texture than others I guess. I get that effect by tilting the beveler so one side overlaps the last impression and pushes the leather up a little. Here in the desert southwest, it's about 115 degrees and 2% humidity. The leather dries out so quickly, I often have to stop, dampen the backside, and wait a little more. It's a balancing act. Someday, I will have a small room dedicated to clean work like this and will be able to control the climate better.
I think you forgot to mention another factor in getting those crisp impressions. Leather thickness. It looks like you are using 8/9 oz. leather?
Another factor, I think is saturation dying or oiling. The sheaths you posted here have a multi-color scheme, (which I love), but the sheath I posted is saturated with Neatsfoot oil. Any saturation with dye or oil, has a swelling effect that reduces the tooling depth.
Joshua States
www.dosgatosforge.com
https://www.youtube.com/channel/UCdJMFMqnbLYqv965xd64vYg
https://www.facebook.com/dos.gatos.71
Also on Instagram and Facebook as J.States Bladesmith
“So I'm lightin' out for the territory, ahead of the scared and the weak and the mean spirited, because Aunt Sally is fixin’ to adopt me and civilize me, and I can't stand it. I've been there before.â€
Great job man. Leather is an easy medium to make mistakes on, especially if your going for that super clean look. You pulled it off though! good job.
-Evan
Evan L. Cihak
Joshua-
Can you add a photo that shows the loop fastening detail? Thanks.
So, that's what Tomas' second tutorial is about. I'm still trying to incorporate the lessons from the stitching tutorial, with great improvements.
Jesse, sorry it took so long to get back to this. I think you mean how the belt loop is fastened? The loop is sewn through all three layers and riveted through two layers.
Joshua States
www.dosgatosforge.com
https://www.youtube.com/channel/UCdJMFMqnbLYqv965xd64vYg
https://www.facebook.com/dos.gatos.71
Also on Instagram and Facebook as J.States Bladesmith
“So I'm lightin' out for the territory, ahead of the scared and the weak and the mean spirited, because Aunt Sally is fixin’ to adopt me and civilize me, and I can't stand it. I've been there before.â€

