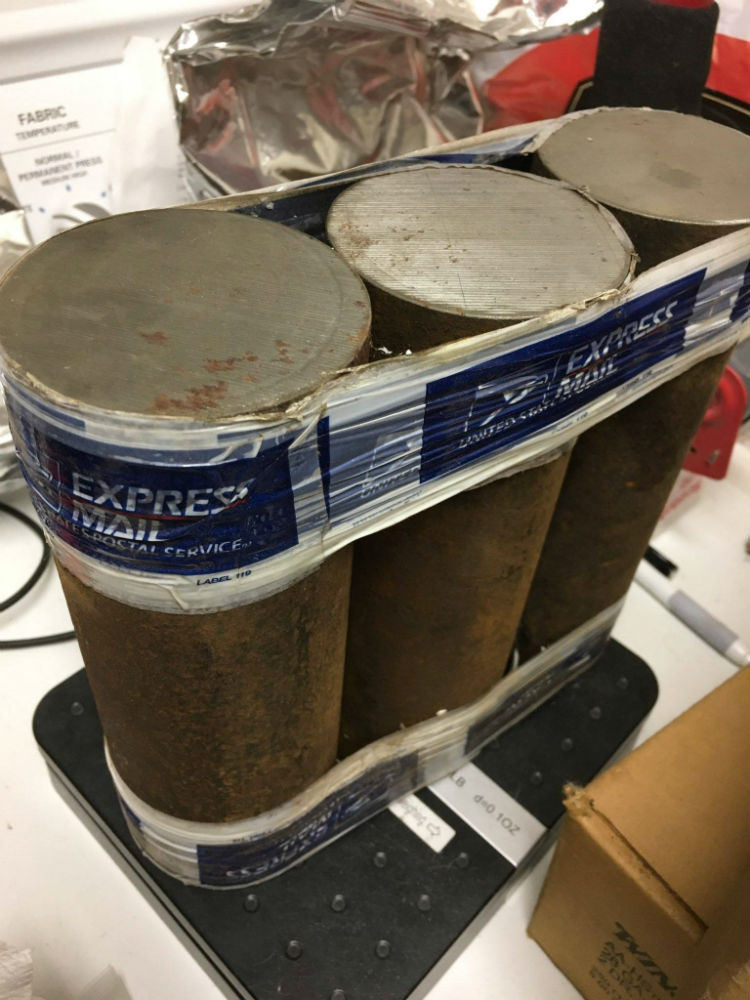
A while back I decided to get rid of my Tippman Aerostitch sewing machine (this is an industrial sewing machine that runs on compressed air). I eventually managed to trade it for some cash and three rounds of Don Hanson's W-2. These rounds are 2-3/4" in diameter and about 8 inches long. I sold one to JJ Simon and kept the other two. I decided I would make a dagger out of some of it and photo document the process. I am far enugh into it that I can probably start showing and not run out of pics before I do the next stage.
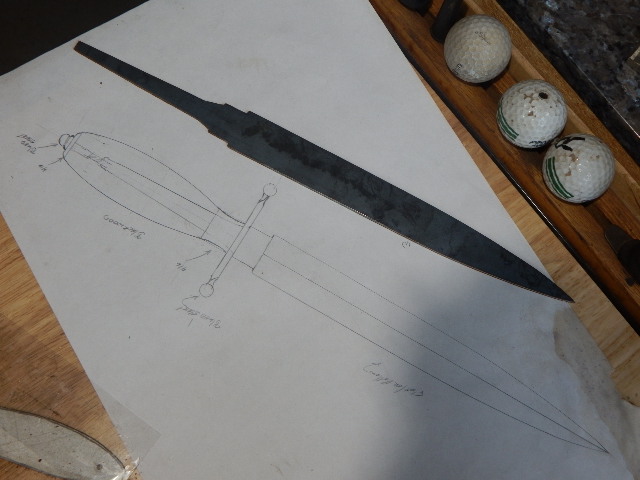
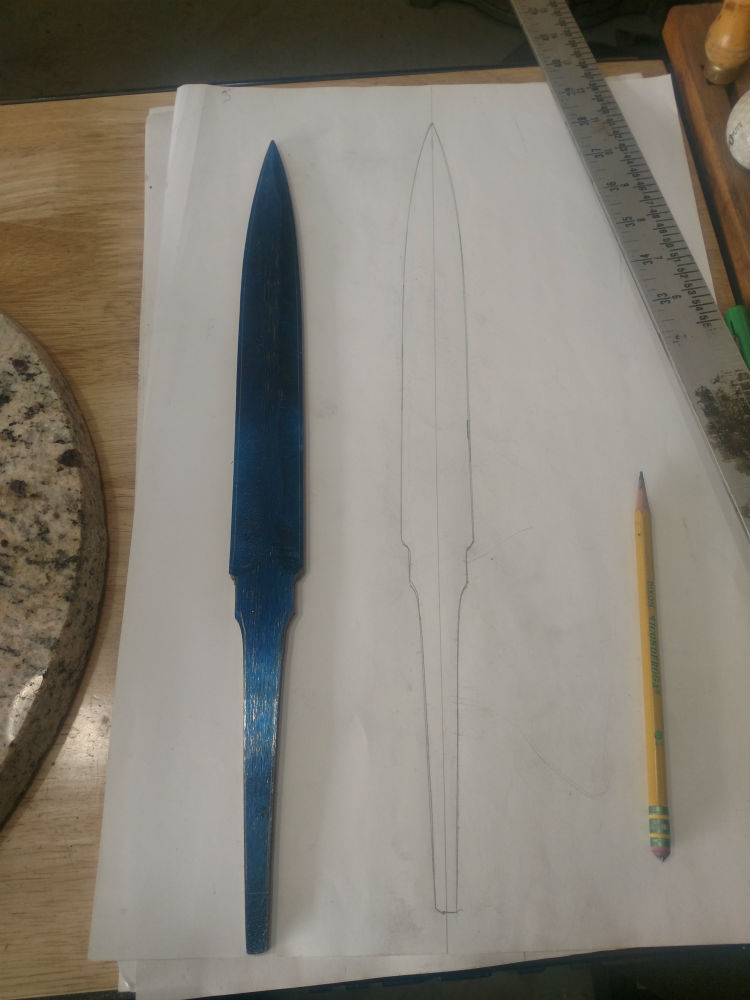
I start with a drawing of the entire knife and a blade template made of 1/8" flat stock. The drawing is not a destination per se, it's more of a target. Sometimes things change along the way, but I always start with a full scale drawing complete with handle and fitting materials choices and a basic design.
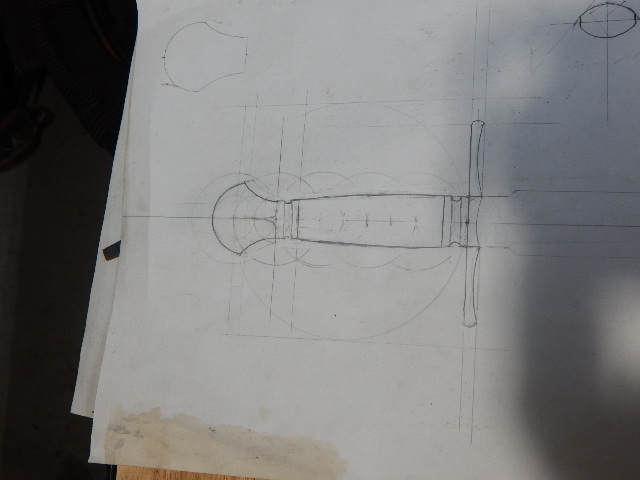
After taking Matthew Parkinson's Falchion class, I am seriously considering changing the handle design to this:
I would be very interested in what everyone thinks of the change in design.
This is the starting material.
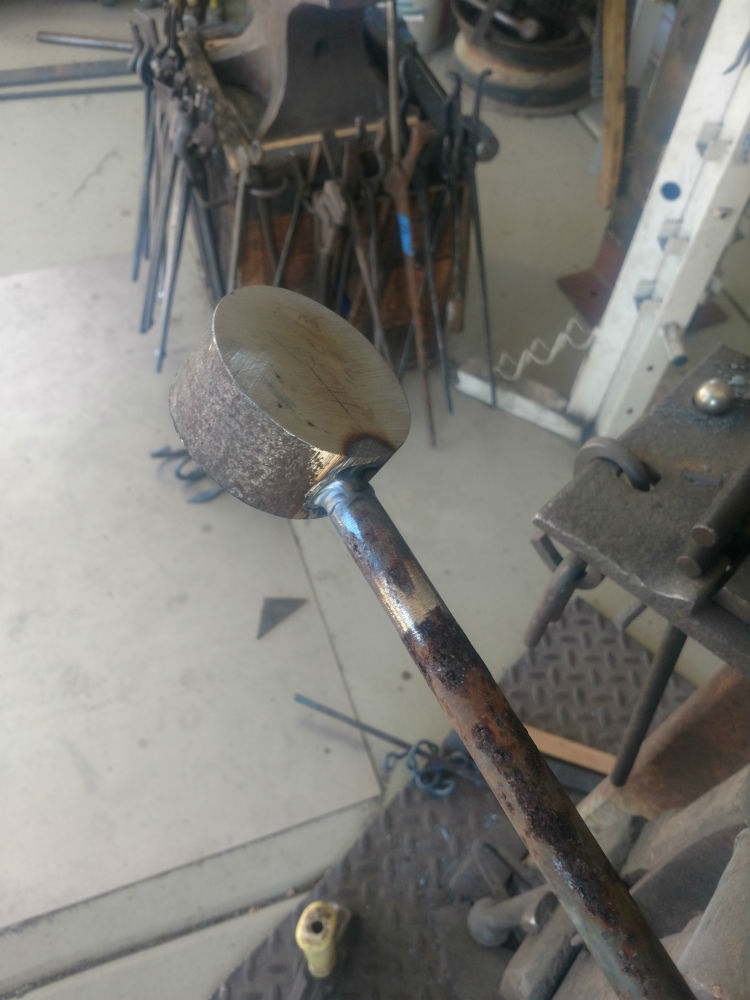
I cut a slice off about 1 inch thick and welded it to a rod of 1/2" round.
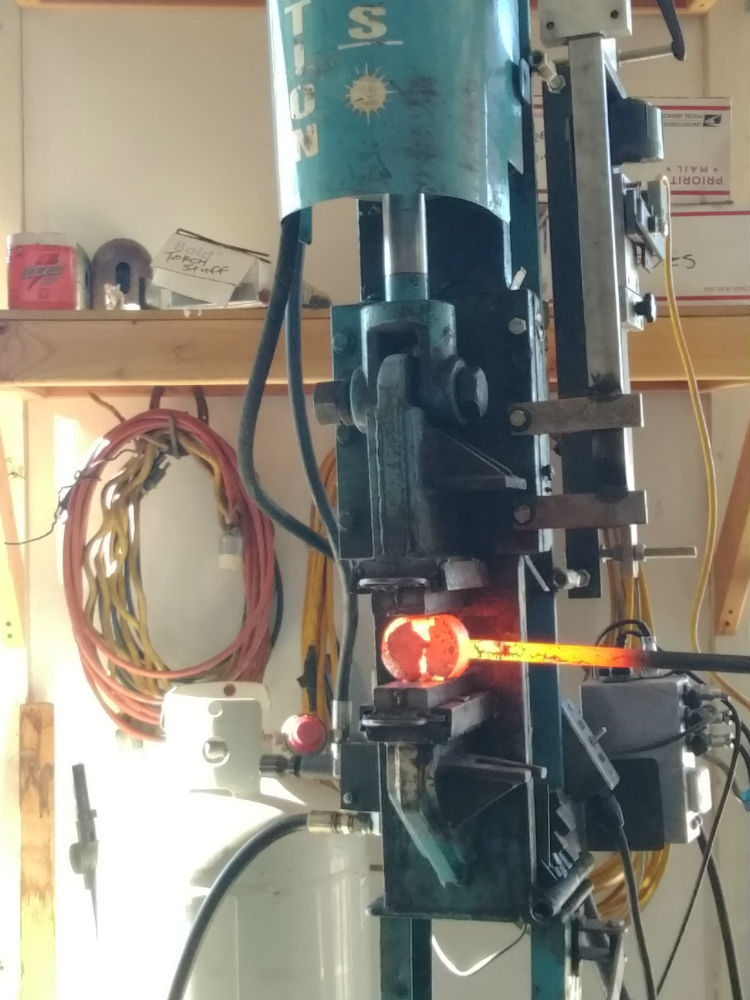
Then it goes into the press for initial shaping.
Intermediate forging step.
Until I have my basic bar of 1"x3/8"x 12" (+/- all measurements)
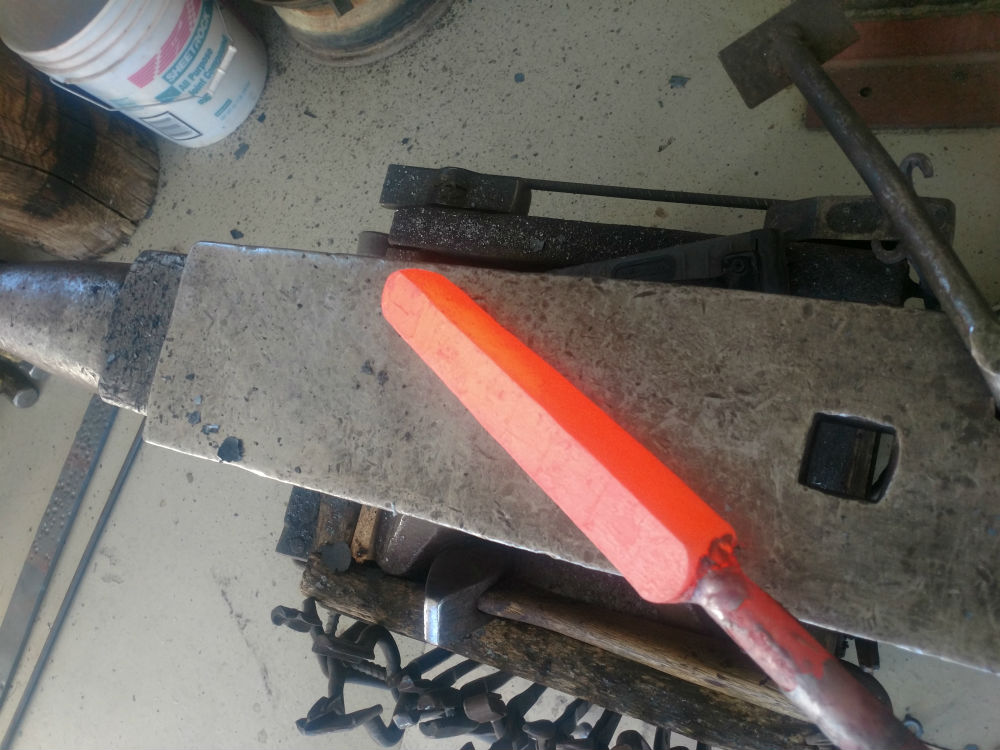
Now is when the heavy hand work begins. I use the template during the forging to get the size and shape right.
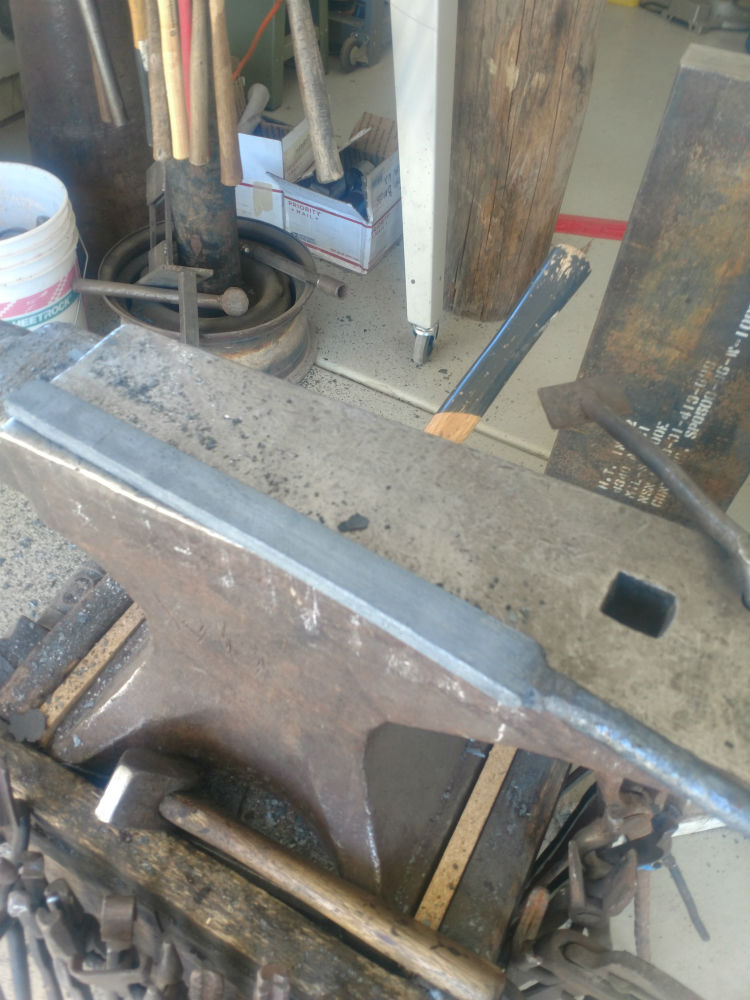
I even draw the outline on my anvil and hold my forging over it to see what areas need adjusting and how much.
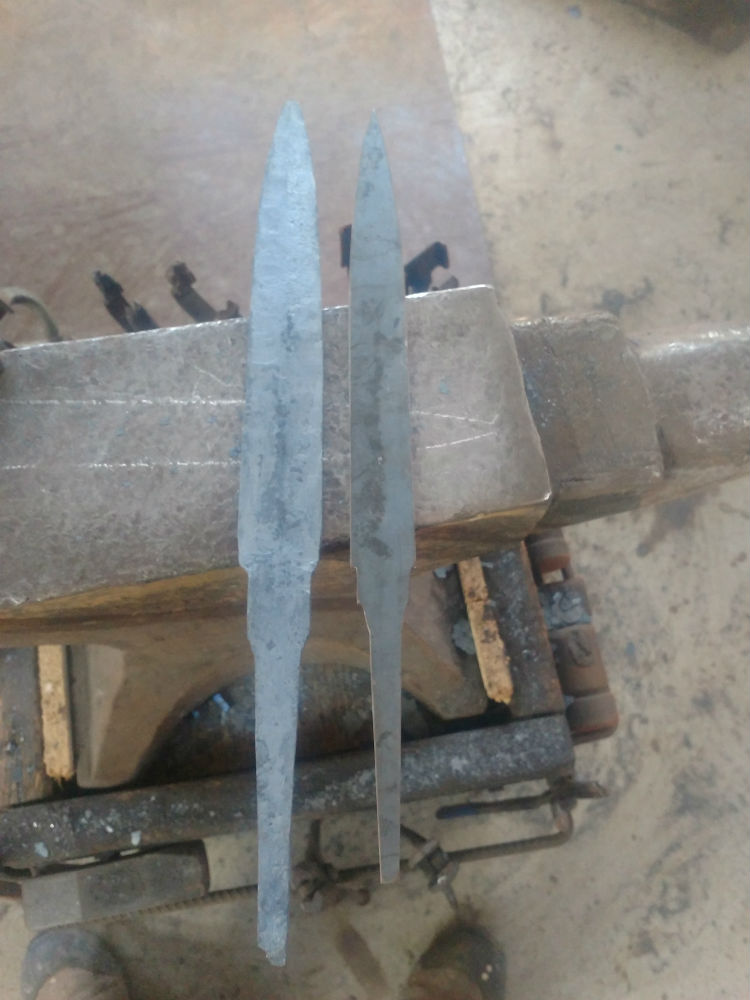
Here is the dagger during forging next to the template.
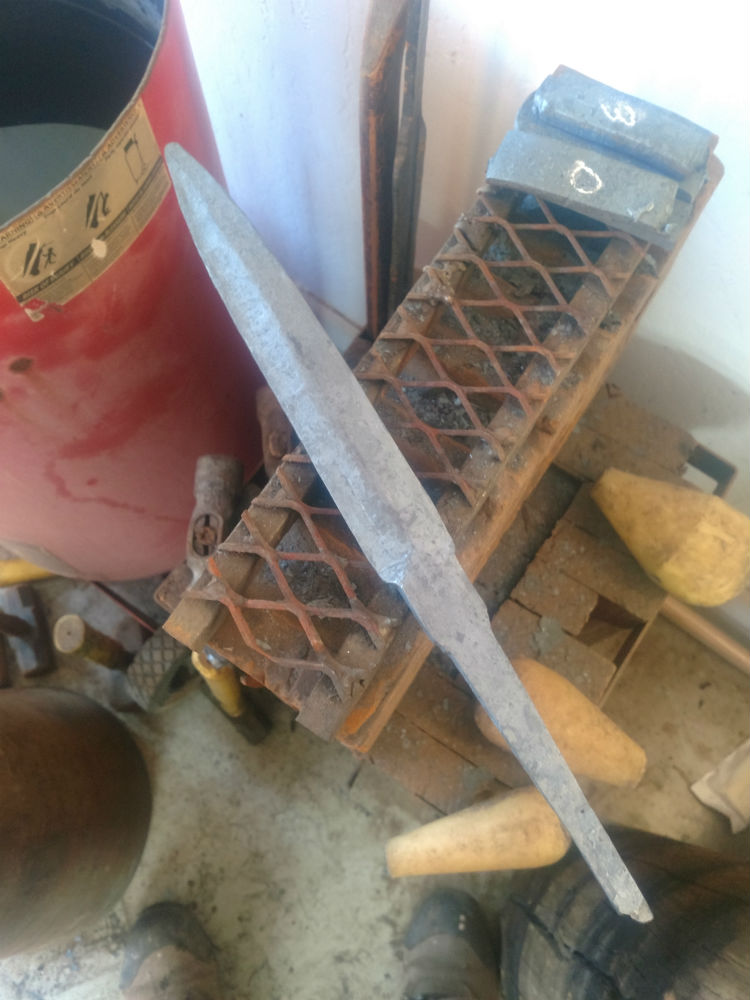
And the finished forging. You can see the cut-offs of two forgings next to the dagger on the cooling rack. O-1 and W-2 scraps for something else!
Joshua States
www.dosgatosforge.com
https://www.youtube.com/channel/UCdJMFMqnbLYqv965xd64vYg
https://www.facebook.com/dos.gatos.71
Also on Instagram and Facebook as J.States Bladesmith
“So I'm lightin' out for the territory, ahead of the scared and the weak and the mean spirited, because Aunt Sally is fixin’ to adopt me and civilize me, and I can't stand it. I've been there before.â€
Good stuff! I do love those long knives.
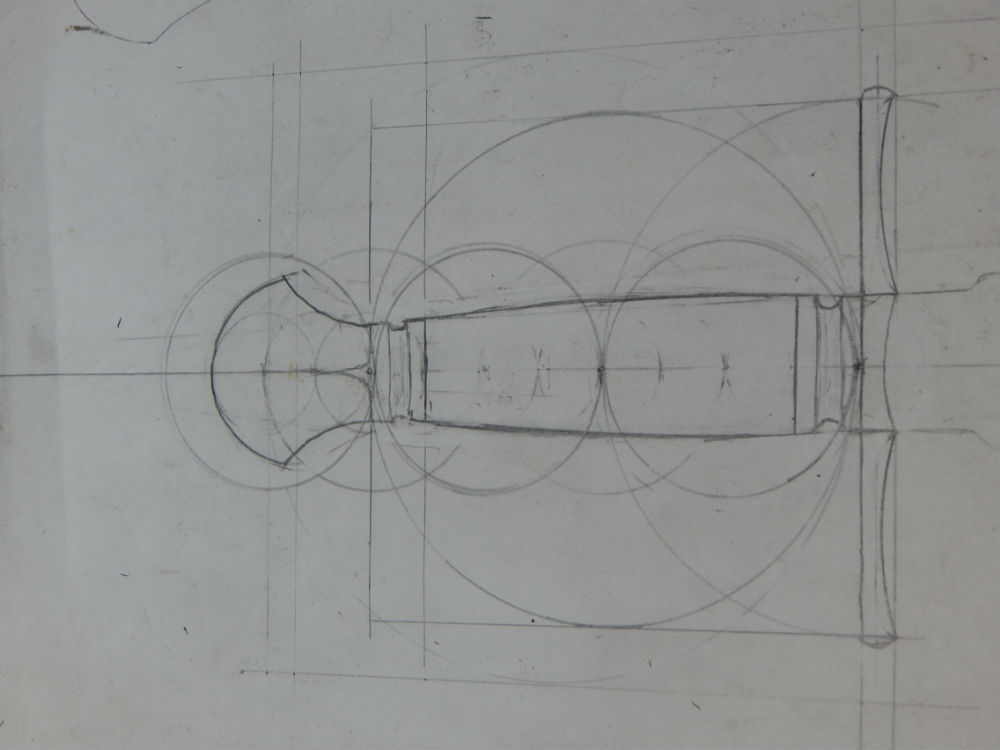
So what's the point of the drawing with the circles? Do the circles help with symmetry or something?
Hey Joshua,
Great work and thank you for sharing! I would definitely say the second design. A little more striking I think.
-Evan
Evan L. Cihak
|quoted:
So what's the point of the drawing with the circles? Do the circles help with symmetry or something?
Handle shapes and dimensions are planned on paper using the whole number ratio design method by Swedish swordsmith and historian, Peter Johnsson. I originally read about it in some of Peter's writings on another forum and his FB page. Then I got some practical training/experience using this method in the class with Matt Parkinson. I just picked up Peter's book, "Die Schwert, The Sword in Form and Thought" yesterday. I am totally psyched to read it. Basically, laid out, the design process is this:
The blade length/width relationship can be expressed as a whole number ratio. The blade/handle relationship is another whole number ratio. So, establishing these ratios (expressed as circles) allows you to define the area of the handle, pommel, and guard using a compass. Then, using the same ratios and points within the handle design area, you establish the limits and shape of guard, handle and pommel. It's a very powerful tool and from Peter's research, it appears to be how most swords (and some other bladed objects) were designed and constructed from Roman times through the middle ages.
Using the ratios in design helps everything keep proportions esthetically pleasing and keeps balance between elements.
Joshua States
www.dosgatosforge.com
https://www.youtube.com/channel/UCdJMFMqnbLYqv965xd64vYg
https://www.facebook.com/dos.gatos.71
Also on Instagram and Facebook as J.States Bladesmith
“So I'm lightin' out for the territory, ahead of the scared and the weak and the mean spirited, because Aunt Sally is fixin’ to adopt me and civilize me, and I can't stand it. I've been there before.â€
That is a crazy cool method of design. I will have to find the book and give it a read.
I did find a video about it that gave a brief review of the process.
|quoted:
I did find a video about it that gave a brief review of the process.
https://www.youtube.com/watch?v=FiSoLMx3v0I
That's the same Peter. When you watch that video, you will see him reference the Golden Ratio and its reoccurrence in the sword form. Somewhere around here is a set of videos of Kevin Cashen showing the same reoccurrence of the golden ratio in dagger design and construction. Having seen Kevin's videos, I automatically associated Peter's work with the dagger/sword relationship.
Joshua States
www.dosgatosforge.com
https://www.youtube.com/channel/UCdJMFMqnbLYqv965xd64vYg
https://www.facebook.com/dos.gatos.71
Also on Instagram and Facebook as J.States Bladesmith
“So I'm lightin' out for the territory, ahead of the scared and the weak and the mean spirited, because Aunt Sally is fixin’ to adopt me and civilize me, and I can't stand it. I've been there before.â€
Cool stuff Joshua. Thanks for posting
Want to see more of my work follow me on Instagram:JasonVolkertKnives
Want to get in touch with me [email="[email protected]"]Email[/email] me.
Nice stuff - right there.
Karl B. Andersen
Journeyman Smith
Hey Joshua,
Question- In the posted video Peter uses 8 circles to describe the ratios of a long sword, with 1 circle representing the length of the hilt, and 1/7th of that (roughly) describing the size of the pommel. On the picture you posted, your handle is 5 circles long with the grip being 4 of the five. Is there a ratio of Blade/Quillon length to handle/pommel length that you are working towards? I didn't see a video from Peter describing the proportions of daggers vs the proportions of long swords.
Thank you!
-Evan
Evan L. Cihak
|quoted:
Hey Joshua,
Question- In the posted video Peter uses 8 circles to describe the ratios of a long sword, with 1 circle representing the length of the hilt, and 1/7th of that (roughly) describing the size of the pommel. On the picture you posted, your handle is 5 circles long with the grip being 4 of the five. Is there a ratio of Blade/Quillon length to handle/pommel length that you are working towards? I didn't see a video from Peter describing the proportions of daggers vs the proportions of long swords.
Thank you!
-Evan
Disclaimer: I am just scratching the surface of this design method idea. So I am like a kid who just discovered matches and fire. I know enough to be dangerous, but not enough to fully understand what I'm doing.
The blade length to blade width is expressed as a whole number ratio. Let's call that L:W.
The Blade length to handle length is also expressed as a whole number ratio, Let's call that L:H
My L:W is 12:1 (Blade is 10.5" long, width (at ricasso) is .875" wide.
I chose a L:H ratio of 2:1
By doing the math, you can deduce the H:W ratio of 6:1
So the radius that represents the handle length is 3 times W.
The drawing I posted earlier has a couple of lines erased and one circle that doesn't belong. I have erased the circle that didn't belong there and added back a couple of lines that described the handle much better visually
So looking at the drawing above, you see the big circle that represents the blade length and the two smaller circles that give the B:H ratio of 2:1.
The other circles establish the vessicas where the overlapping circles of the same radius intersect. I'm not quite sure how they are used, but that will become apparent when I dig deeper by reading the book. Right now, I'm just trying to establish a basic form and dimensions.
The quillon ends are determined by drawing the arc of the big circle from the center point of the blade width and the square that encompasses the big circle. You will notice that the drawing of the quillon shows rounded ends that go past the line of the square. I added the arcs in the front of the quillon (also taken from ratios to the already established dimensions) and put a terminus of the arc at that intersection of the square with the quillon. This provides a visual termination rather than a physical one.
The pommel is described by another whole number ratio against the handle length H. (P:H) I originally chose a P:H of 1:2, but that looked awkward to my eye. I downsized it to 3:8 and I thought it looked much better.
BTW: I still have to adjust the spacers (front and rear) to align with points in the circles and vessicas. I just haven't gotten that far yet.
Joshua States
www.dosgatosforge.com
https://www.youtube.com/channel/UCdJMFMqnbLYqv965xd64vYg
https://www.facebook.com/dos.gatos.71
Also on Instagram and Facebook as J.States Bladesmith
“So I'm lightin' out for the territory, ahead of the scared and the weak and the mean spirited, because Aunt Sally is fixin’ to adopt me and civilize me, and I can't stand it. I've been there before.â€
Josh that looks great. I love the way the ratios work for proportions. It just look right.
ryan
Thanks guys. I'm hoping these ideas will spark some experimentation and help others, as well as me, work out sound design principles.
Greg, If you are interested in getting the book, the online retailer that does international orders is:
This weekend I've been dealing with a celebration of life for a friend that passed away, and several roof leaks so not much more to show, but I'll get to it.
Joshua States
www.dosgatosforge.com
https://www.youtube.com/channel/UCdJMFMqnbLYqv965xd64vYg
https://www.facebook.com/dos.gatos.71
Also on Instagram and Facebook as J.States Bladesmith
“So I'm lightin' out for the territory, ahead of the scared and the weak and the mean spirited, because Aunt Sally is fixin’ to adopt me and civilize me, and I can't stand it. I've been there before.â€
OK gang. Back to the process photos. I have to admit, I am making much slower progress than I thought I would. Not much time to devote to this (and 5 other knives I'm making) as I have a double commission that I have to get done as well. I thought I'd at least get this thread up to where I am at right now.
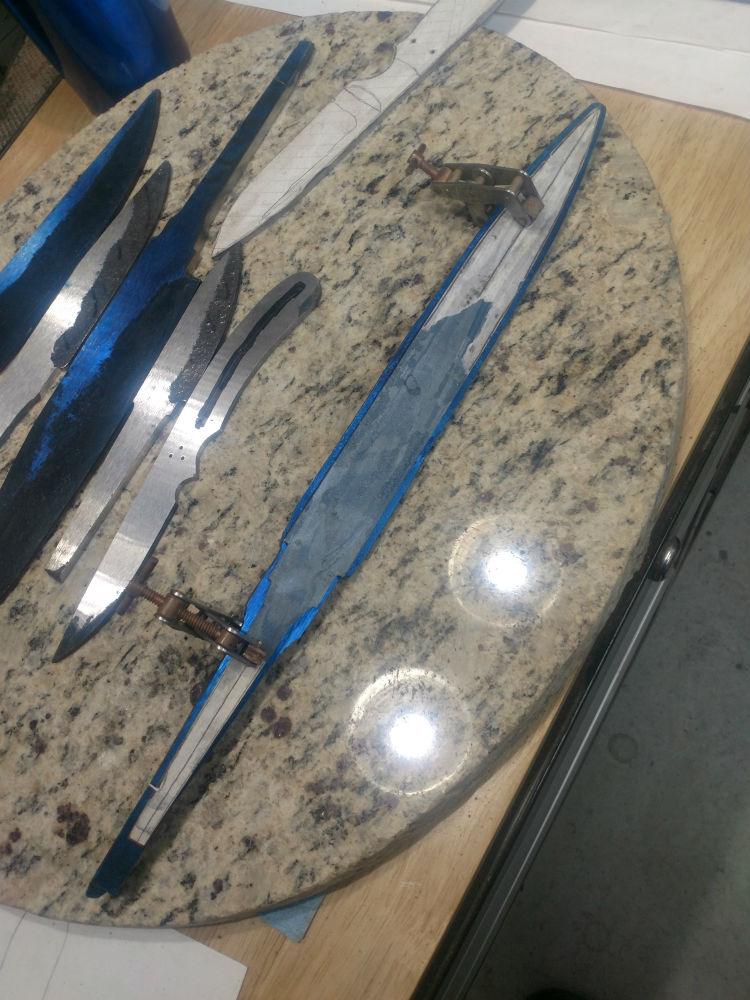
Now where did I leave off? Oh yeah, I had finished forging the dagger. So then I turn to a tried and tested method written by the late John White MS on this very forum. I wish I could find the post again (maybe one of the mods can find it an pin it) I copied the text and dropped it into a Word Doc. He outlined his entire process for forging, normalizing, and heat treating W-2. So I follow it to the letter. Then I surface grind it until the ricasso and the center ridge are flat, spray it with layout fluid and clamp my template to it. I scribe the outline and grind the profile first.
In order to ensure the shape is symmetrical, I draw a straight line down the center of one face, from the point to the end of the tang. Mark the end of the tang, Then I draw a straight line on a piece of paper. I lay the knife down and line up the two lines and draw the profile. Flip it over and line up the point and the mark on the end of the tang and draw the profile again. Wherever the lines overlap tells you where you have to grind a bit more. Grind a little, erase the last set of profile lines, draw a new set, and repeat as necessary. When both profile lines match, you have symmetry.
Grind the bevels on the 2x72 and the 9 inch disc to 220 grit. I leave the edges at about .05" or a little less and do a last stress relief before heat treat. This is where I diverge from MS White's formula by adding a small bit. I use liquid paper as an anti-scale compound for this step. I paint the entire blade with the stuff and do a sub-critical stress relief at 1150*F, hold for an hour and air cool.
The liquid paper doesn't completely block the scaling, but even at austenizing temps, the scale is so minimal, it wipes off with 220 grit paper very fast.
Joshua States
www.dosgatosforge.com
https://www.youtube.com/channel/UCdJMFMqnbLYqv965xd64vYg
https://www.facebook.com/dos.gatos.71
Also on Instagram and Facebook as J.States Bladesmith
“So I'm lightin' out for the territory, ahead of the scared and the weak and the mean spirited, because Aunt Sally is fixin’ to adopt me and civilize me, and I can't stand it. I've been there before.â€
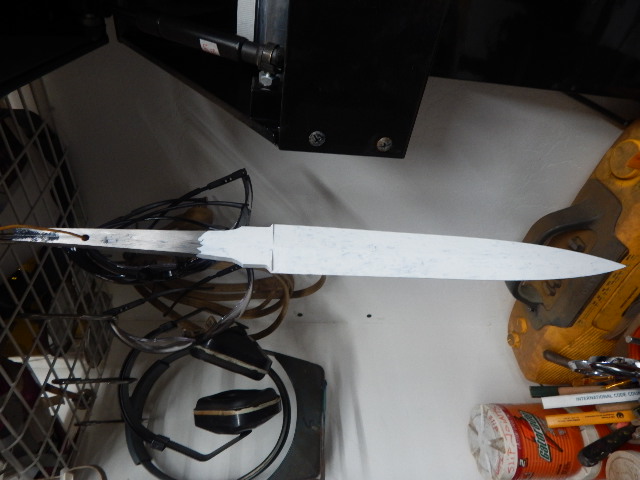
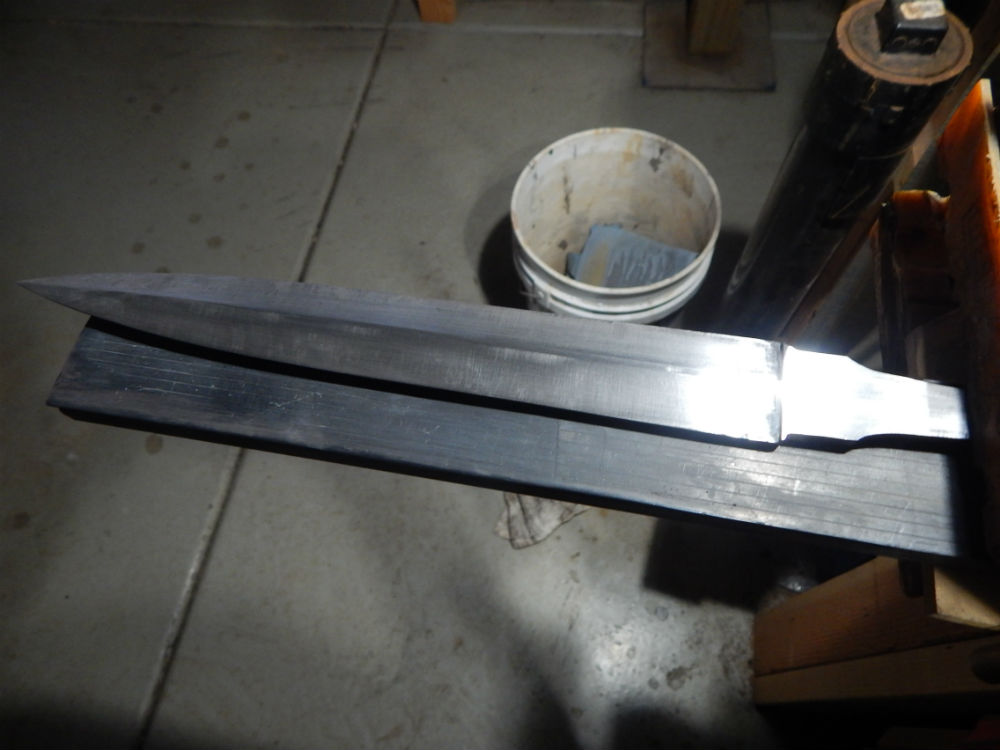
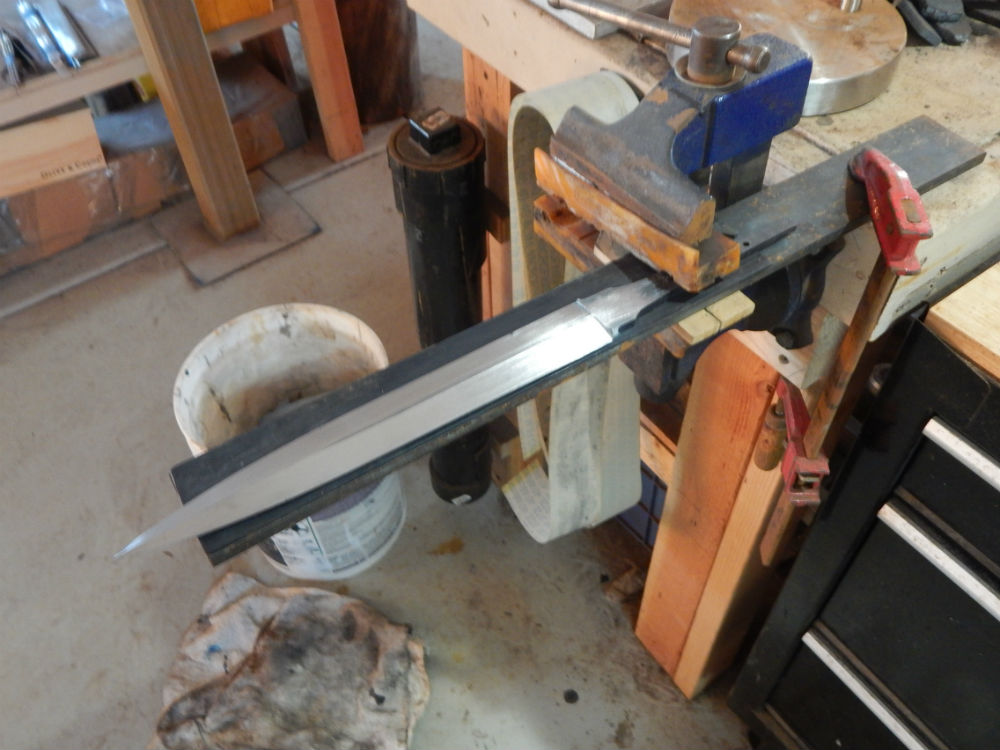
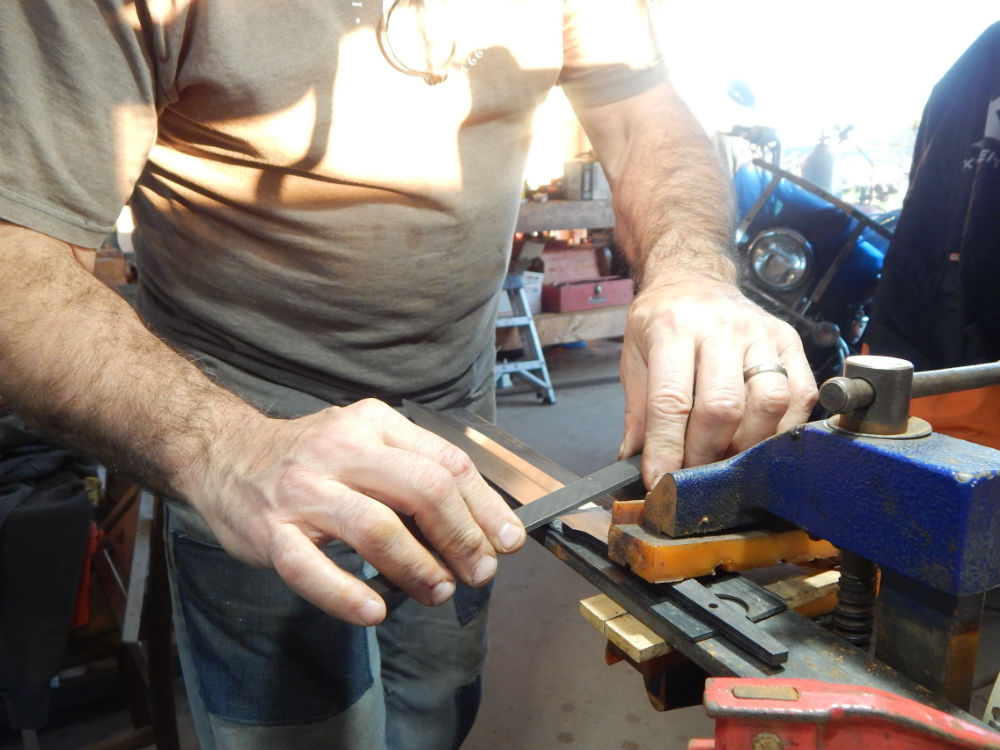
Now I am going to draw file all those 220 grit lines across my blade out with a flat smooth cut 8 inch file.
This is my draw file and hand sanding station.
Now I call upon another ABS MS, Don Fogg for draw filing technique. He did a video on this for the Arctic Fire 2012 (?). It's a soft touch process working in a relatively small area and expanding along the whole length as you go.
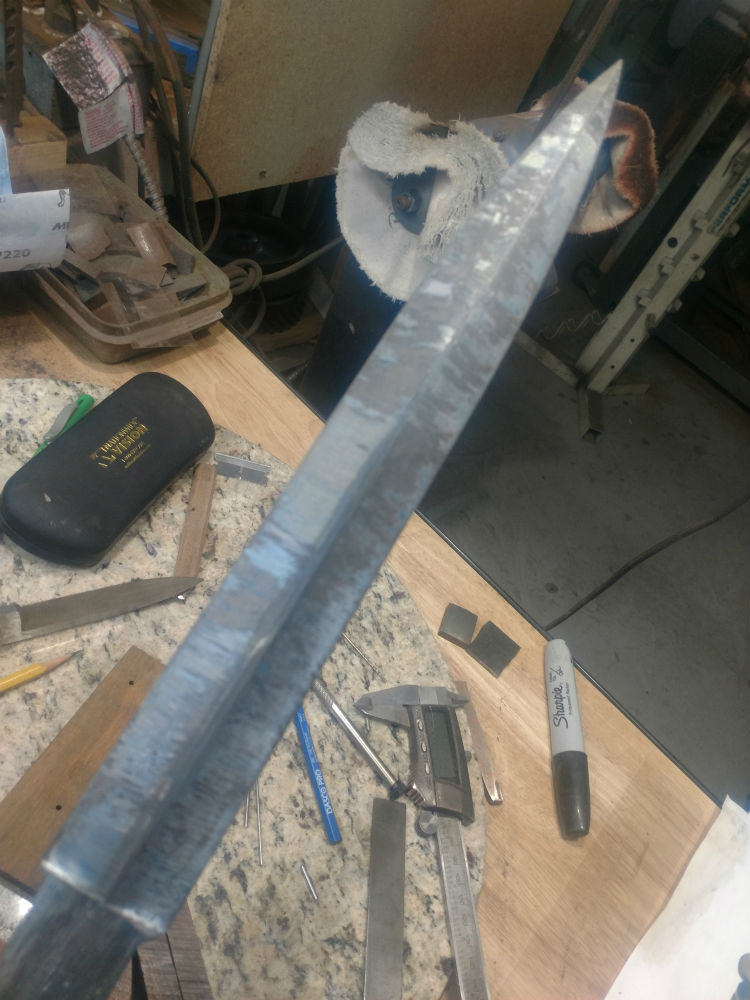
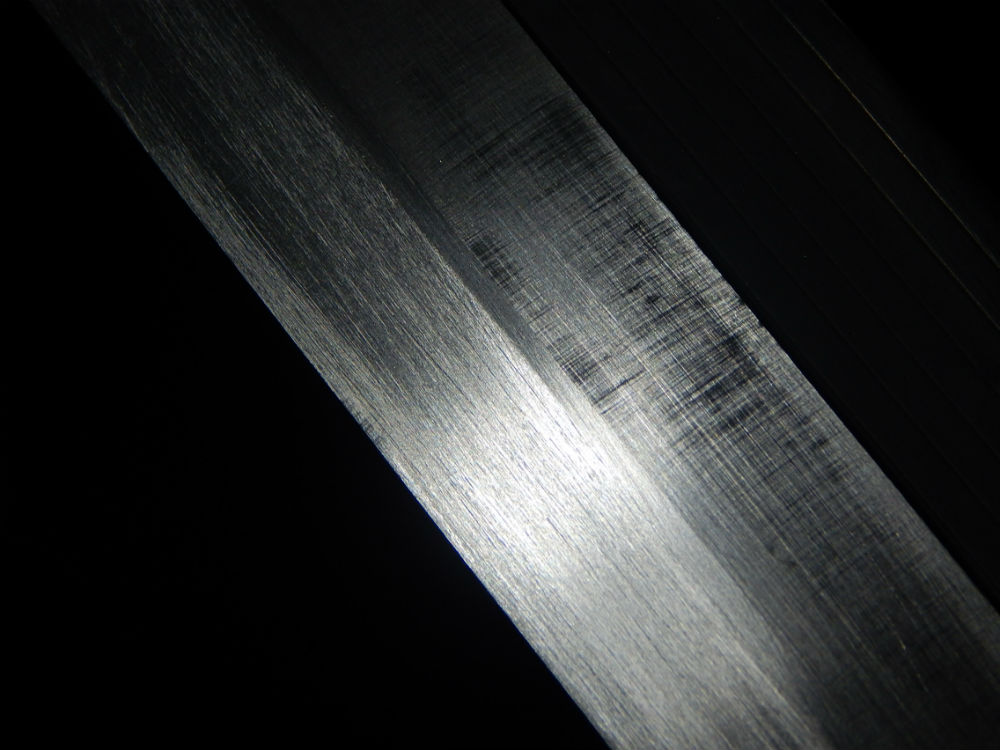
When all of those 220 grit marks are gone and the scratches from the files are running lengthwise along the blade, you are ready for HT.
Here is a close up shot of the difference between the 220 grit mechanical grind and the draw file finish.
Joshua States
www.dosgatosforge.com
https://www.youtube.com/channel/UCdJMFMqnbLYqv965xd64vYg
https://www.facebook.com/dos.gatos.71
Also on Instagram and Facebook as J.States Bladesmith
“So I'm lightin' out for the territory, ahead of the scared and the weak and the mean spirited, because Aunt Sally is fixin’ to adopt me and civilize me, and I can't stand it. I've been there before.â€
Well, I am caught up to as far as I have gotten. So, if anyone has anything they think I should consider as I move forward, please feel free.
Joshua States
www.dosgatosforge.com
https://www.youtube.com/channel/UCdJMFMqnbLYqv965xd64vYg
https://www.facebook.com/dos.gatos.71
Also on Instagram and Facebook as J.States Bladesmith
“So I'm lightin' out for the territory, ahead of the scared and the weak and the mean spirited, because Aunt Sally is fixin’ to adopt me and civilize me, and I can't stand it. I've been there before.â€

