
This was one of the most in depth and intense projects I have ever done. I want to share it to perhaps prompt any who want to stretch their thinking to do so. Because that is just what I had to do. Stretch the way I think.
First I had to overcome fear of making a mistake. Taking my time and working through the process in my mind over and over is what made it possible. Not many people speak of things like this and I think we all go through it. But it's my belief that fear keeps some of us in a holding position, unable to venture off into uncharted waters, onto things we've never tried.
Enough of that for now. But more later.
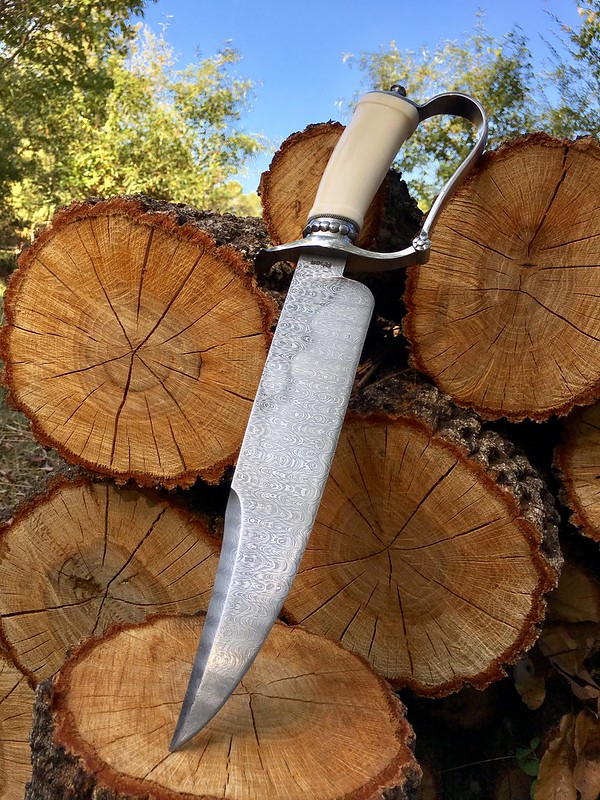
Here is the final photos of the knife.

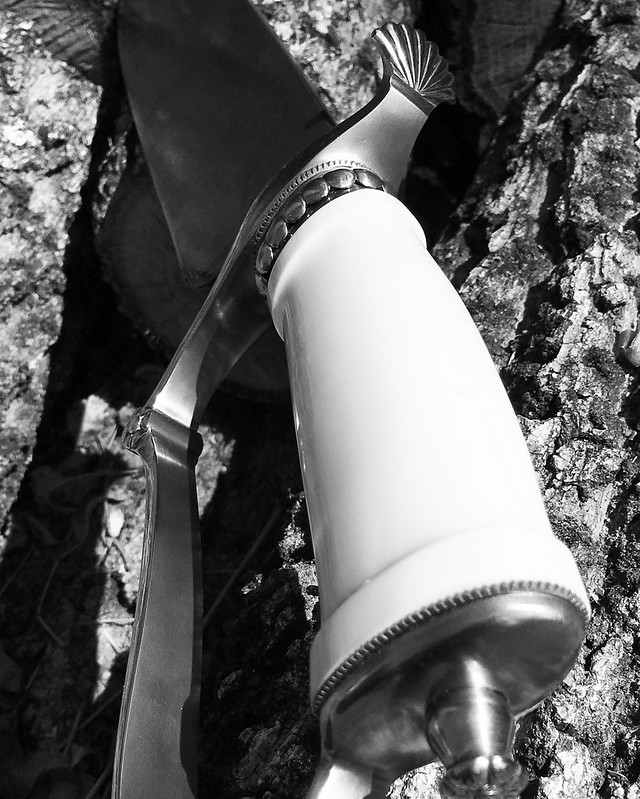
Here's some more pictures of the fittings. This is the D Guard forged.

I'll get back to the D Guard. This is the spacer assembly before I forged the "pearls" down.

Now I'm heating the points with a brazing tip and driving them into domes.


After defining the pearls by filing and polishing the spacer assembly looks like this.


Lin,
That is truly an amazing piece of work!
Bob
Thanks Bob. I’ll try to post some more photos tomorrow.
Lin, that is simply outstanding craftsmanship, beautifully executed.
Amazing craftsmanship and attention to detail Lin!! Beautiful.

Beautiful knife, Lin! Thank you for sharing how you go about the pearls.
I'm curious about the round detail where the S-guard area meets the D-guard area. It looks like that was forged as a solid piece. I can't tell from the pictures. Is that detail engraved in, or is two pieces connecting together somehow?
Again, beautiful work! Thank yo for sharing!
Jesse, Do you mean the thin spacer with notches? It's a piece of stainless that I coined the edges with a checkering file. After that I filed a bevel on the side facing the viewer.
If this is not what you mean, let me know.
Here I've laid out the shell and started the steps. I notched the edge and used the notches as starting points for the filed grooves. They aim toward the center, converging. Having the guard curved already is necessary to allow the file to have clearance.

This is the filed shell. There may be some more smoothing and defining with needle files and sand paper necessary but you always have to be very careful to not wash away the details. A light buffing will make it shine.

More coming.
Another beautiful knife. I really enjoy seeing all your pictures of the process and I envy how you forge so close to final shape. By the way your additions to the planning for the choil topic really helped me thank you.
Gilbert
Lin, Sorry about my poor description. This is the detail I am wondering about... But that spacer with steel pearls is awesome. I WILL have to try that, assuming that's OK.
Thanks for sharing, Lin. Outstanding work. You're an inspiration for us all.
|quoted:
First I had to overcome fear of making a mistake. Taking my time and working through the process in my mind over and over is what made it possible. Not many people speak of things like this and I think we all go through it. But it's my belief that fear keeps some of us in a holding position, unable to venture off into uncharted waters, onto things we've never tried.
Thanks for sharing this wisdom Lin.
Beautiful work!
|quoted:
Thanks for sharing this wisdom Lin.
Beautiful work!
Reminds me of some of Don Fogg's musings in "The Way". 
Thanks guys.
Jesse, feel free to make anything you want.
The first thing I did was drill a small hole in the center of that cylinder. I then filed the flower pattern. Then I made a pin and set it in tight to fill the hole.
I’ll try to post more pictures tomorrow.
