
This will be an explanation of how I forge a small belt axe head. First, there may be a faster or an easier way for your set up. The same might apply to me as well, but I enjoy the journey as much as the destination. Plus, I have the very fortunate circumstances to be able to take my time and forge such objects in a historic setting and with the old tools and forge. The setting itself prompts me to get as close as I can to the old ways.
The material I am starting with is just mild steel. About 1/2 inch X 2 inch X 6 inch. This can be scaled up or down depending on your desire and elbow grease. This one will make a head that will be about 1-1/4 pound. A lot depends on the volume of bit material or if you get things uneven and adjust by removing some material.
Don't expect to make it perfectly the first go round. It might take a few attempts to be happy. Just be determined to learn where the problems are and avoid that on the next one.
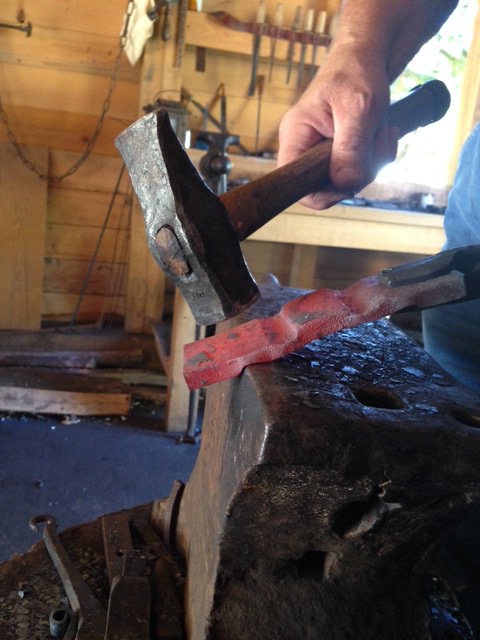
You will need a drift. I forged mine. I looked at some axe heads of the size I wanted to forge and studied the eye shape. That is how I forged and ground mine. 5-1/2 inch is long enough. The maximum width of the drift needs to be about 2/3 from the small end. The angle of taper is slight, not over 7-10 degrees. 7 is better. The drift tapers distally too although much less extreme. Just enough to say it is tapered. This is for many reasons which will be come apparent as you use it. 4140 is good material for the drift but I sometimes use mild steel. The drift needs to be done before you start the axe since it will determine the general size of the eye and thus the measurements and locations of the steps.
I will snap a picture of the drift and insert it here.
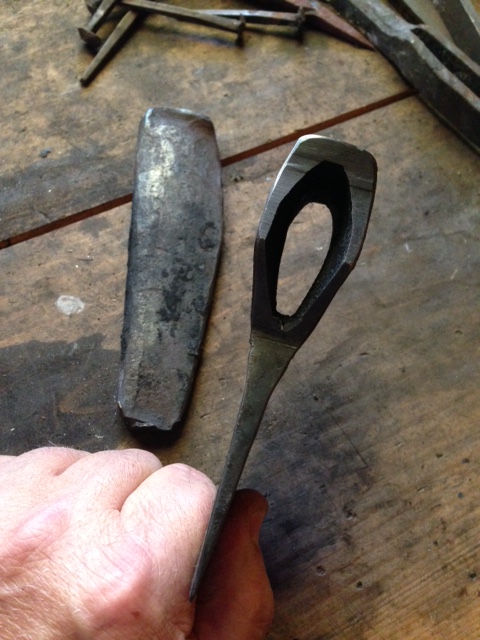
In the above pictures, you see the drift I use on these small axes. To one side is a "drift" I made that is too stubby or, at least, the taper is too steep. The one in the head is working out great. You can see the back is sort of straight with the front growing in width and taper to about 2/3 it's length and then tapering back down again. That axe head is heat treated but I have some clean up to do. The drift is sitting in it's final depth. It's important to note that the drift is supposed to be driven in both top and bottom of the head to create a slight hour glass shape of the inside. I will address this more in detail later in the process.
This technique of forging an axe head is totally developed around the anvil and tools available in the early blacksmith shop. It is not complicated but requires the smith to elevate his skills to meet the task whereas today it is common for smiths to purchase or build jigs and rely on power equipment to make up for man power or a lack of technical ability. There is no shame in that of course. Its just the way it had to be then because there was no resources such as we have now. The advent or power equipment changed the stages and techniques used to make an axe. This why you can look at an antique axe and tell about when it was made.
This might take a while. I want to explain the photos as I go and I don't have the complete set of photos yet but I'll be getting them really soon. I do have plenty to start with.
Back to the starting piece. 1/2 X 2 X 6 inch. This was once wrought iron and a steel bit inserted. I have mild steel for this one. I want to establish the poll. I use the edge of the anvil to "step" it down.
Here's a snap shot of the starting piece.

Now it's yellow hot and stepping down. Some of the photos make it seem like I'm working the steel too cold. The piece has lost heat while fiddling with the picture. I want to emphasize that you have to work this hot (yellow) during these steps.

In the above pictures, you can see that the measuring (eyeballing to me) is from the center out each direction. The poll at this point has to be over sized to allow for reduction at high heat. Its about 1-1/8 to 1-1/4 wide. Also as you see, the edge of the anvil is used. I think a slight rounded edge on the anvil is better.
The next step seems to be confusing to some. It's time to establish the step that forms the front of the eye. Location is important naturally but you have to allow for the reduction of the eye wall thickness while also allowing for some spread in length. Lets look at the step.
This is another picture showing the hammer position for the blow.
These two steps; the poll step and the front of eye step, create almost a diamond shape of material that will be the eye wall. That volume of material is what you need to judge. It can be a bit thick, but I hate it when it gets thin. The distance from the poll step to the front of eye step should be for mine about 1-1/4 inch. This will spread out as well as up and down. That diamond shape is storing your material.
I'll be back with more.
Look good so far Lin--and I am enjoying it <img src=' http://www.americanbladesmith.com/ipboard/public/style_emoticons//smile.gi f' class='bbc_emoticon' alt=':)' />
Thanks for taking the time to share this with us
Brian

I'm really enjoying this Lin. I've always admired your axes and appreciate you taking the time to document your process. Your photos are clear, and your descriptions are both thorough and concise. I may just have to print this out when you're finished and keep a copy in my shop!

Thank you Lin! Good stuff.
Brion
Brion Tomberlin
Anvil Top Custom Knives
ABS Mastersmith
Thanks guys. I'll post more pictures soon.
I'm enjoying the show!
Thanks Lin!
Russell
Lin, thanks for sharing your process with us. I have used this process for a few myself. The great thing, to me, about this process is that your not limited to size, shape or style of head. This process can be adapted to make different styles including double bit axes. The double bit is one I want to try.
Chris
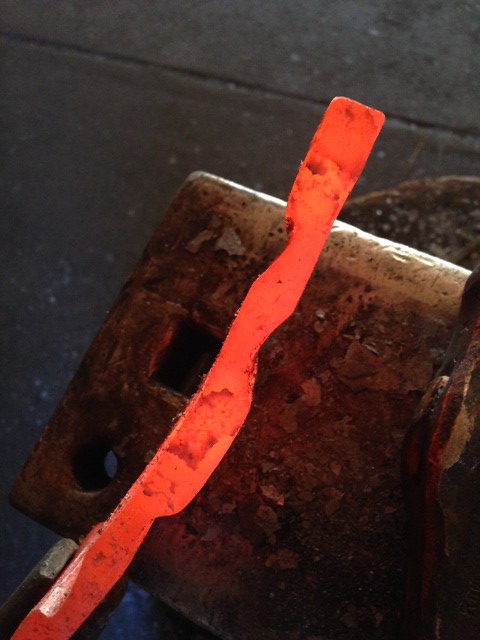
In the above photo you see the material has been separated by clear lines. Each step divides the piece into segments and each segment has to be shaped without disturbing the others. You accomplish this by holding the piece over the far edge or against the near edge of the anvil. Let's look at the piece before the flattening is done. It is in the same state as the last photo but showing it on the eye side and the poll side.
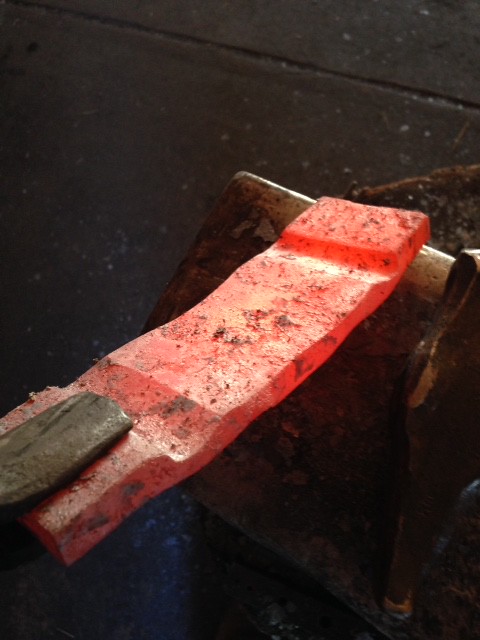

In the above photos you see a definite ridge that crosses the piece (not the poll). This forms the point of the diamond when shown edge wise. As you see, it takes somewhat accurate forging for these to be this way but it's a little forgiving so don't worry. These ridges need to be drawn mostly perpendicular to the length of the piece with the cross peen. After a series of chops use the face of the hammer to smooth it and this raises and lowers the cheeks into outward curves which are wider than the poll. They don't need to be too thin so as to become weak or out of proportion to the surrounding work. Work one side of the axe and then the other to try to get them balanced in thickness and dimension. Now you can start the drawing out of the jaws. You can draw a little, leaving it blunt or draw it thin, whichever you prefer. I draw it thin. Here is a shot edge on of the bow tie after the flattening of the cheeks and the tapering of the jaws.
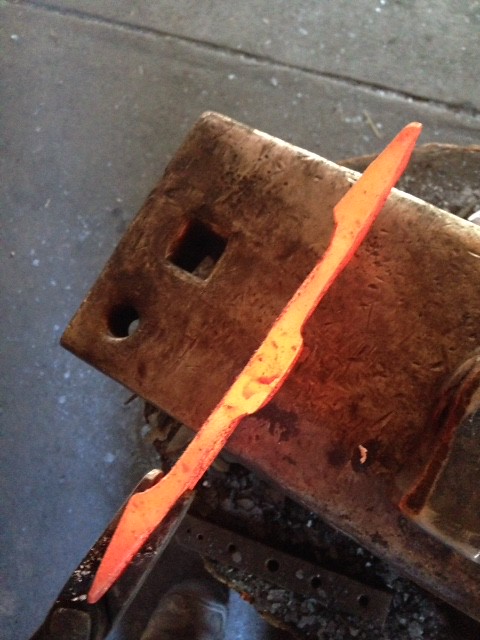
Now a profile of the same stage. There is actually more topography than this picture appears to show. This is the poll side.

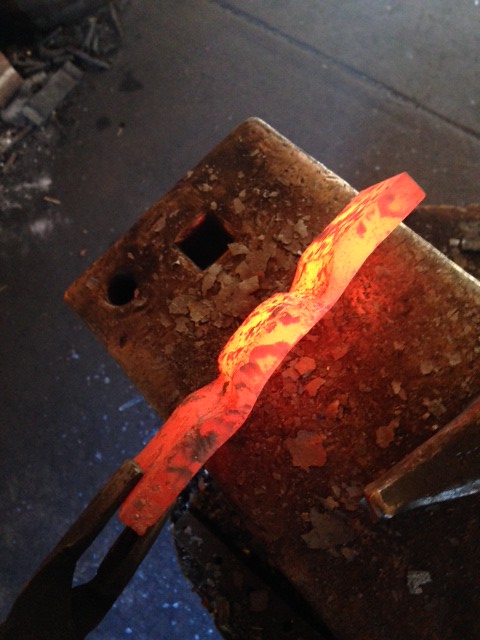
Now it's time to bend it like this.
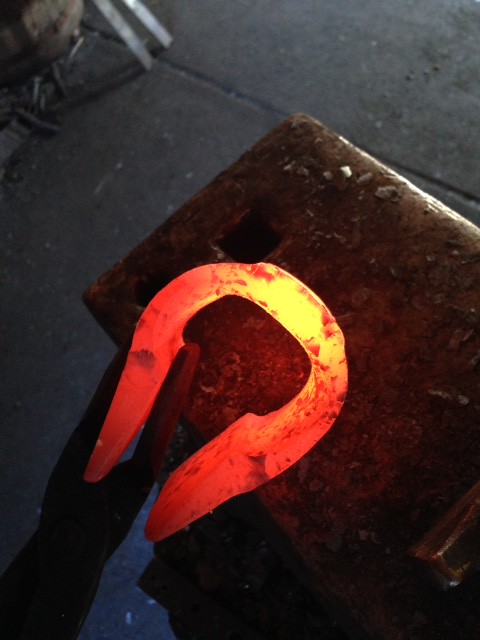
Try to do it in one heat. It's awkward to heat it if you don't get it all the way around. Now you need to force the eye walls in and under the poll. You have to get that area bright yellow hot and hammer them in by alternating from one side to the other. Remember, yellow hot. As it lowers in color, re heat and continue.
It needs to look something like this.
Lin, I am wondering do both the mild steel and the high carbon stretch at the same rate? The reason I ask is that I would like to try this with wrought iron, and was wondering if it stretched similar to the mild steel or the high carbon. Thanks Landon
Landon, I have made these out of mild and 5160 and have had trouble making clean welds. It take several more welding heats after the majority of movement of forging has been done to get it all to stick. I suspect it is because of the disparity of movement. When I use a simple steel (1084, 1075, etc.) the welds are very clean using fewer heats. I plan to use some 80crv2 soon because it moves so easy under the hammer. I suspect it will follow the mild or wrought at its' pace. I think 01 would also work well. Bill Moran used 01 in combination with wrought iron or mild steel to make some Damascus.
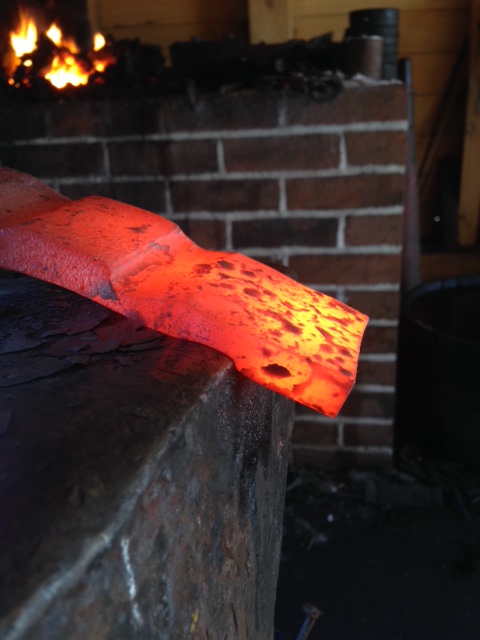
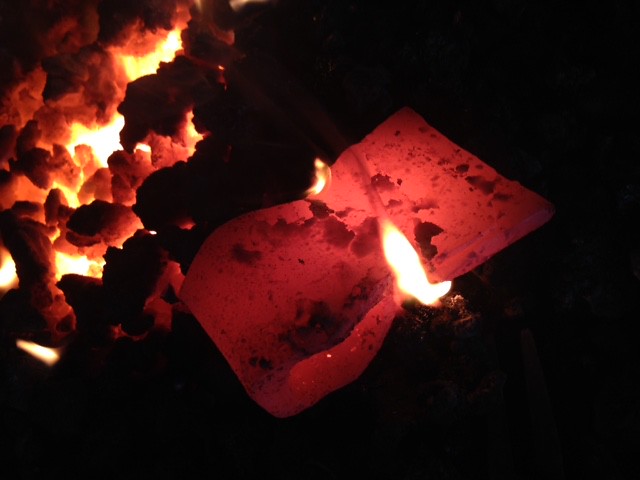
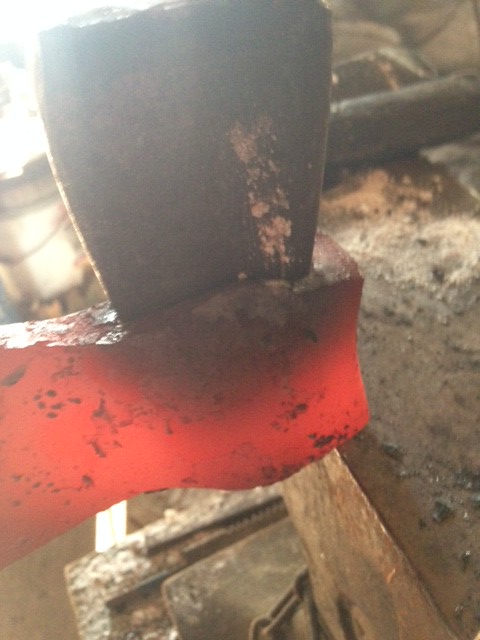
This bit is of 1075 steel. I used .300 X 1-1/2 and forged a thin edge on one side and cut into the edge with a chisel to create teeth to help grab the jaws and prevent slipping during the weld. I heat the jaws to bright red or yellow and shove the bit in as shown using my hammer, just sliding it off the anvil into the jaws. Then set the jaws down into the teeth before the heat evens out.

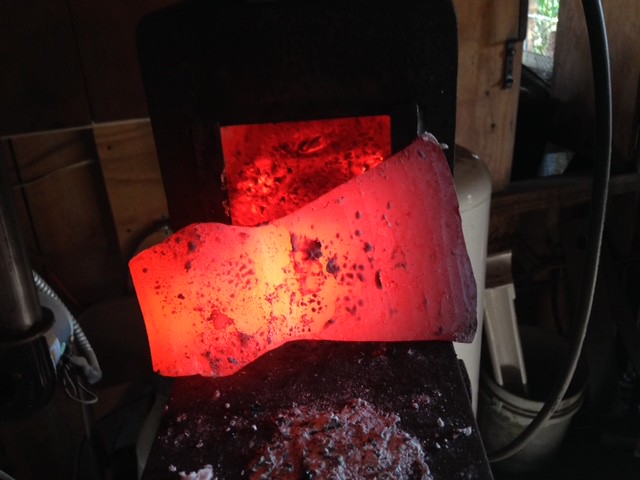
Now is where your welding experience comes into play. Simply make the weld, concentrating heavy, soft blows to the rear of the blade onto the rounded edge of the anvil, moving out from the center. Work fast but deliberate with no fiddling around. Repeat this as necessary till you are satisfied the weld is good. Then proceed with drawing out the blade. All of this is done with the eye portion of the head off the anvil. You may have to make some crab jaw looking tongs to suit this purpose.
After setting the weld, I let the piece cool and took it to my shop and used a power hammer to draw out the blade. That's also when I tacked the inside of the eye as I mentioned earlier. That way it can be drifted into shape with no ill affects of a welding bead in the eye standing proud.
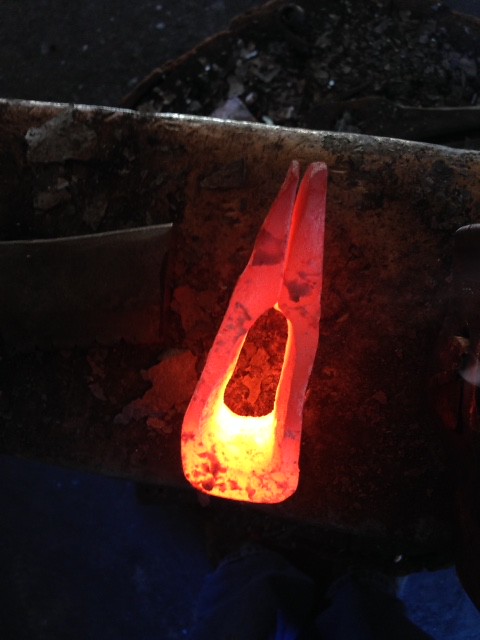
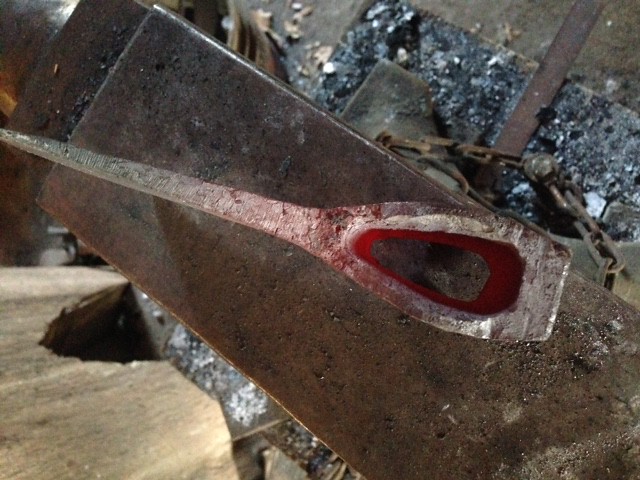
At this point, the eye is still a little misshapen from the folding step. We have concentrated on the weld and the drawing out of the blade. Now is when we find out if the first steps of our eye's forging process will work with our drift and if everything is even. (Actually, you should be able to see that by now, just by looking at it).
I use the simplest duck jaw tongs and hold it by the edge and drive the drift into the eye, sitting the poll end on the edge of the anvil. It needs to be bright yellow. Work fast and heat often.
I want to be clear about this: In the above picture, we are not wanting to stretch the eye necessarily, although it may require it if our original steps are too small. Ideally we are just using the drift to align the eye. The drift serves as a filler to stuff into the eye, an inner anvil, to back up our outer hammer blows when shaping the eye walls and the poll.
In the last picture, you will notice that the poll is taking on a curved shape. We now need to do two steps in the same heat if possible. Shape the outside of the eye and hammer a boat tail shape to the poll by lifting the tongs while hammering the side of the poll. Both directions in the eye. A few quick hammer licks and quickly, while still hot, turn the tongs to this position.

and whack it on the anvil face pretty hard while the drift is still in place. This alternating of the two maneuvers will move the material out to the corners and straighten the curve in the poll. This probably will need to be repeated a few times and it will take shape.
Notice in the next picture the boat tail shape and the squaring of the poll.
Take every chance to make sure it is straight and lined up. Thermo cycle.
You can grind or file the profile as close as you like. It's ready to heat treat.

Thank you Lin, that helps as I was planning on using 5160 for the bit. I think I will use some 1084 instead. Thanks again Landon

Very good wip Lin, thank you! 🙂
