Hello,
I've always found the hardest part of forging a knife close to finish is keeping the ricasso near the heel thick and square. Can anyone suggest how to correct this or approach it during forging so it's not as big a problem?
Thanks,
Nick
Hey Nick,
I am sure everyone has a different way to skin this cat, but I generally use the cross peen of the hammer to draw the heel. This takes some hammer accuracy, because if you miss, you have a nice deep peen mark in your ricasso, but it draws the steel toward the edge instead of spreading it along the blade and thinning the heel.
Another way to get a thick heel is to use slightly wider stock and taper the blade so that heel is the widest point. This extra material in the heel will make it so that when you draw the bevels, the width and thickness will even out along the blade.
Hope this all makes sense.
Jordan
If I want a very square choil, I will forge in the step where I want the ricasso , then I start to pull down the heal because the edge is getting longer some of that volume will go toward the ricasso, I slide my hammer down that side and up set it back into place. After a few cycles of this I have a nice square choil , with an up set inner edge , this gives me a lot more leeway in grinding as well. starting around 1.20 you can see what I am talking about. https://www.youtube.com/watch?v=Rim5rO1iAC0
Something i see students do a lot that gies then trouble with this , is pushing The ricasso onto the anvil, once the bevel is being forged , the ricasso shouldn't be on the anvil, that will shift the bevel over to one side , and can make thee plunge washed out.
MP
Excellent video Matthew. Thank you.
Brion
Brion Tomberlin
Anvil Top Custom Knives
ABS Mastersmith
I made a heavy duty guiotine with a long base. It has a 1 inch square post on the bottom to fit on the anvil. I have a chain with a spring built in to go around the horn and keep the whole fixture firmly on the face of the anvil. Lay the knife on the spine and align it to where you want the heel of the choil to be and strike with a large hammer. It may take several strikes and beating down the mushrooms to same thickness as the Ricasso. Be sure to not go so far as to go beyond the dimensions you want for the ricasso. Then it's just a matter of tweaking the plunge of the heel to the center of the ricasso. (If you've forged bevels even you shouldn't have to do much adjusting). It creates an almost vertical heel.
|quoted:
I made a heavy duty guiotine with a long base. It has a 1 inch square post on the bottom to fit on the anvil. I have a chain with a spring built in to go around the horn and keep the whole fixture firmly on the face of the anvil. Lay the knife on the spine and align it to where you want the heel of the choil to be and strike with a large hammer. It may take several strikes and beating down the mushrooms to same thickness as the Ricasso. Be sure to not go so far as to go beyond the dimensions you want for the ricasso. Then it's just a matter of tweaking the plunge of the heel to the center of the ricasso. (If you've forged bevels even you shouldn't have to do much adjusting). It creates an almost vertical heel.(BTW, it's not traditional guiotine. It's flat on the bottom. About 3/4 or 1 inch. Just realized most are thinking "what's he talking about?)
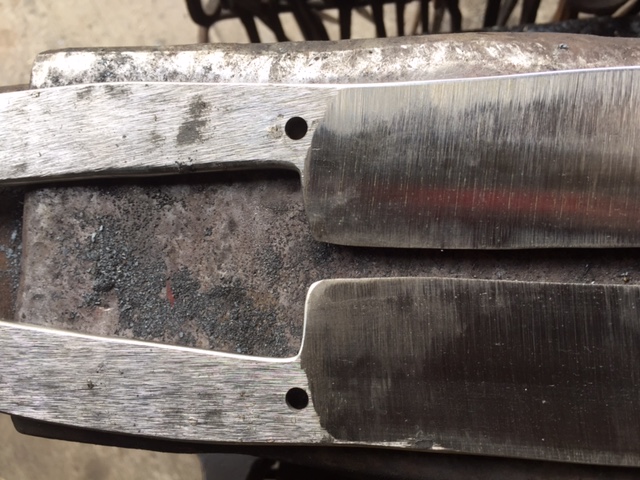
Having pondered this I took the way that a tenon is started in blacksmithing and used a 1 side hot cut or hack.
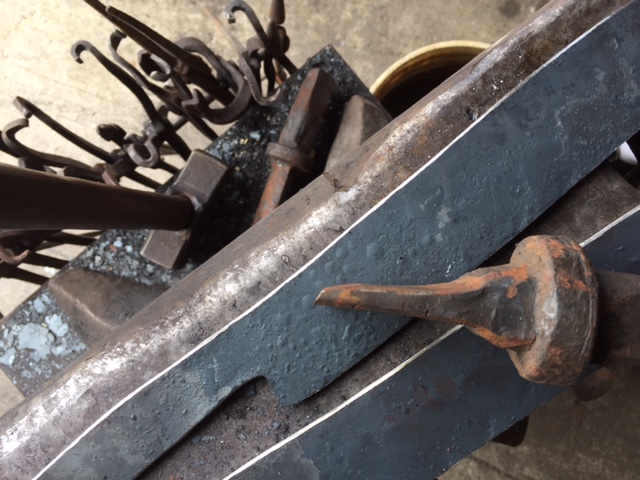
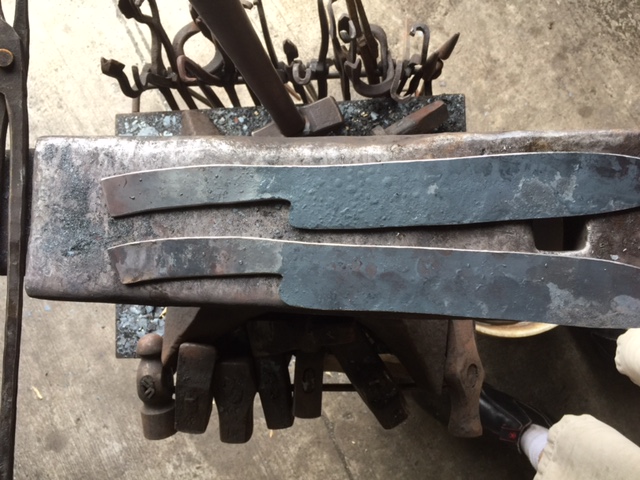
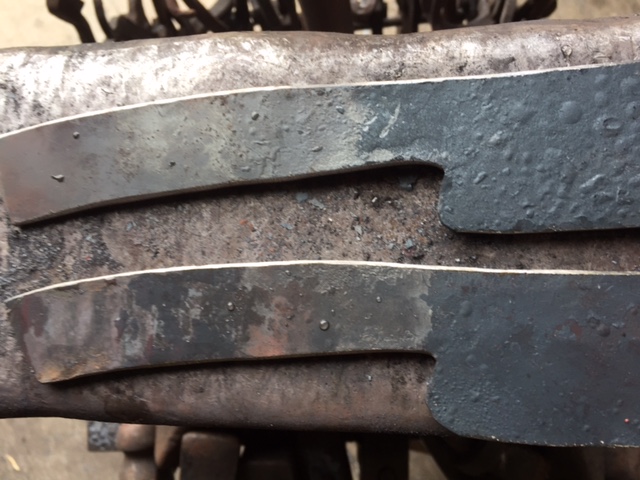
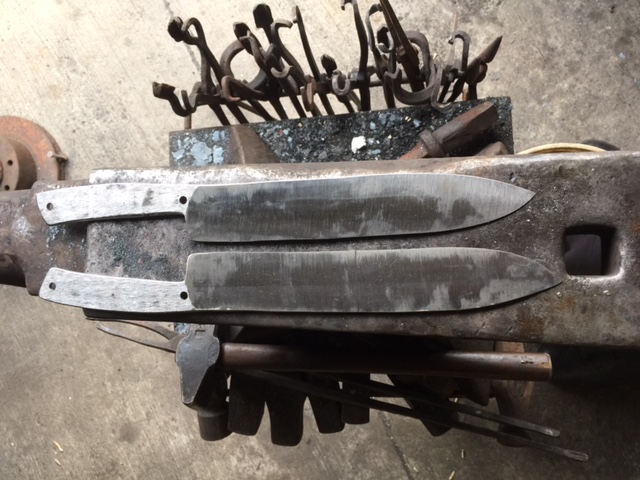
Here are some pics of how the heel of these two blades forged out and then what I could do with them with the grinder.
There are a few advantages to this way of doing it.
It is quick.
It conserves material where I need it and it allows the material to actual be moved backwards if I wanted a swept back kind of heel.
The danger of it is creating a cold shut.
I was reminded of this today after I posted here and in it the smith uses a one sided hot cut to make 3 right angle forgings on small folding knife blades.
I'm going to assume after 72 years he had the process down to the way it was efficient since he got paid by the piece.
If you listen he says he would make 2 gross a day and that a dozen was 14 to allow for breakage.
|quoted:
I was reminded of this today after I posted here and in it the smith uses a one sided hot cut to make 3 right angle forgings on small folding knife blades.
I'm going to assume after 72 years he had the process down to the way it was efficient since he got paid by the piece.
If you listen he says he would make 2 gross a day and that a dozen was 14 to allow for breakage.
https://www.youtube.com/watch?v=zpeyhC-UIFg
Incredible video and story.
Every blow is measured and precise.
Thanks for posting the link.
My pleasure.
Great story and the skill of 70 plus years amazes me too.
Also I love his bladesmithing anvil set up.
|quoted:
If I want a very square choil, I will forge in the step where I want the ricasso , then I start to pull down the heal because the edge is getting longer some of that volume will go toward the ricasso, I slide my hammer down that side and up set it back into place. After a few cycles of this I have a nice square choil , with an up set inner edge , this gives me a lot more leeway in grinding as well. starting around 1.20 you can see what I am talking about. https://www.youtube.com/watch?v=Rim5rO1iAC0
Something i see students do a lot that gies then trouble with this , is pushing The ricasso onto the anvil, once the bevel is being forged , the ricasso shouldn't be on the anvil, that will shift the bevel over to one side , and can make thee plunge washed out.
MP
Thanks a bunch for this video, nice to watch. Where can I get the tongs you're using?
|quoted:
Thanks a bunch for this video, nice to watch. Where can I get the tongs you're using?
I don't want the tongs, I want that anvil! <img src=' http://www.americanbladesmith.com/ipboard/public/style_emoticons//laugh.gi f' class='bbc_emoticon' alt=':lol:' />
Joshua States
www.dosgatosforge.com
https://www.youtube.com/channel/UCdJMFMqnbLYqv965xd64vYg
https://www.facebook.com/dos.gatos.71
Also on Instagram and Facebook as J.States Bladesmith
“So I'm lightin' out for the territory, ahead of the scared and the weak and the mean spirited, because Aunt Sally is fixin’ to adopt me and civilize me, and I can't stand it. I've been there before.â€
|quoted:
Thanks a bunch for this video, nice to watch. Where can I get the tongs you're using?
I made those, I do occasionally make tongs to sell when I have the time.. I have been trying to fit a run in for some time hopefully by the summer.
MP
|quoted:
I made those, I do occasionally make tongs to sell when I have the time.. I have been trying to fit a run in for some time hopefully by the summer.
MP
Great, I'll keep an eye out.
|quoted:
If I want a very square choil, I will forge in the step where I want the ricasso , then I start to pull down the heal because the edge is getting longer some of that volume will go toward the ricasso, I slide my hammer down that side and up set it back into place. After a few cycles of this I have a nice square choil , with an up set inner edge , this gives me a lot more leeway in grinding as well. starting around 1.20 you can see what I am talking about. https://www.youtube.com/watch?v=Rim5rO1iAC0
Something i see students do a lot that gies then trouble with this , is pushing The ricasso onto the anvil, once the bevel is being forged , the ricasso shouldn't be on the anvil, that will shift the bevel over to one side , and can make thee plunge washed out.
MP
your explanation and watching the clip gave me some simple and obviously effective answers. The tongs and hammer method for the ricasso helped some light bulbs come on. Thank you
Minimum Effort = Minimum Results every time

