
This months discussion topic is guard styles. We will discuss everthing from a simple hunter guard to a more complex fighter or bowie guard. Along the lines of what your primary guard style is and tips and techniques for making them.
I usually do the standard single branch hunter guard on hunters and others. Lately I have been doing a number of double branch fighter guards and classic bowie guards. One piece of equipment I would not be without is my small wheel attachment for my grinder. It is a 3/4" wheel and I use it on 80% of my guards. I am sure we will get into different methods and things like alignment pins.
So lets hear your thoughts on guard styles also problems you have with making guards. We look forward to seeing what comes up.
Brion
Brion Tomberlin
Anvil Top Custom Knives
ABS Mastersmith

Brion
Guard Styles is an excellent Topic of the Month. I would encourage everyone to not only describe guard styles and construction techniques but also to post photos and short YouTube videos.
Remember that you can post YouTube videos that will display and play within your post using the "Insert Media" tool in the above menu.
Dan Cassidy
Journeyman Smith
Send an email to Dan


This should be a good topic.
I know so many people who have trouble with guards. A lot of problems are avoided by using the small wheel attachment, but here's where I'm weird I guess. I hardly ever use one for that, at least. I much prefer using my rotary platten to get my inside curve. I will try to get a short clip of the procedure over the weekend.
Some pictures or video will be important on this subject, so dont be shy. I can imagine photos needed in these areas:
alignment pins
slotting
jigs for holding
sculpting
multi piece

Oh Masters , please do elaborate on this subject. ( and butcaps too, if thats not a whole subject on its own )
I have been looking high and low for information on this.
I'm a sponge.
9-11-01 , We Will Never Forget.
Work smarter NOT harder
There is an excellent discussion on building a Clam Shell Guard with step by step instructions and photos by Craig Camerer, JS and Steve Culver, MS on the ABS Forum at, Click: How to Build a Clam Shell Guard

Craig Camerer, JS

Steve Culver, MS

Steve Culver, MS
Dan Cassidy
Journeyman Smith
Send an email to Dan

I agree - not only a good topic, but I could see it lasting longer than a month!!
We do make quite a few different guard styles and with MANY!! philosophies behind them.
I will share my reasoning behind my predominant hunter guard.
I, too, make quite good use of my 3/4" small wheel.
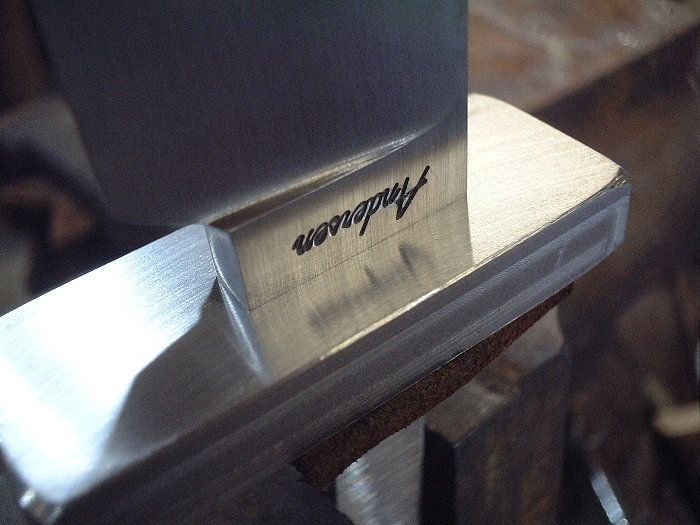
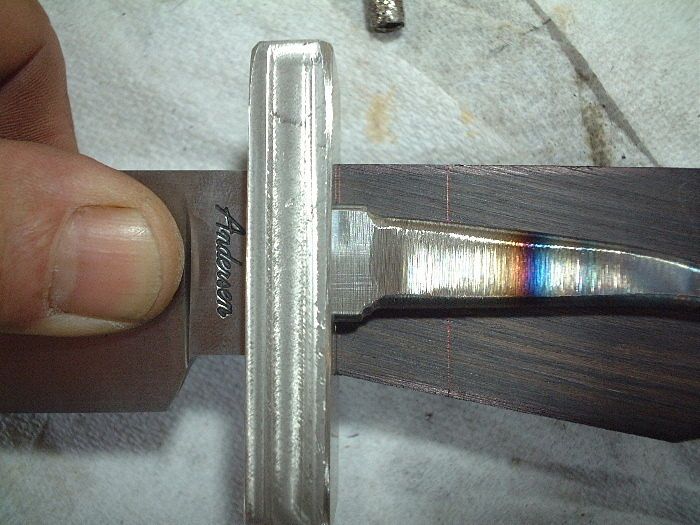
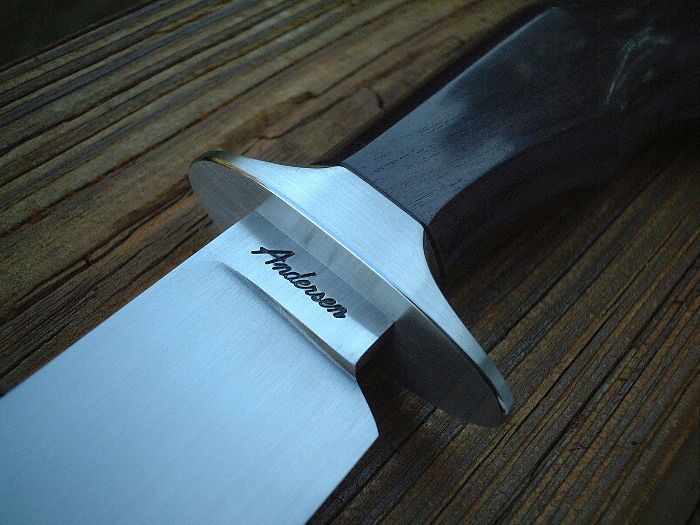
However, I like to shape my guards independently of the handle material. I just don't like the radius for the finger to continue on into the handle material, I like the handle material to remain in line with the choil of the blade. The only place I want the radius is in the guard itself.
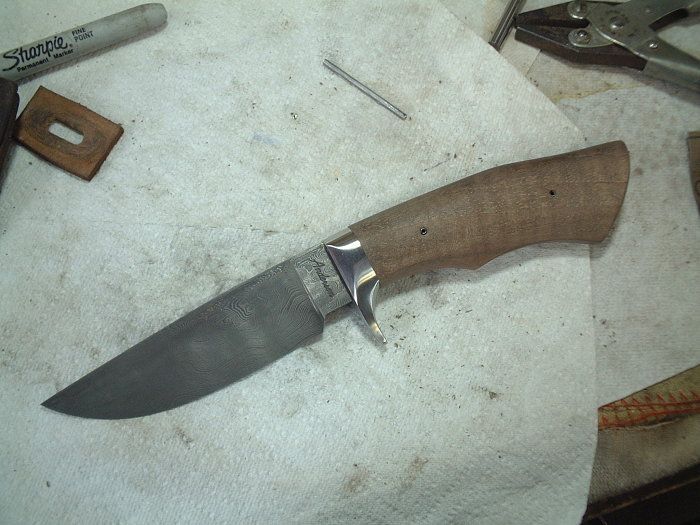
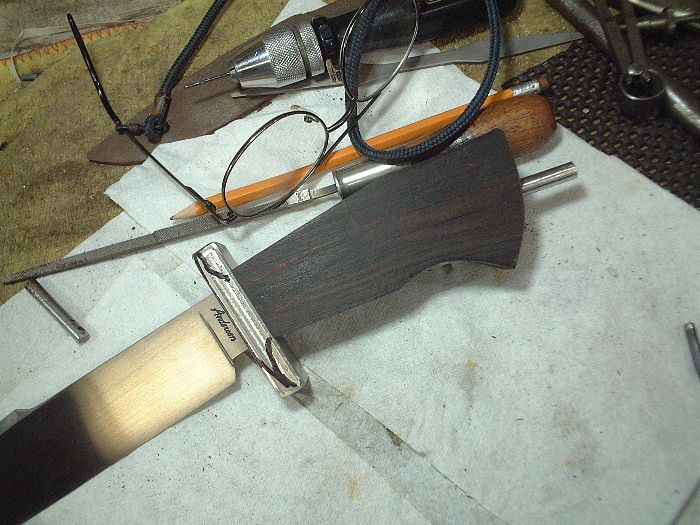
Here are a couple different sets of pictures to illustrate my meaning.
Of course, the first three are of in-progress photos, and the third is of the unfinished knife.
The first shows sort of the basic creation of the components. Keep in mind this is a mortised handle knife, and even on those, I use alignment pins for the ability to work on parts independently of one another.
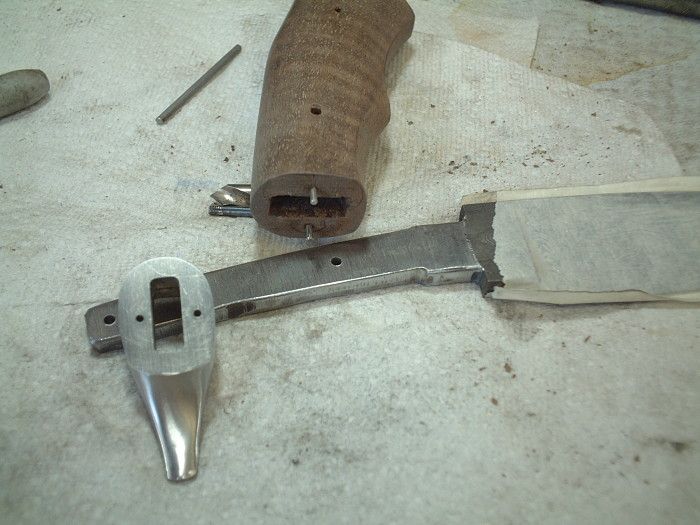
The second shows how they line up:
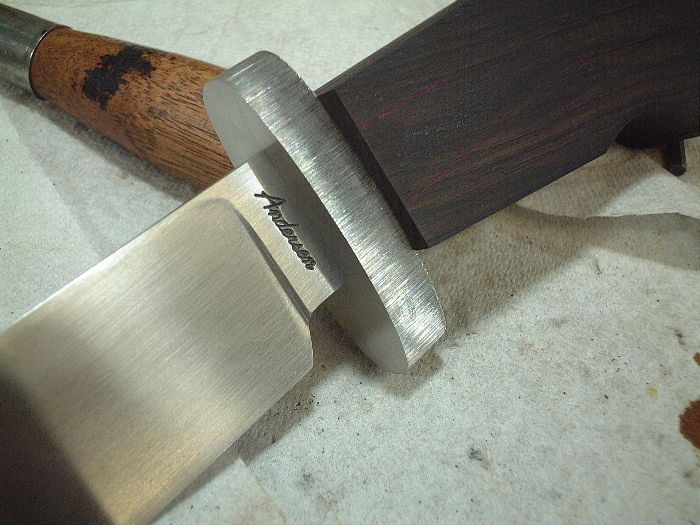
And the third will give a good idea of what I mean in my description of the flat bottom on the handle material:
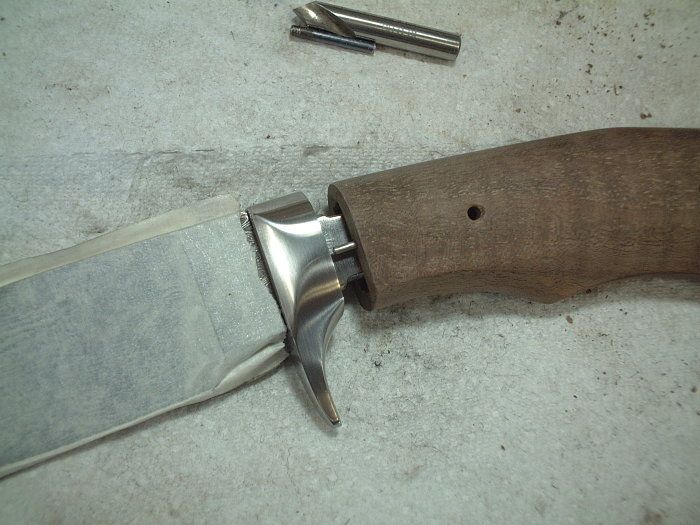
These last two show a little more refinement: <img src=' http://www.americanbladesmith.com/ipboard/public/style_emoticons//rolleyes.gi f' class='bbc_emoticon' alt=':rolleyes:' /> Note how the bottom of the handle material is in perfect alignment with the choil bottom.

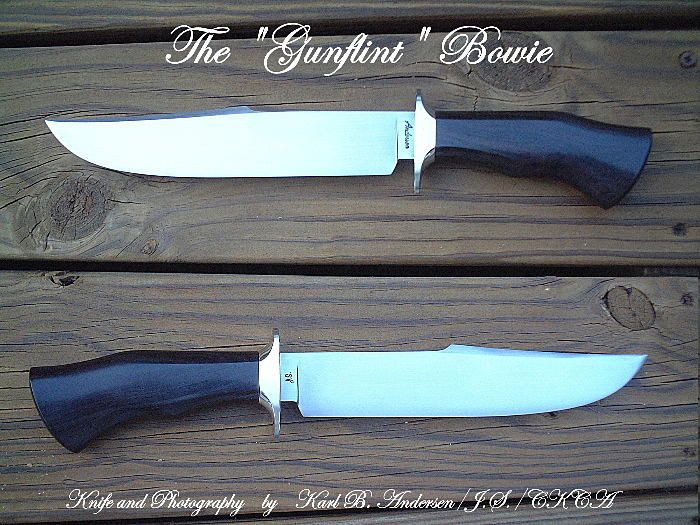
Karl B. Andersen
Journeyman Smith
Apparently I have time to burn here this morning.<img src=' http://www.americanbladesmith.com/ipboard/public/style_emoticons//rolleyes.gi f' class='bbc_emoticon' alt=':rolleyes:' />
And I hope we get more folks to participate in a really in-depth topic.
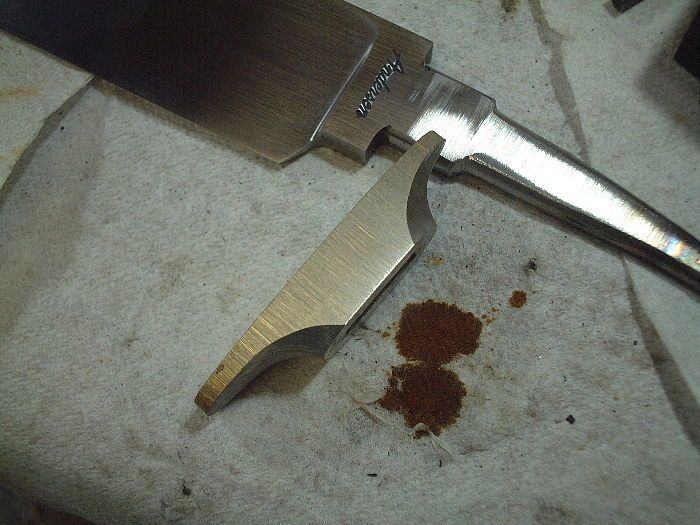
I'll show how I make a hi-lo guard with some of the highlights:
Slot a chunk of steel and make it fit your knife.
Have a direction to go:

Check some details:
I fit 2 dimensional handle material next:
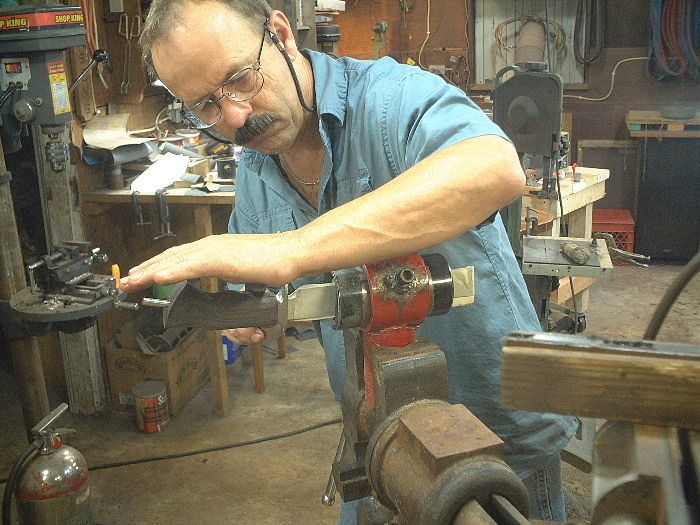
Begin shaping guard independently of the knife/blade:
Karl B. Andersen
Journeyman Smith
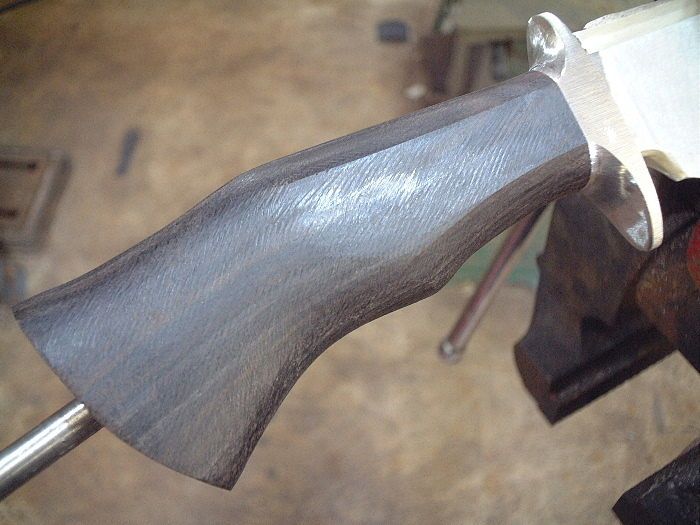
Refine guard to more closely resemble desired shape:
Check progress:

Shape handle using guard as guide:
Leave guard rough - cause it's gonna get abused during the shaping process:
Karl B. Andersen
Journeyman Smith
Switch from filing to sanding and gradually bring all pieces into one flowing unit:
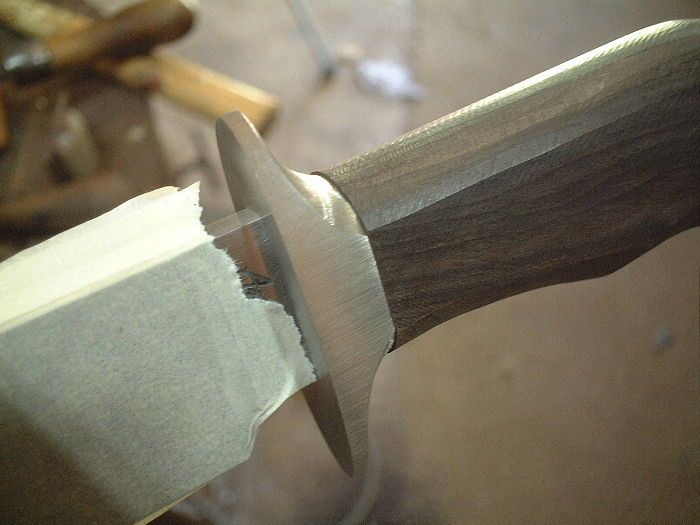
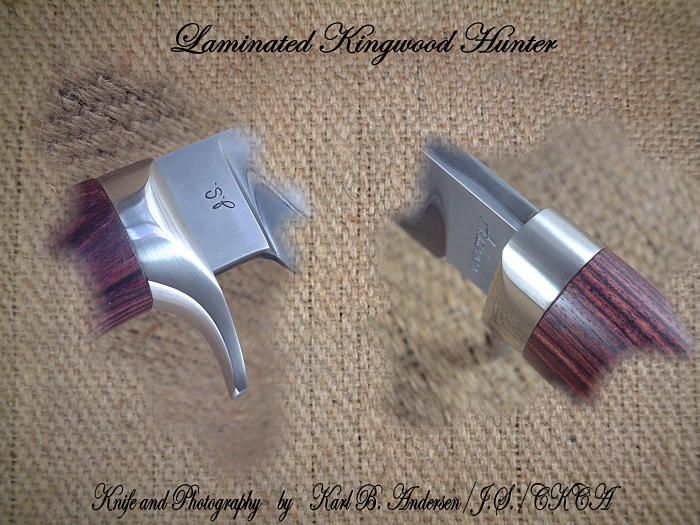
Make it purty:

Hope the customer likes it!
Karl B. Andersen
Journeyman Smith
Hello Karl
Nice work in progress!
What size guide pins do you use?
Again nice work!
|quoted:
Hello Karl
Nice work in progress!
What size guide pins do you use?
Again nice work!
5/8" long X 1/16" either stainless pins or roll pins.
Karl B. Andersen
Journeyman Smith
Karl - thanks - I really appreciate the step-by-step crisp photos. (Beautiful knife, by the way!)
Yea Karl thanks alot! A great short clip tutorial to keep us going. Nice work!
Nice work Karl! How do you cut the slot in your guards? I've been working on one, but the edges aren't crisp and it isn't nearly as flush with the tang as yours. I would love to see some pics and how-tos for full tang guards, since that's what I'm working on at the moment. Thanks.
~Josh
I mill my slots with a small bench top Grizzly mill I bought 12 years ago for $600.00.
So, that's $50.00/year I have invested in it and it's still working like the day I bought it.
I spend an appropriate amount of time up front to get the ricasso sides flat, equal and parallel. Then I just mill my slot to exactly that thickness.
It is incredibly rare that I have to even touch anything with a file.
To the contrary, I often just take a hard sanding block and some 400 grit paper and take a little off the ricasso sides.
Then, just tap the guard into place!
People surely seem to complicate that process some.
Karl B. Andersen
Journeyman Smith
