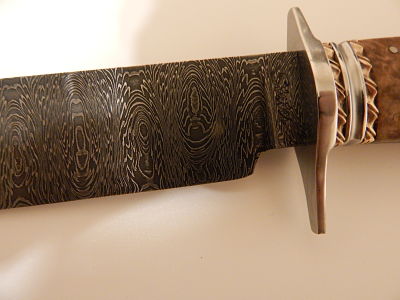
The Topic of the Month for July 2016 is, Damascus Pattern Development. More specifically, Advanced Damascus Pattern development. Most damascus smiths know how to create simple damascus patterns. This thread is to discuss how to create advanced patterns using accordion cuts, tile welding, four-way welding, etc.
Please share your photos and sketches of advanced damascus patterns, and your tools and techniques for creating them.
Oh yeah this is going to be good! the most advanced pattern ive tried was crushed and twisted W still pretty simple... now i want to learn the trick techniques!
Tucker Parris
looking forward for this post. Thanks!
I can break it down in a simple statement...... It's all about "one more manipulation". <img src=' http://www.americanbladesmith.com/ipboard/public/style_emoticons//smile.gi f' class='bbc_emoticon' alt=':)' />
That might sound like I'm joking....but it's the truth..... the difference between "simple" damascus, and "complex" damascus is the number/amount of manipulations conducted on one of more billets. <img src=' http://www.americanbladesmith.com/ipboard/public/style_emoticons//smile.gi f' class='bbc_emoticon' alt=':)' />
(I'll gather some pics and come back later with some "show and tell" stuff.)
Ed Caffrey, ABS MS
"The Montana Bladesmith"
www.CaffreyKnives.net
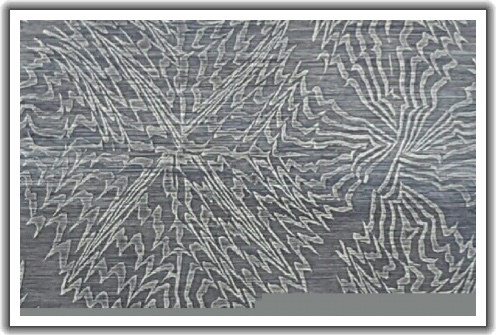
Landon has shown us a great example of a four-wayed pattern. Here's one that I added more layers to as I four-wayed it. This just gives you a little bit of an idea of the nearly unlimited options that you can do with a mosaic. (This one was four-wayed twice.)

Gary
This a great topic to follow.
I am attempting my first ferry flip and don't have a press handy.
I have a power hammer or I can hand weld it.
Any suggestions?
This topic is near to my heart. While I may be getting ahead of myself, damascus/pattern welded steel has captured my attention. I look forward to the discussion.
|quoted:
I can break it down in a simple statement...... It's all about "one more manipulation". <img src=' http://www.americanbladesmith.com/ipboard/public/style_emoticons//smile.gi f' class='bbc_emoticon' alt=':)' />
This is true, but still just scratching the surface. I would venture to say that it is more about a mixture of manipulations, and maybe that's what Ed meant, adding another(new and different) manipulation to the previous manipulation sequence.
The simplest forms are flat laminates with minor manipulations, or none at all. Think about random, raindrop, bulls-eye, maiden's hair, even the esteemed ladder pattern could be considered a "simple" manipulation, as there is really only one manipulation past welding up a flat billet. Now take two of those manipulations, say twisting (maiden's hair) and wedge cutting or accordion cut (ladder pattern) and combine them. You now have two types of manipulations to create a slightly more complex pattern. Let's call the single manipulation a "single stage" pattern, and the two types of manipulations a "2 stage" pattern and so on.
A W (or double U) pattern is a 3 stage pattern, First you either truncate the corners of the flat billet or reforge it on the edge grain, the second stage is cutting and restacking, the third stage is the accordion cut. How many different methods of manipulation can you think of? How many stages of development? How many different permutations are there in how those manipulations are sequenced? The only limit is your imagination. There can be great pattern development on a purely experimental basis just by asking yourself "what would it look like if I did this?"
I prefer to work backwards sometimes and say "I would like it to look like this, now how do I get there?"
That to me, is the greatest artistic challenge in pattern development.
Joshua States
www.dosgatosforge.com
https://www.youtube.com/channel/UCdJMFMqnbLYqv965xd64vYg
https://www.facebook.com/dos.gatos.71
Also on Instagram and Facebook as J.States Bladesmith
“So I'm lightin' out for the territory, ahead of the scared and the weak and the mean spirited, because Aunt Sally is fixin’ to adopt me and civilize me, and I can't stand it. I've been there before.â€
I recently lost our home computer and an external hard drive within weeks of one another (power surges) and have been unable to retrieve most of my knife photo gallery <img src=' http://www.americanbladesmith.com/ipboard/public/style_emoticons//sad.gi f' class='bbc_emoticon' alt=':(' />
Luckily I still have this one from Point 7
This was a multi-bar pattern with 9 twisted bars. 5 were twisted clockwise and 4 counter-clockwise. Then I stacked up the bars in a 3x3 grid so that the end grain looked like a checker board with respect to the twists. Then I re-squared the bar by truncating the corners, flattened that out so that 5 bars showed on the wide faces, and accordion cut the bar. I would classify this as a 4-stage pattern. I did not achieve the desired result. The next time I do something along these lines, I will use a tighter twist and only flatten out one axis rather than a full re-squaring.
Joshua States
www.dosgatosforge.com
https://www.youtube.com/channel/UCdJMFMqnbLYqv965xd64vYg
https://www.facebook.com/dos.gatos.71
Also on Instagram and Facebook as J.States Bladesmith
“So I'm lightin' out for the territory, ahead of the scared and the weak and the mean spirited, because Aunt Sally is fixin’ to adopt me and civilize me, and I can't stand it. I've been there before.â€
Man, that's a nice knife.
I was hoping there would be more discussion and pattern development details in this thread.
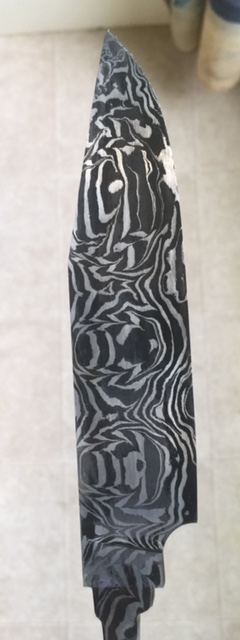
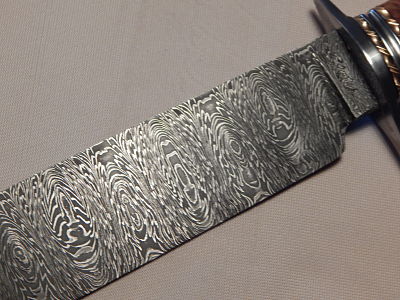
That's a nice looking W pattern JJ. The coarse grain is a bold look, and yes, it does look a little like faces. This W pattern I made under commission and the owner said it looked like skulls & crossbones. Personally, I see bugs, like scarabs. Everyone sees what they want I guess!
What was your process? how many initial layers and what quantity in the re-stack?
Joshua States
www.dosgatosforge.com
https://www.youtube.com/channel/UCdJMFMqnbLYqv965xd64vYg
https://www.facebook.com/dos.gatos.71
Also on Instagram and Facebook as J.States Bladesmith
“So I'm lightin' out for the territory, ahead of the scared and the weak and the mean spirited, because Aunt Sally is fixin’ to adopt me and civilize me, and I can't stand it. I've been there before.â€
I started with a 13 layer stack of 1075 and 15n20.
I think its 280 layers.
So a 5 layer stack the first time and a 4 layer stack the second.
I went to work on the W's in the first layer count of the first billet and continued until I drew it out and then Ladder cut it with the small wheel on my grinder.
|quoted:
I was hoping there would be more discussion and pattern development details in this thread.
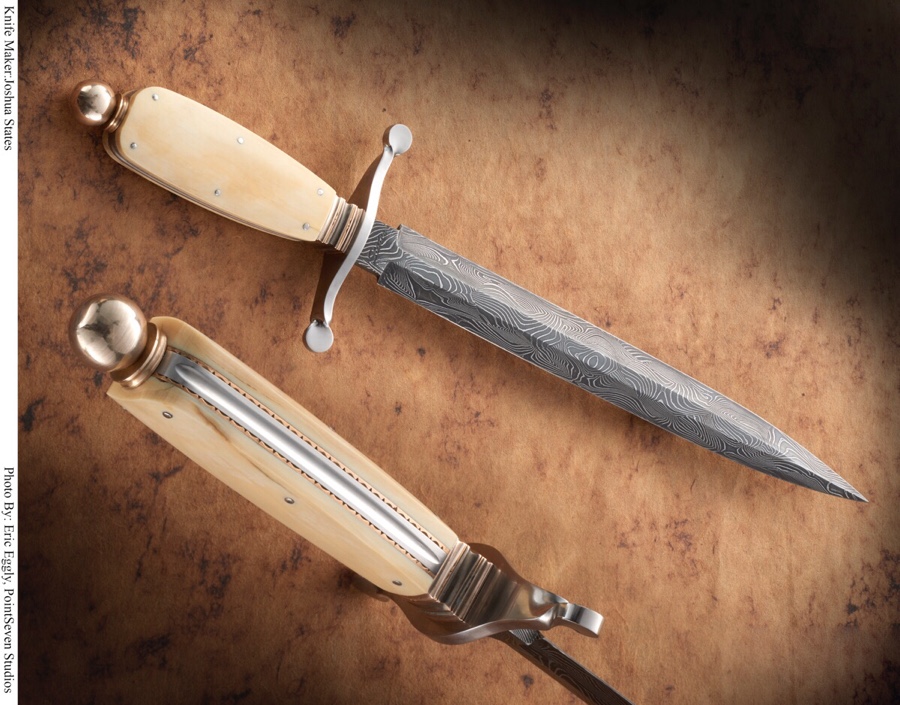
There's another conversation currently going on in a different thread http://www.americanbladesmith.com/ipboard/index.php?/topic/2453-rain-drop-damascus/page__pid__17750__st__0&#entry17750 with some of our more seasoned smiths weighing in on the effects of forging a Damascus patter to shape vs. stock removal for the blade. Good information there and many considerations on how the different processes are preferred for different patterns. It's kind of a process evaluation, with forethought about how a specific manipulation will change the pattern. (yes, I consider profiling with a hammer to be a manipulation)
Depending on the desired result, profiling to shape with a hammer may not be advisable. I have not tried any tiling patterns yet and I'm curious as to what others have experienced when profiling these types of patterns. I can already visualize the effects on single edged blades, but I wonder how much control other makers are capable of exerting on pattern distortion during forging and the different approaches to daggers when considering pattern distortion.
Joshua States
www.dosgatosforge.com
https://www.youtube.com/channel/UCdJMFMqnbLYqv965xd64vYg
https://www.facebook.com/dos.gatos.71
Also on Instagram and Facebook as J.States Bladesmith
“So I'm lightin' out for the territory, ahead of the scared and the weak and the mean spirited, because Aunt Sally is fixin’ to adopt me and civilize me, and I can't stand it. I've been there before.â€

