I recently took a commission for a "Bowie No.1" and thought that you might enjoy seeing my progression through this one. I started with a piece of W1 steel:


The handle scales are of black walnut burl w/ .999 fine silver fittings:

Escutcheon engraving by Steve Dunn:

I'll try to keep you updated with photos as I progress with this one.
Getting started on the tang filework:


The original James Black knife had 19 rolls on the top of the tang and 22 on the bottom. These were silver plated.
You may notice a small slot filed into the top of the blade just in front of the rope filework. This is for a silver overlay which wraps around the blade immediately in front of the handle scales.
Here's the blade with the filework completed and ready for tempering. In order to match the original James Black knife, I gave it 19 rolls on the top of the tang and 22 on the bottom of a tang that was tapered both front to back and top to bottom.


I recently became aware that Mark Zaleski & Bill Worthen are having a book signing of their new book: "A Sure Defense: The Bowie Knife in America" on Dec. 3 at The Historic Arkansas Museum in Little Rock and will do all that I can to have this one completed for the event. These two men are amongst the top authorities anywhere on Bowie knives and I wouldn't miss a chance to get an autographed copy of their work.
Progressing with the No.1:
At this point the silver just ahead of the handle scales is soldered to the blade (Low temp solder 381 degree so as not to effect the blade temper). The handle scales will get attached to the tang with 1/8" stainless tubing. A 1/16" silver rod will be inserted into each and then peened over separate domed pin heads which I have yet to turn on the lather.

Getting started on silver plating the filework. For this I am using 30 gauge sterling (dead soft). The second photo is my homemade tool for shaping the silver to the existing filework.


I'll try to post more when I'm ready to attach the scales.

All those little details on those knives. You make it look easy Gary. Well done.
Brion Tomberlin
Anvil Top Custom Knives
ABS Mastersmith
Thanks Brion.
Turning the domed pin heads:


That looks wonderful so far. Love the silver!
The handle scales attached (the masking tape is only to protect the pre-engraved escutcheons):
To attach the scales I used 1/8" stainless tubing. Once I have the silver pommel wrap attached & pinned I will place 1/16" pins through the tubing and peen the ends over the domed pin heads.

Gary
I have enjoyed watching your build of the James Black Knife, and you taking the time to photo and post your work. There is a lot of details on this blade and your documenting how
you worked them in your build is very considerate. Thank you for your time, I will enjoy seeing the completed knife.
Anthony
Adding the pommel wrap:
This is 16 gauge sterling silver. Once the epoxy cures, I will drill & add two silver through pins and peen the heads. Also, the edge of the wrap will get hammered over (the edge of the scales has been slightly beveled).

I'm starting to see the light at the end of the tunnel. I still have to peen the end of the handle pins as well as to sand & finish the walnut scales.

I hope that you've enjoyed the trip through the construction of this classic Bowie. [I'll try to post a photo of the finished knife tomorrow.]
Gary
Here's the completed knife:
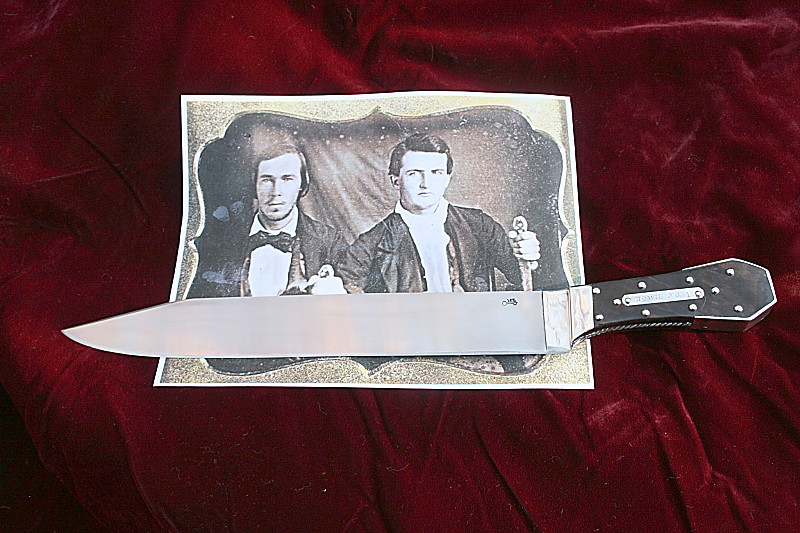
I will have it at The Historic Arkansas Museum tomorrow for the book signing if you would like to compare it to the original.
I hope that you enjoyed seeing the construction on this one. Maybe it will give you an idea of what the 19th century makers went through to make their knives.
Gary
Gary
Thanks, Looks nice. I know the owner will be proud of it.
Anthony
|quoted:
Gary
Thanks, Looks nice. I know the owner will be proud of it.
Anthony
Thanks. He's a big historic Bowie fan like me so I suspect that it will go straight into his favorite showcase.
