I have been semi-studying the old Norse culture and the blade forms from the Viking age and Germanic/Celtic iron age. I was introduced to this subject by a group of smiths who are extremely knowledgeable about the history and methods of construction. For those of you who may not know, this is the early 8th century to the 11th century (more or less) and covers most of north and central Europe. Now many of you might be asking yourself, "what could have been so cool about knives and blades made 1000+ years ago?". I can assure you the pattern welding alone is mind boggling when you consider the technology available. The embellishments and other metal working is astounding. I really became fascinated when I attended the 2016 ABANA conference in Salt lake City. There was a replica of the Mastermyr tool chest and all of the 200 some tools that were inside it. The replicas were made from modern steel, but the originals were either made from heath steel or hearth iron. The "anvils" that were inside it were about the size of a Dixie cup. That's when I realized that we take that 150-400 pound hunk of iron & steel in our shop for granted. These guys were using tiny stump anvils and making swords on them. Then I thought about the fact that they used softwood charcoal in their forges...... OK. Enough brain twisting.
One of these smiths is our very own Matt Parkinson, and I had the opportunity to take a class with him here in Arizona: Link to post where he made a multi-bar knife in this style during the workshop. Needless to say, at this point I was hooked. I had to try this style. It's called a Seax or Sax. Apparently, Seax is the older, more Nordic pronunciation, Sax is the shortened form that evolved more on the British Isles during and after the Nordic conquest.
The more I read about this the more I realized that there was going to be a considerable learning curve. There were geometries I was not used to creating and embellishment techniques I knew nothing about. So, I took a piece of advice from some old friends of mine back in the New England rock-climbing community. They had a club called the Fat Boys Mountaineering Club (FBMC for short). Their motto is "Aim Low and Overachieve". I took the mental approach of doing this simply for the sake of doing it. I put neither expectations of quality nor time constraints on the project. This was going to get done eventually, and how well it turned out, it turned out. This project is almost done. I worked on it sporadically over the last year, sometimes only getting an hour of shop time a day, sometimes none at all, sometimes a couple of hours at a clip. Releasing myself from all those expectations and standards let me just enjoy the journey, so I'm going to share it with you here. I have been going through the photos of this project and sorting them out. This is going to last a while.
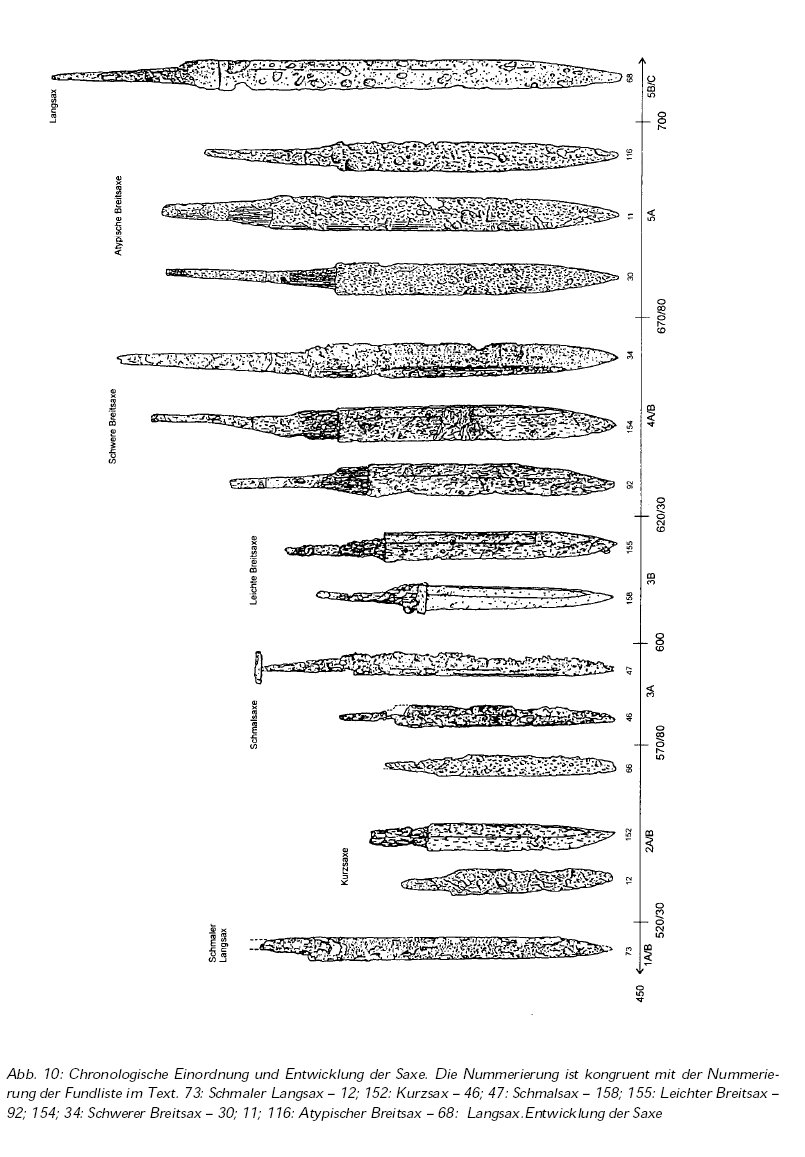
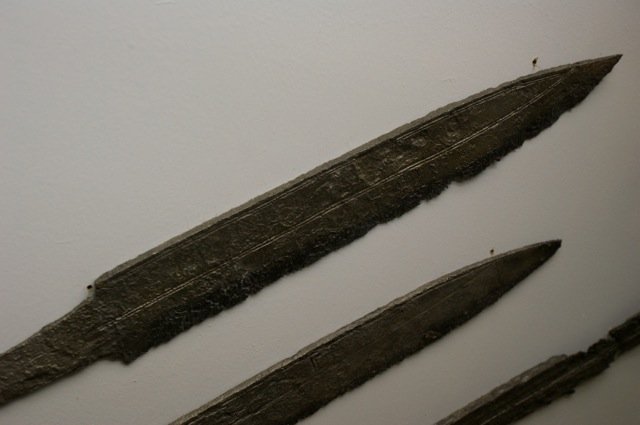
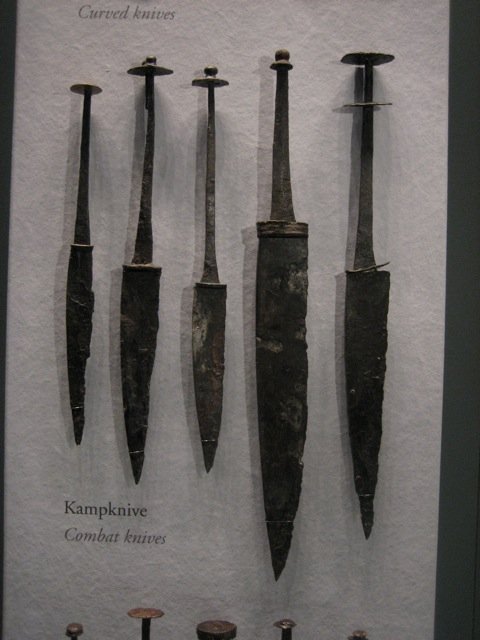
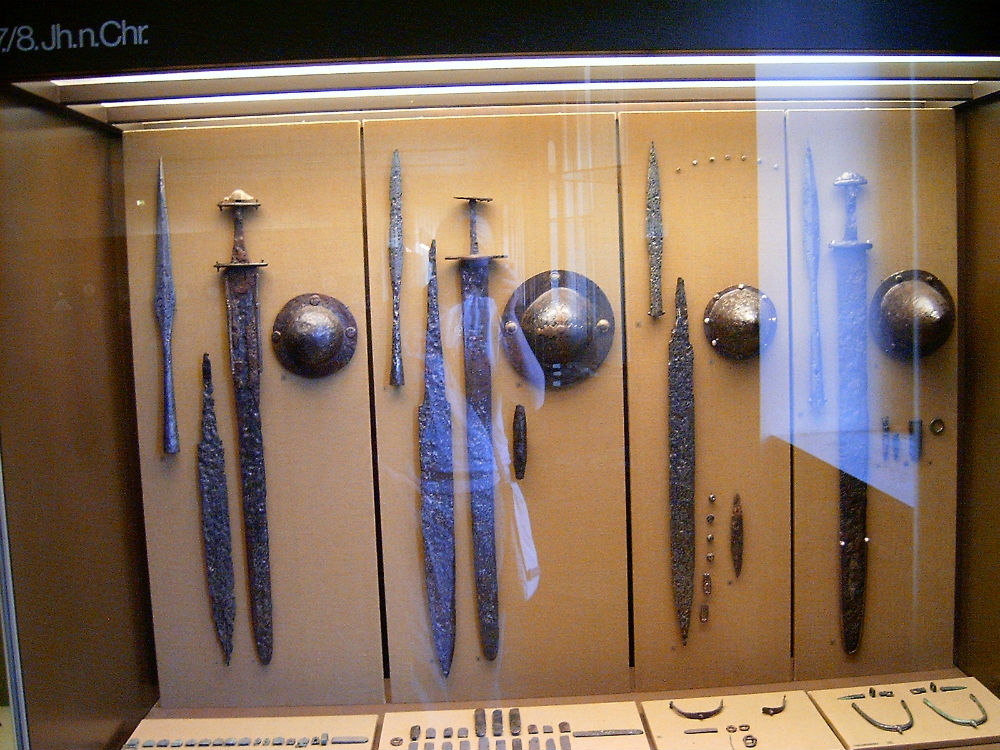
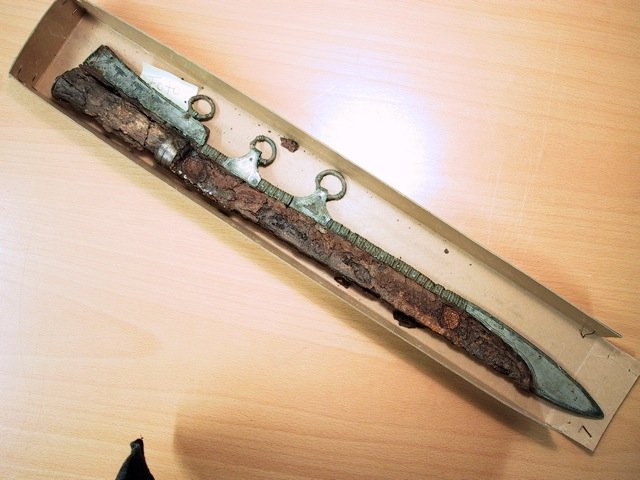
First a bit of research. I decided to go way back in time to the 7th or 8th century and try one of the forms found there. You may think that it's not too different from a modern drop point knife (and you would be fairly correct). I decided against the later "broken back" sax with the clipped point we now think of as "Bowie style", because, well, just because. I was venturing into unfamiliar territory and I wanted to go deep. Here are a few images of the types of knives I'm thinking of.
Making the blade.
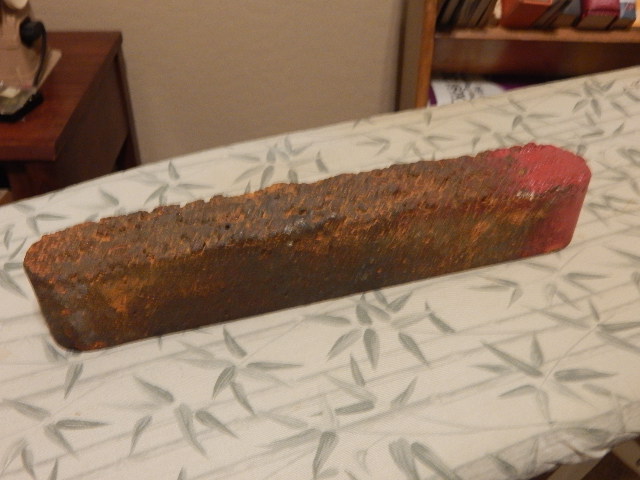
The steel used for this was W-2 from a 22.5 pound ingot I purchased from MS Ray Rybar. I had to cut a third off of it and forge it down into a usable bar.
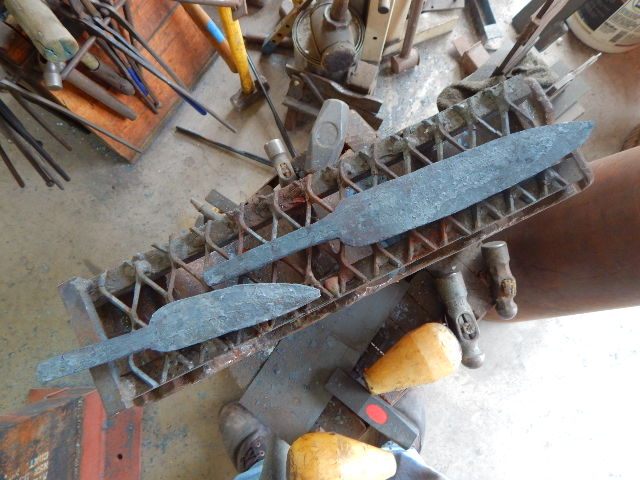
I forged two blades from it. One was going to be the knife and the other is for destructive testing to make sure I got the HT correct. Not that I didn't trust Ray to make accurate W-2 or John White's HT recommendations, it's just I was using an unfamiliar steel and I wanted to be sure I did it right.
The blades as-forged.
The small test blade after grinding and HT.
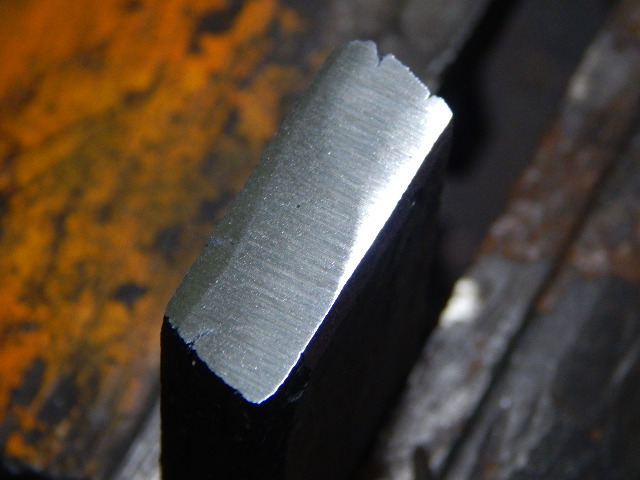
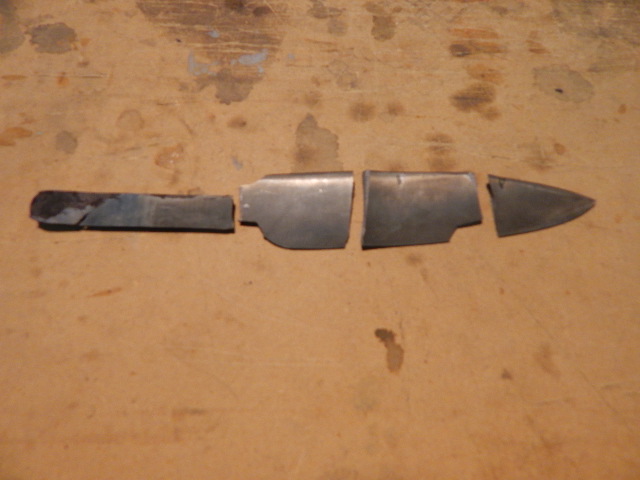
The break testing.
Satisfied with the HT, I would HT the main blade and move to the grinding and finishing. More later.
Joshua States
www.dosgatosforge.com
https://www.youtube.com/channel/UCdJMFMqnbLYqv965xd64vYg
https://www.facebook.com/dos.gatos.71
Also on Instagram and Facebook as J.States Bladesmith
“So I'm lightin' out for the territory, ahead of the scared and the weak and the mean spirited, because Aunt Sally is fixin’ to adopt me and civilize me, and I can't stand it. I've been there before.â€
BTW- I meant to post this is the WIP section. If it is possible, can admin move the thread over there?
Joshua States
www.dosgatosforge.com
https://www.youtube.com/channel/UCdJMFMqnbLYqv965xd64vYg
https://www.facebook.com/dos.gatos.71
Also on Instagram and Facebook as J.States Bladesmith
“So I'm lightin' out for the territory, ahead of the scared and the weak and the mean spirited, because Aunt Sally is fixin’ to adopt me and civilize me, and I can't stand it. I've been there before.â€
Let me see Joshua. I will try. Good stuff by the way.
Brion
Brion Tomberlin
Anvil Top Custom Knives
ABS Mastersmith
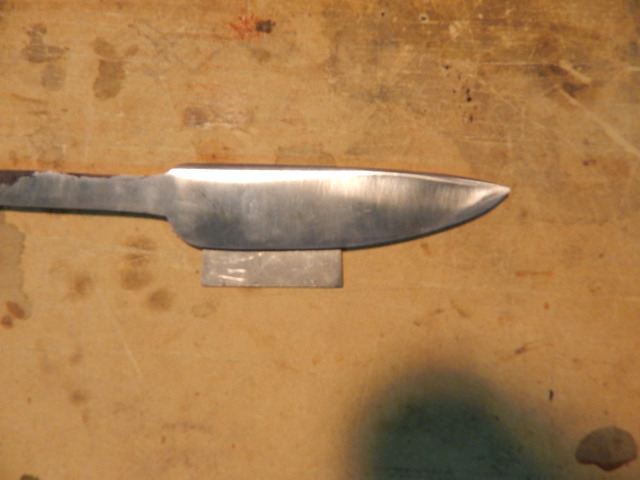
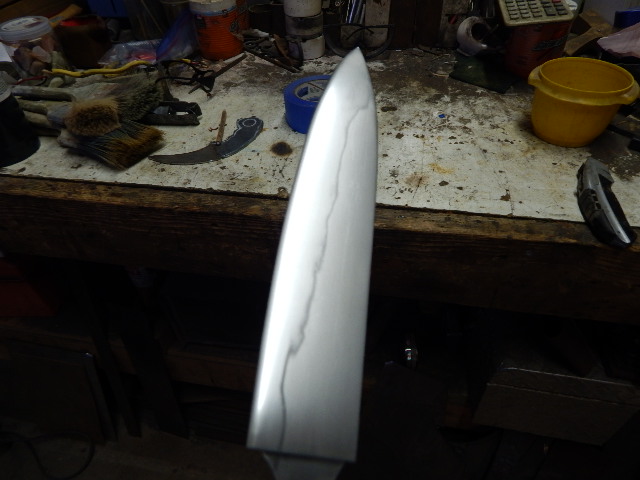
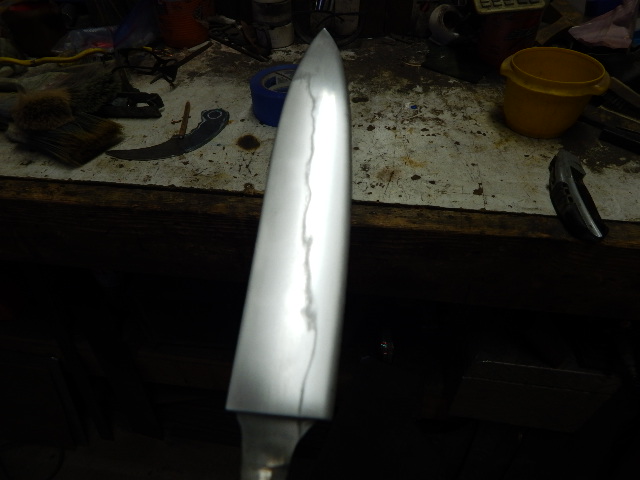
The next phase was the grinding and polishing of the blade. This was different from what I'm used to doing. I typically do all my grinding on a work rest with a push stick. It's a system I learned from Tim Hancock and it works well for the standard Sheffield type, ricasso with plunge lines blade style. The geometry here is more triangular in cross section all the way through the blade and is done freehand. I didn't get any photos of me grinding this blade, but I just uploaded a couple into the demo thread that Matt P. did so you can see the technique.
After grinding and copious hours of hand sanding to 600 grit and etching, then polishing to 9 micron and adding tons of elbow grease this is what I ended up with.
Next is making and setting the guard.
Joshua States
www.dosgatosforge.com
https://www.youtube.com/channel/UCdJMFMqnbLYqv965xd64vYg
https://www.facebook.com/dos.gatos.71
Also on Instagram and Facebook as J.States Bladesmith
“So I'm lightin' out for the territory, ahead of the scared and the weak and the mean spirited, because Aunt Sally is fixin’ to adopt me and civilize me, and I can't stand it. I've been there before.â€
Looking forward to seeing what you do with the guard, handle and sheath. Nice looking blade and hamon.
Gilbert
Nice Joshua! You don't happen to have a pic of the clay layout do you?
Brion
Brion Tomberlin
Anvil Top Custom Knives
ABS Mastersmith
|quoted:
Nice Joshua! You don't happen to have a pic of the clay layout do you?
Brion
Sorry Brion, I seem to have either missed taking that photo, or I simply don't remember where I saved it. I changed laptops in the middle of this project and I still cannot seem to locate all the photos I saved on the backup hard drive. I use Rutlands furnace cement, slightly watered down, applied with a small artist's paintbrush. It's a little less than 1/16" of goop. It goes into the oven still wet and I bring the oven up to temp to dry the clay.
Thanks Gilbert! I am really stepping out of my comfort zone on this one. The next step is casting the butt plate and bolster.
Joshua States
www.dosgatosforge.com
https://www.youtube.com/channel/UCdJMFMqnbLYqv965xd64vYg
https://www.facebook.com/dos.gatos.71
Also on Instagram and Facebook as J.States Bladesmith
“So I'm lightin' out for the territory, ahead of the scared and the weak and the mean spirited, because Aunt Sally is fixin’ to adopt me and civilize me, and I can't stand it. I've been there before.â€
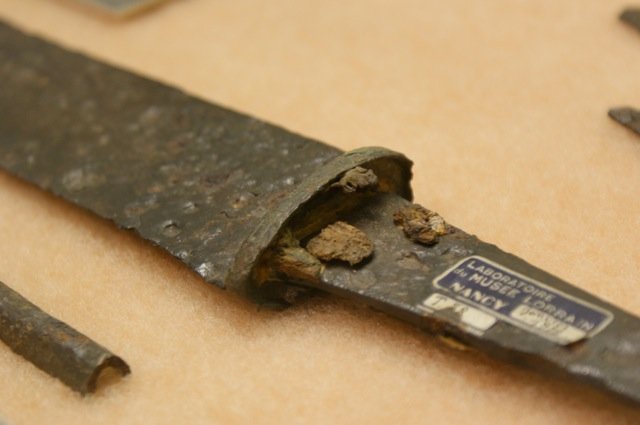
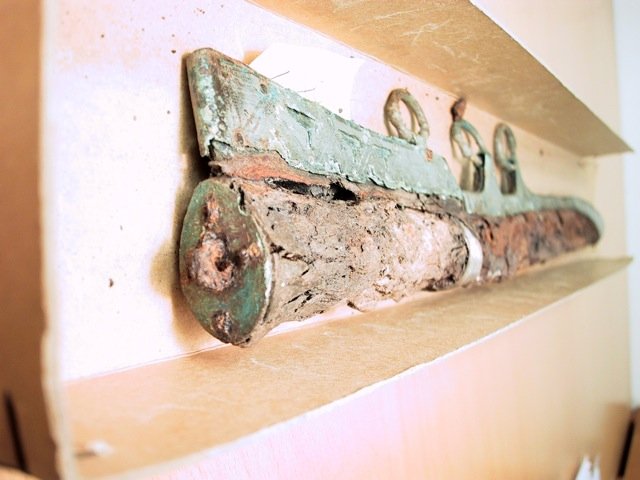
Seaxes did not have guards as we typically think of them. Most of the ones that have been found had a ferrule that was inset into the front of the handle, or what I call a bolster plate like in these photos.
The handles are almost non-existent on these finds, but the hardware give us an idea of the shape cross section.
I chose to use Shibuichi for the fittings on this blade. I have been making Shibu out of failed mokume billets for some time and have only made a couple of fittings and some jewelry with it.
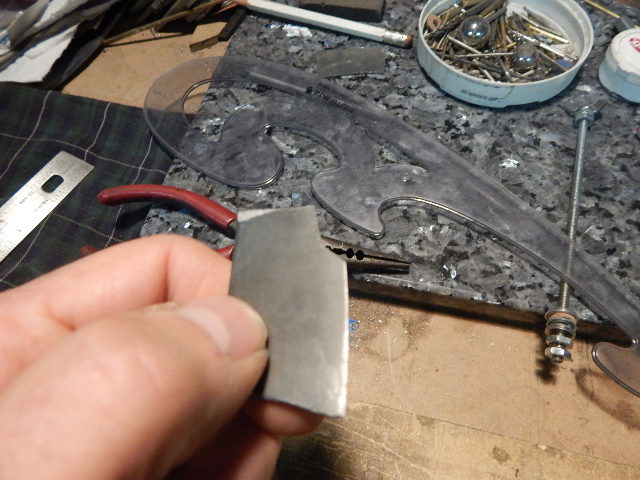
The butt and bolster plates for this are pretty simple to make.
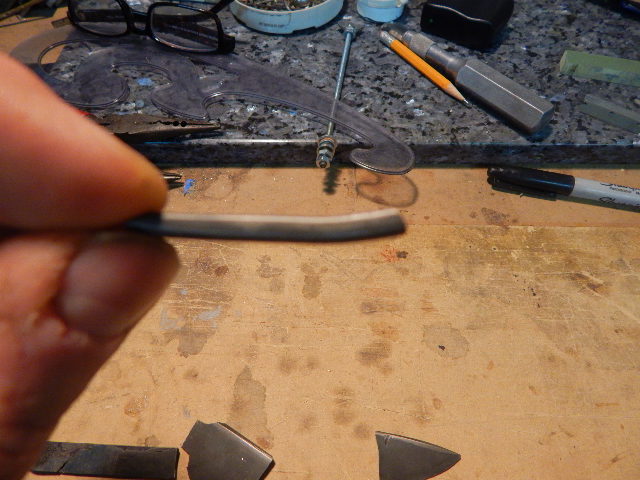
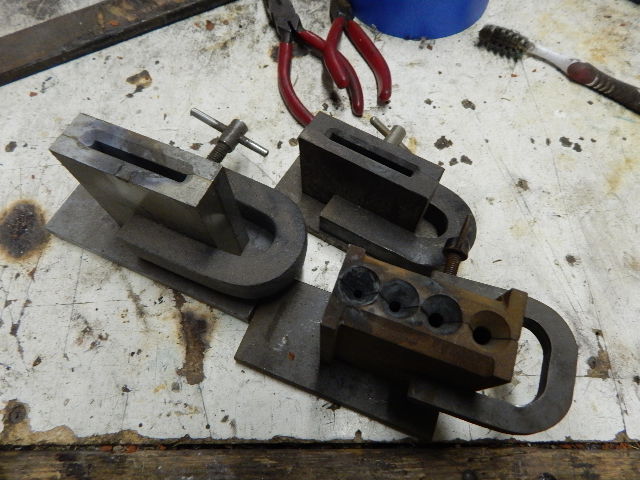
I picked up these plate forms a while back from a friend of mine who had a bunch of casting supplies he never used. I also got a rod form that has 4 different diameters from 1/8" to 1/4".
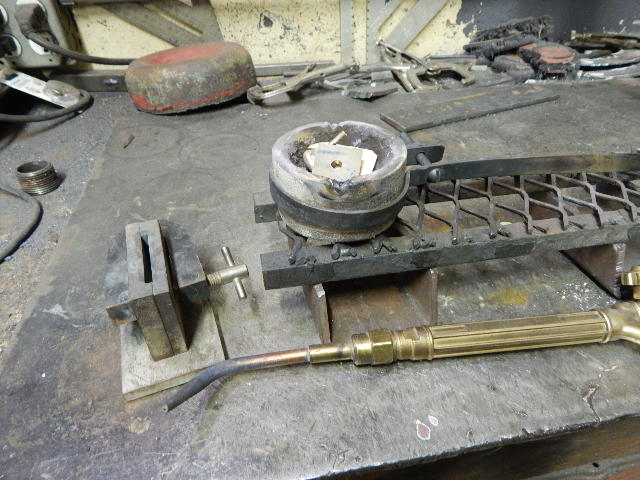
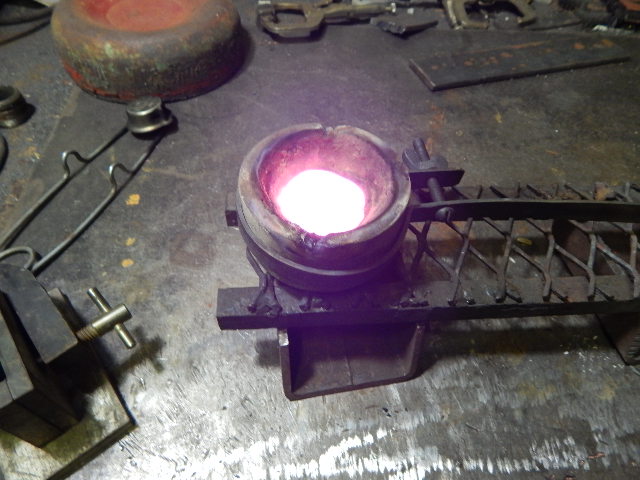
The setup is fairly simple. You need a crucible and holder, oxy-acetylene torch with a welding tip, and the form.
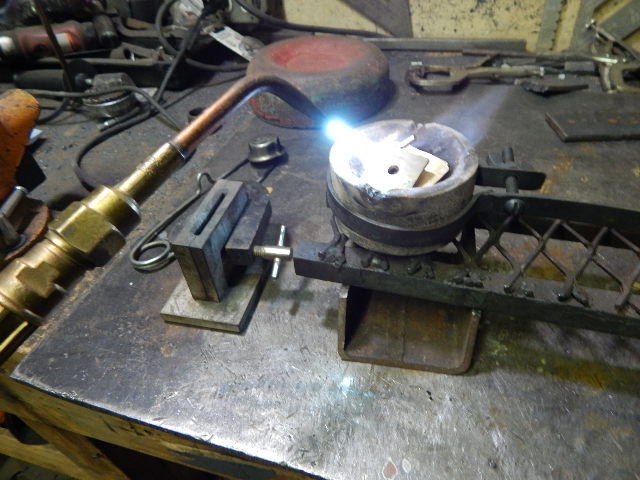
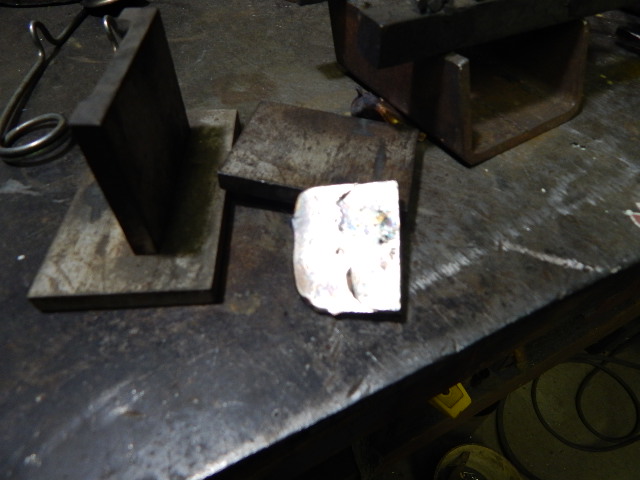
Heat the metal pieces until molten, and pour into the mold. Separate the mold and you have a 1/8" plate ( a little thicker actually) of Shibu.
I took the torch away for the second photo. You have to keep the heat on the molten metal all the time right up to finishing the pour.
Joshua States
www.dosgatosforge.com
https://www.youtube.com/channel/UCdJMFMqnbLYqv965xd64vYg
https://www.facebook.com/dos.gatos.71
Also on Instagram and Facebook as J.States Bladesmith
“So I'm lightin' out for the territory, ahead of the scared and the weak and the mean spirited, because Aunt Sally is fixin’ to adopt me and civilize me, and I can't stand it. I've been there before.â€
Good stuff man! That HT looks spot on!
Thank you for sharing this with us, Joshua! I'm glad to see the historical references you have included. I'm excited to see this project come to fruition. If my memory serves correctly (disclaimer: it often does not), I seem to recall reading that the spines of many types of seax were rather thick, by our standards. Has your research shown this to be the case? I, also, am very interested in blades from this period and would love to learn more.
Thanks again!
Tim
|quoted:
Thank you for sharing this with us, Joshua! I'm glad to see the historical references you have included. I'm excited to see this project come to fruition. If my memory serves correctly (disclaimer: it often does not), I seem to recall reading that the spines of many types of seax were rather thick, by our standards. Has your research shown this to be the case? I, also, am very interested in blades from this period and would love to learn more.
Thanks again!
Tim
I'm glad you are enjoying it. As for the spines of seaxes, I guess that is subjective. It depends on who wrote it and what they were comparing them to. The Seax was the standard style of arms, both large and small for a couple of centuries in Europe and geographically appeared from the Balkans to Greenland and Scandinavia to central Europe. There were many different minor variations on the basic design and these variations stemmed from resource issues as much as from cultural ones. So, generalizations about size are difficult to support. Especially when most of the documentation isn't in English and they use that funny metric measuring system...... Certainly the Broadsax or Langsax variations that are comparable to swords in size had thicker blades. I just got this picture from Jeroen Zuiderwijk, a smith-historian I know from the Netherlands.
Anyway, back to the project. I had envisioned a maple handle with antler spacer, both with some carved embellishments. These two photos of one particular artifact show the basic shape and idea.
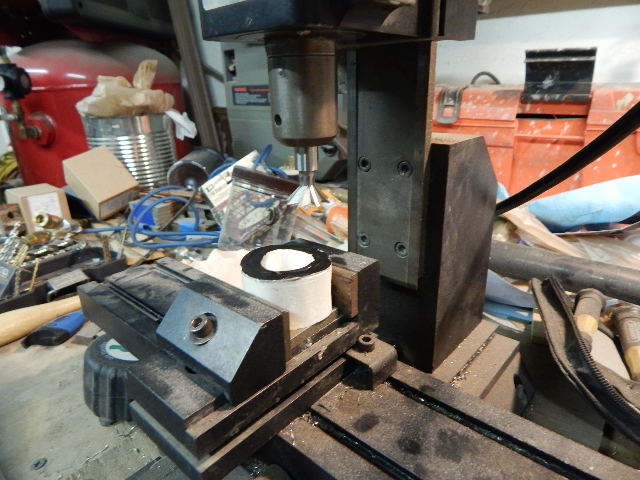
The antler I cut from an elk shed I have, cleaned the pith out of the center and sanded one face smooth on the disc grinder. Them I put it in the mini mill and surfaced the other side with a dovetail mill.
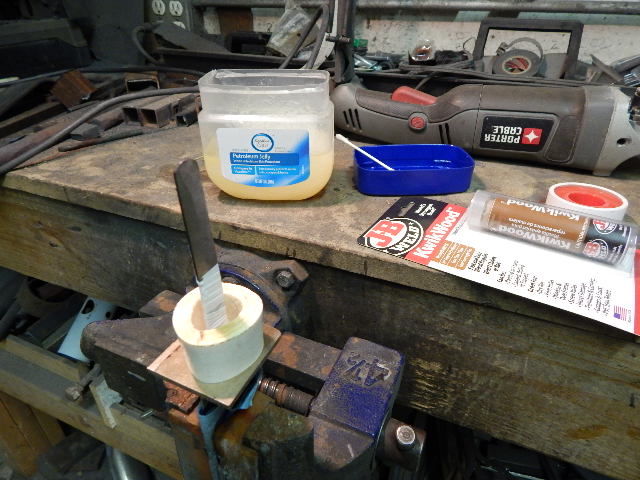
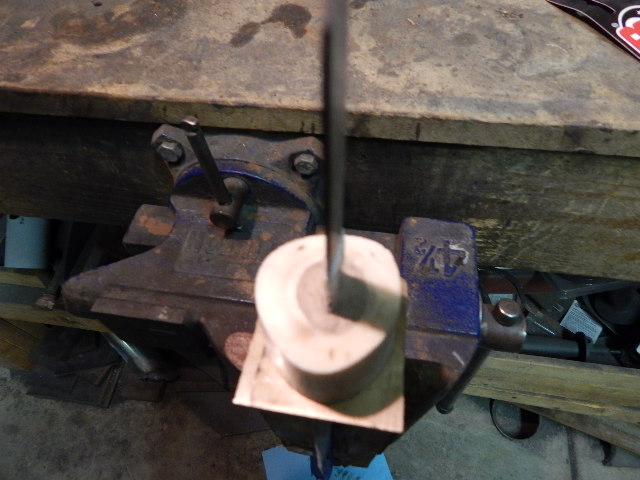
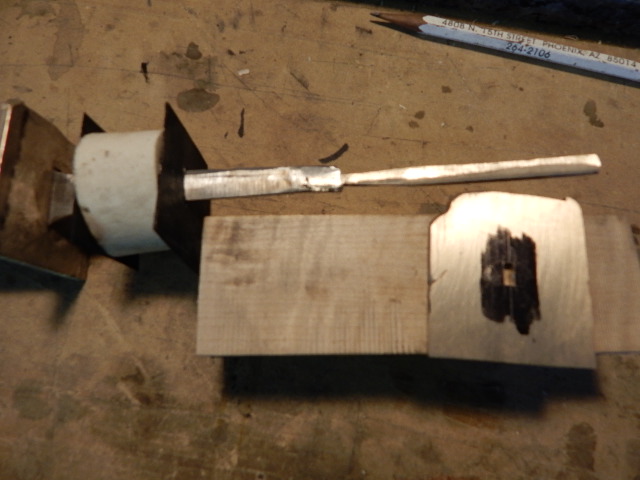
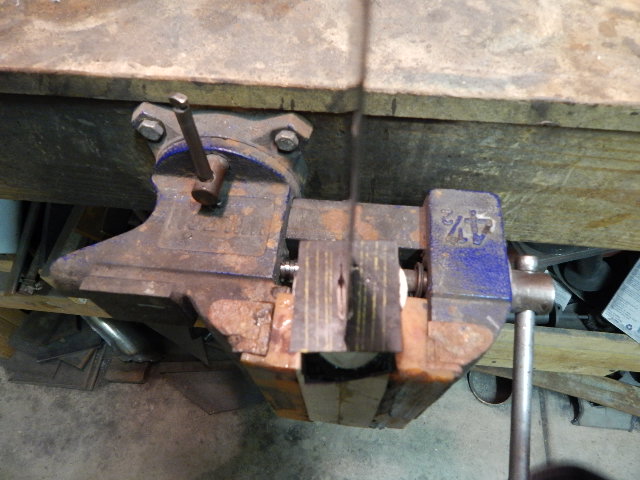
Pressing the guard plate back onto the knife, I chucked it in a vice point down, wrapped the tang in Teflon tape and greased the guard and tape with a thin layer of petroleum jelly. Then added the antler spacer and packed the void with Kwikwood putty.
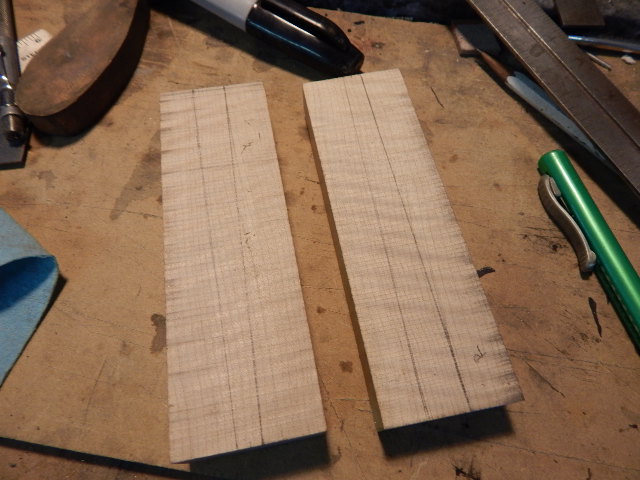
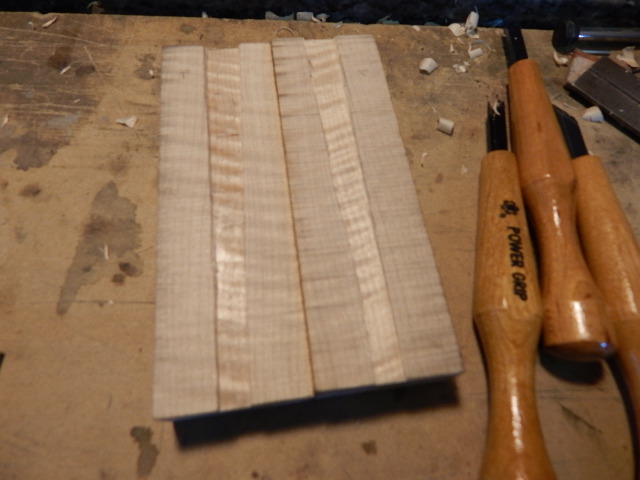
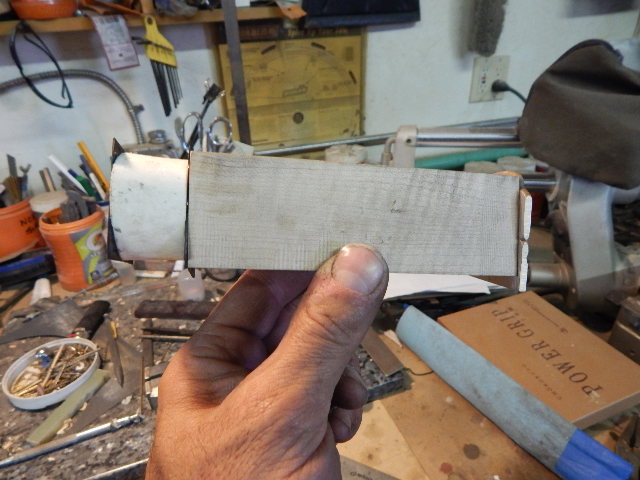
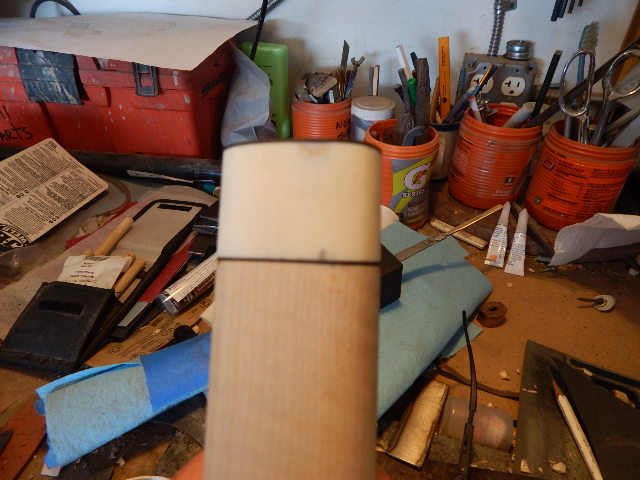
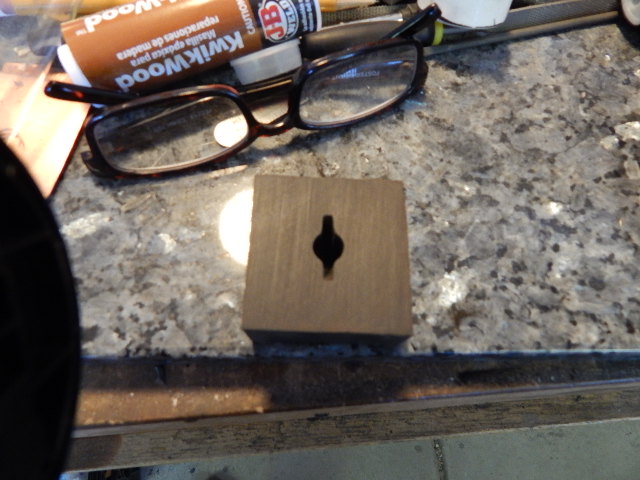
After that set up I took my block of rock maple (aka fiddleback maple) and split it for a mortise through tang.
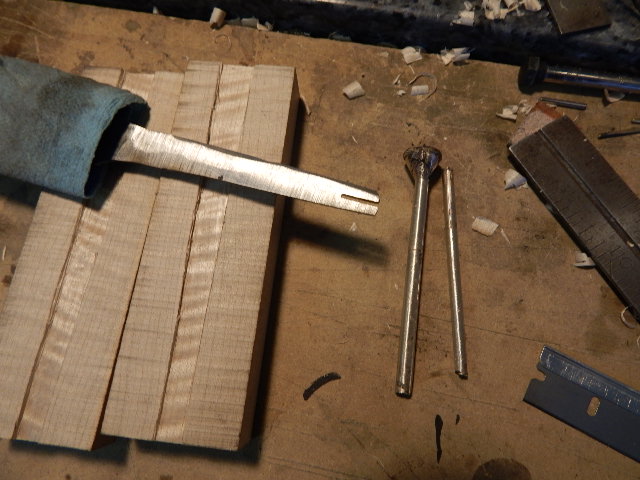
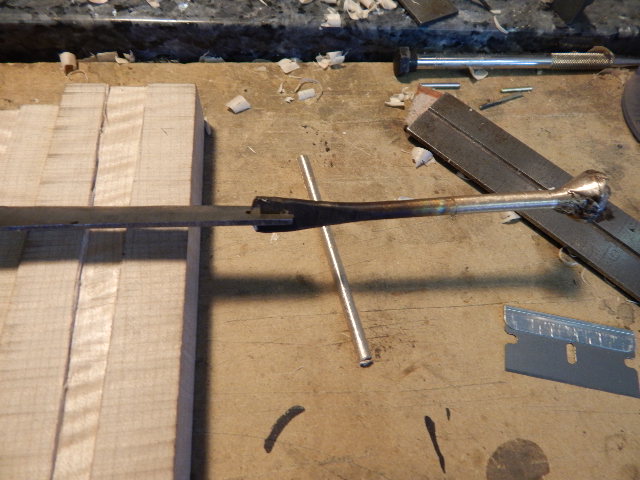
Creating the tang extension from the shibuichi meant casting a round rod, slicing the tang end and brazing the rod into the tang.
Joshua States
www.dosgatosforge.com
https://www.youtube.com/channel/UCdJMFMqnbLYqv965xd64vYg
https://www.facebook.com/dos.gatos.71
Also on Instagram and Facebook as J.States Bladesmith
“So I'm lightin' out for the territory, ahead of the scared and the weak and the mean spirited, because Aunt Sally is fixin’ to adopt me and civilize me, and I can't stand it. I've been there before.â€
The mortise is checked for a snug fit and the wood glued back together.
Now to index the blind pins to hold the antler to the wood and the wood to the buttcap.
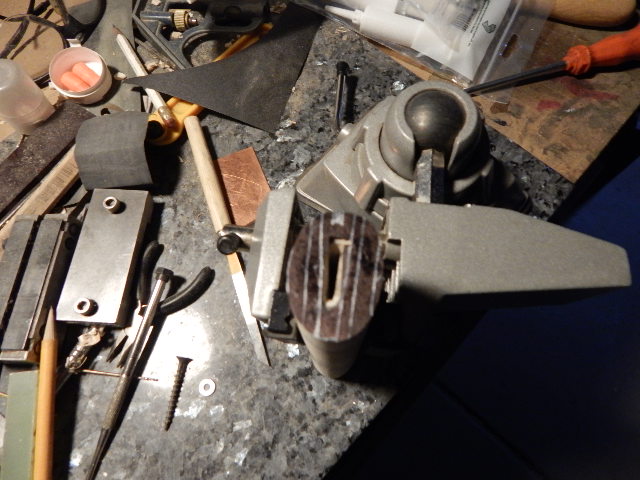
For this operation, I use pieces of vulcanized paper as an index card with a slot cut tight to the tang. Drill the blind pins holes through the paper into the spacer. Pin the paper and spacer together and slide them onto the tang. spray the backside of the paper with some 3M #45 and slide the handle onto the tang. Press/tap until the handle sets up against the paper. Remove and drill the holes in the handle using the index card as a guide. Repeat the process for the butt cap. The whole assembly should hold together using just the pins for support, but I will add a long drywall screw (or a threaded rod with washers and nuts) to hold everything together and do the grinding.
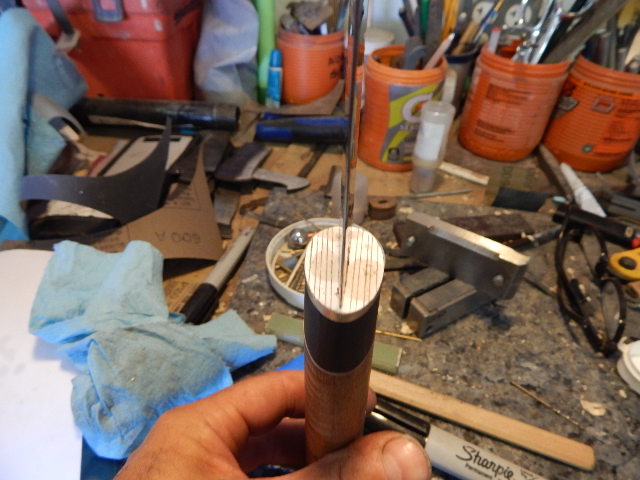
Glue a piece of vulcanized paper to the blade end of the spacer. Assemble the handle and spacer onto the knife without the guard and chuck it in a vice blade pointing up. Lay successively thicker pieces of shim material flat against the blade and draw a line on the paper. do both sides of the blade. This produces a set of lines parallel to the blade across the spacer so you can eyeball the symmetry when grinding. Rough grind the spacer periodically checking the fit on the blade and redrawing the reference lines.
Try not to grind all the way through the antler into the putty, because then you will have to make another spacer and start over again.
I replaced the antler with a piece of blackwood.
When the handle is shaped fairly close to finish, assemble everything onto the blade, scribe the guard plate and butt cap to the handle and cut off the excess with the bandsaw. Super glue a piece of white paper to the guard and butt cap and prepare your reference lines with the shims as before.
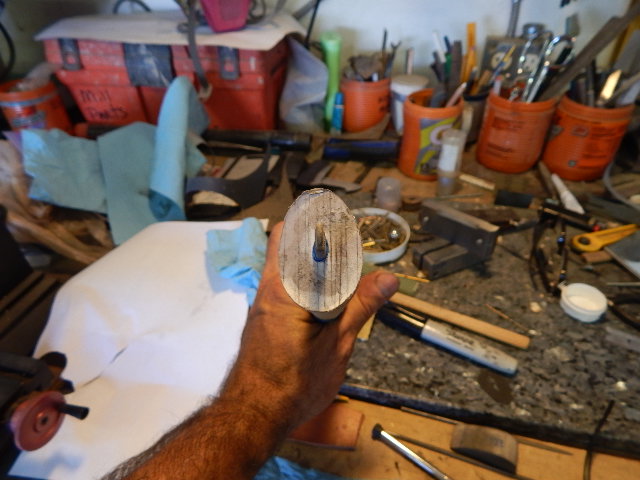
The handle gets ground fully assembled, and off of the blade. I use the 9 inch disc to set all the transitions flush and a slack belt to narrow the center and produce a "waist" in the center of the handle.
I cannot believe that I do not have a picture of the handle before I started to carve it so you could see the shape. Until next time when I start the carving sessions. Stay tuned.
Joshua States
www.dosgatosforge.com
https://www.youtube.com/channel/UCdJMFMqnbLYqv965xd64vYg
https://www.facebook.com/dos.gatos.71
Also on Instagram and Facebook as J.States Bladesmith
“So I'm lightin' out for the territory, ahead of the scared and the weak and the mean spirited, because Aunt Sally is fixin’ to adopt me and civilize me, and I can't stand it. I've been there before.â€
Joshua
Lots of time and work, thanks for sharing.
Anthony
|quoted:
Let me see Joshua. I will try. Good stuff by the way.
Brion
Thanks for the move Brion!
Joshua States
www.dosgatosforge.com
https://www.youtube.com/channel/UCdJMFMqnbLYqv965xd64vYg
https://www.facebook.com/dos.gatos.71
Also on Instagram and Facebook as J.States Bladesmith
“So I'm lightin' out for the territory, ahead of the scared and the weak and the mean spirited, because Aunt Sally is fixin’ to adopt me and civilize me, and I can't stand it. I've been there before.â€
|quoted:
Joshua
Lots of time and work, thanks for sharing.
Anthony
I try and show as much of my methods as possible for two reasons:
1. Someone might benefit from how I do things.
2. Someone more experienced might say "what are you doing it that way for? Why don't you just do this...." <img src=' http://www.americanbladesmith.com/ipboard/public/style_emoticons//tongue.gi f' class='bbc_emoticon' alt=':P' />
Joshua States
www.dosgatosforge.com
https://www.youtube.com/channel/UCdJMFMqnbLYqv965xd64vYg
https://www.facebook.com/dos.gatos.71
Also on Instagram and Facebook as J.States Bladesmith
“So I'm lightin' out for the territory, ahead of the scared and the weak and the mean spirited, because Aunt Sally is fixin’ to adopt me and civilize me, and I can't stand it. I've been there before.â€

